Tuesday, May 31, 2022

Misti: Field of Wildflowers


Hello and welcome to the My Sweet Petunia blog for Team Tuesdays. I am posting an older card because my husband and I ripped apart my craft room this morning. It was somewhat impulsive but my mojo is almost gone and my poor MISTIs keep getting lost. We had so much fun rearranging everything, I still have to put away just about all my supplies. However, my MISTIs will have their own special place. 

For the card, I used the Wildflower Stamp and die set from Reverse Confetti's May release. I really love this image but because the die cut shape is so intricate you really do need your MISTI. I stamped this out once but double stamped it to catch all the details. I also die cut the shape out twice so I could add some dimension. I stamped the sentiment with my mini-MISTI with the sticky pad. I lined everything up in the MISTI using my magnets and the MISTI along with the L shaped Creative Corner. I tucked a small tag behind the panel and called it done. 

Thanks for stopping by;

Susan

Products Used: I am using compensated affiliate links at no further cost to you. 


Thursday, May 26, 2022

Thank You Berry Much


Hi everyone,
Ilina here taking over the My Sweet Petunia blog today and sharing a sweet card using the Catherine Pooler Designs Strawberries and Jam stamp set and dies.
To make the card I started by die cutting bunch of pieces from white card stock.
Once I die cut the amount of die cuts I needed I created a jig using darker cardstock from the negative space and placed it in my MISTI in which I previously placed a sticky mat.
I placed one white die cut in the negative space at a time and using the set acetate sheet with the printed image I positioned the stamp and picked it up with my MISTI door. Repeat for all images. Stamp all images using the desired colors.
Cut white panel measuring 4" x 5 1/4" and assemble the die cut elements. Adhere to white note card and you are done!
Hint: this method is great for mass producing!

SUPPLIES (affiliate links may be used at NO cost to you!) 

Tuesday, May 24, 2022

Layering Roses with Layered Inks

Hello friends!! It’s Channin here and today I’m sharing a bold floral card I created with a beautiful layering stamp set from Honey Bee Stamps. To create the perfect pink rose I employed several tricks to get just the right shade and I can’t wait to share them with you!

To create this card I started with stamping the roses from the Antique Layering Roses stamp set. There are four layers for each rose and for each layer I used a combination of Distress Inks to create the perfect shade. Starting with layer one, I first inked the stamp up with Spun Sugar and stamped twice. I then inked up the stamp with Worn Lipstick but I used a foam blending tool apply the ink to the stamp and then stamped the layer. The foam blending tool creates a lighter application resulting in a lighter shade. 


For the second layer of the roses I inked up the stamp in Worn Lipstick and then stamped. Next, with a foam blending tool I inked it up with Picked Raspberry and then stamped. Then for layer 3, I first stamped the stamp twice in Picked Raspberry and then inked up the stamp with Abandoned Coral and then stamped. For the final layer, I first inked up the stamp with Picked Raspberry and stamped three times. Then I inked up the stamp with Candied Apple and stamped twice.


Next, I stamped my leaves. For the first layer of the leaves I stamped them in Shaded Lilac. I then inked up the upper third of the leaf with Blueprint Sketch using a foam blending tool and stamped again. Next, I ink up the second layer of the leaf in Shaded Lilac and stamped twice. I then inked up the layer with Blueprint Sketch using a foam blending tool and stamped again. For the last layer, inked it up in Blueprint Sketch and stamped three times. 


After I had stamped all my roses and leaves I then die cut them out with the matching dies. I then created a watercolored background on Bristol paper with Tombow Dual Brush pens. When the panel had dried I then adhered it to the front of an A2 top-folding white card base. Next, I created a sentiment by first die cutting “BIG’s” out of white cardstock using the Big Buzzword Honey Cuts. I then stacked and adhered two layers of the “BIG” die cut together and then die cut a shadow layer out of vellum. Next, I adhered the vellum over the stacked letters and then finished the sentiment by adhering the remaining cardstock letters on top. I then stamped and white heat-embossed two sub-sentiments from the Big Buzzword Stamp Set onto black cardstock. I then finished the card by adhering the images and sentiments to the card front. 


I hope you enjoyed my card! Thank you so much for stopping by!


~Channin


Supplies:

Tuesday, May 17, 2022

Spring card Camp meets Team Tuesday


Hello friends and welcome to Team Tuesday. It's Ceal, here. 
Today I am sharing a couple cards that I created using a technique that I learned when taking the Spring Card Camp. 

The technique is ink lifting and for the first card I used a background by Erin Lee Creative and the second card is a background stamp by Simon Says Stamp. 
To make these cards I started with white top folding card bases, black panels for mats and a white panel to ink blend on. 
I placed the panel on the Sticky Mat in the Original MISTI and laid the background stamp over it and then picked it up with the door of the Misti. I inked up the stamp with embossing ink and then stamped it down twice to get good coverage and embossed it with white powder.

If I tried this technique without a MISTI, I would be throwing away a lot of panels.
If you haven't bought yourself a Sticky Mat yet I would advise you to go buy one right away, they come three to the set and to me they are a necessity in the craft room. 


This Post uses compensated affiliate links where possible. When you place an order after clicking one of my links, I receive a small commission at no additional cost to you. Thanks so much for shopping from my links and supporting me <3


Thursday, May 12, 2022

A Big Hi!

Hi, there!  I just love featuring stamps and dies in different ways!  This is a pretty winter wreath by MFT, but just by coloring it in Spring colors, it becomes a spring wreath!  The MISTI is such a wonderful tool when it comes to a project like this, as both the wreath and the sentiment required stamping multiple times.  


The MISTI is like a potato chip in that you can't have just one! I use several MISTIs every time I stamp.  I left the wreath stamp in the MISTI until the project was completely finished.  Then with a second MISTI, I stamped the sentiment.  One of my favorite things is having an extra Mini MISTI to keep my signature stamp in at all times.  It's such a time-saver with no more alignment struggles on every card.  So sorry if you received a crooked signature from me in the past! :)  


***Affiliate links used when possible at no extra charge to you!***

Here is what I used today:

 
You can find more of my projects at I Would Rather Be Stamping. Thanks so much for stopping by!

Tuesday, May 10, 2022

Angel Polaroid Card


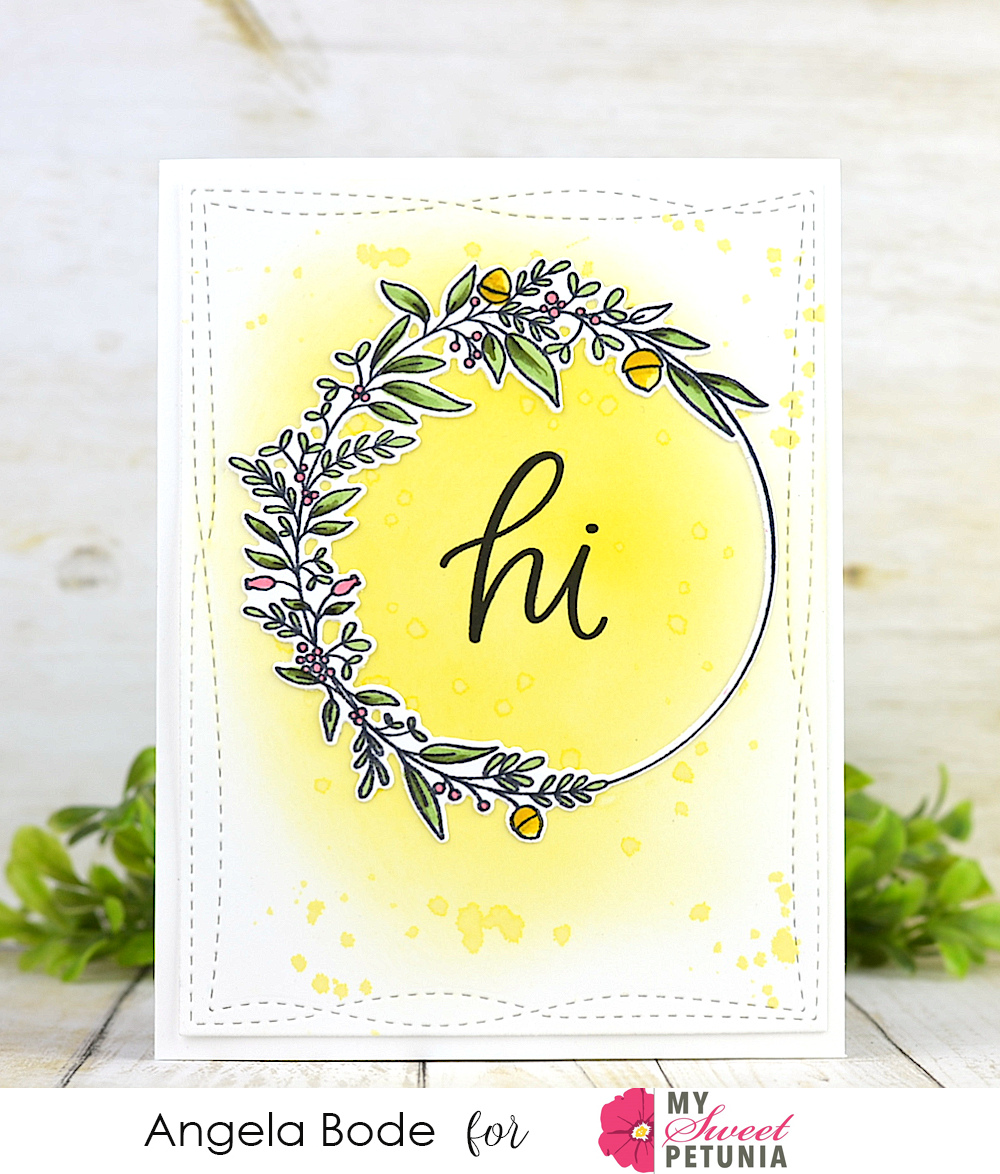
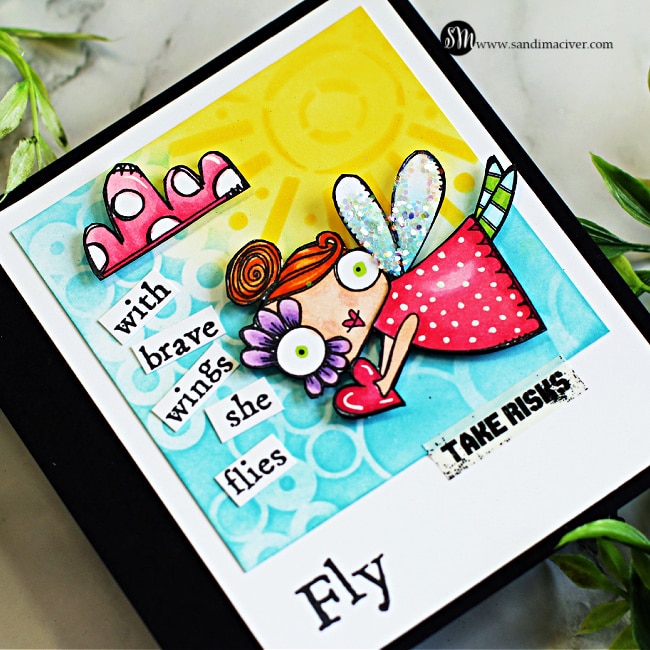
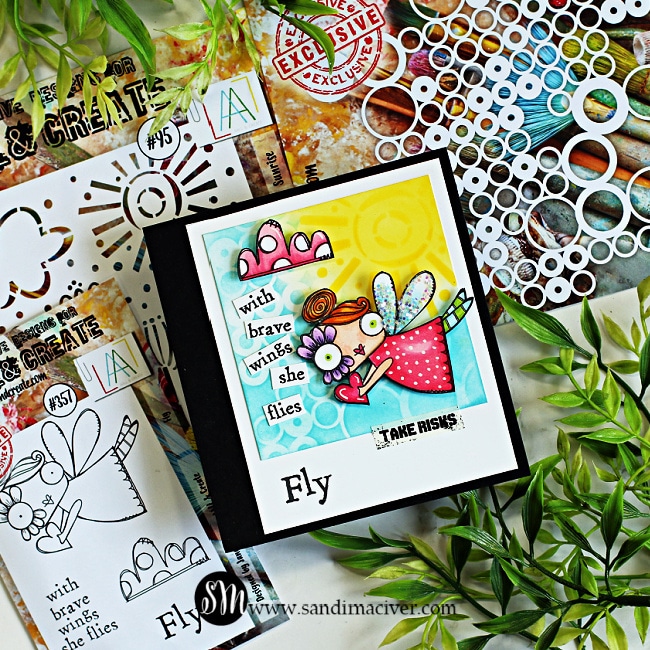
Hey cardmaking friends and welcome back, It's Sandi MacIver here and today I have a little Angel Polaroid Card to share with you.  Today I'm sharing With Brave Wings She Flies card created with products from AALL & Create.  I am really enjoying making these polaroid sized cards and I decided to create a Disk Bound Art Journal Book with them.  The black base is a little wider on the left side to accommodate the the Disk Punch holes to bind my little book together. 

 All supplies are linked to multiple sources in the thumbnails at the end of this post. Compensated affiliate links may be used at no cost to you and product disclosure is below.  As always, I appreciate your support of my Blog and YouTube Channel.

  with brave wings she flies handmade card using card making supplies from AALL & Create

Supplies used to create the With Brave Wings She Flies Card:

#357 With Brave Wings she Flies stamp set - Janet Klein 
 #45 - Digital Bubbles Stencil - Autour de Mwa 
 #95 - Sunrise Stencil - Janet Klein 
 #32 - Take Risks Light Washi Tape - Autour de Mwa 

 Start with a piece of white cardstock 3.1 x 3.1"  and the Sunrise Stencil.  
Use a blending brush and add Mustard Seed Distress Oxide Ink to the top right corner and then through the stencil to create the sun. 
 Next, apply broken China ink to the rest of the piece.  Lay the Digital Bubble Stencil  over and blend more ink through to create the bubbly sky. 
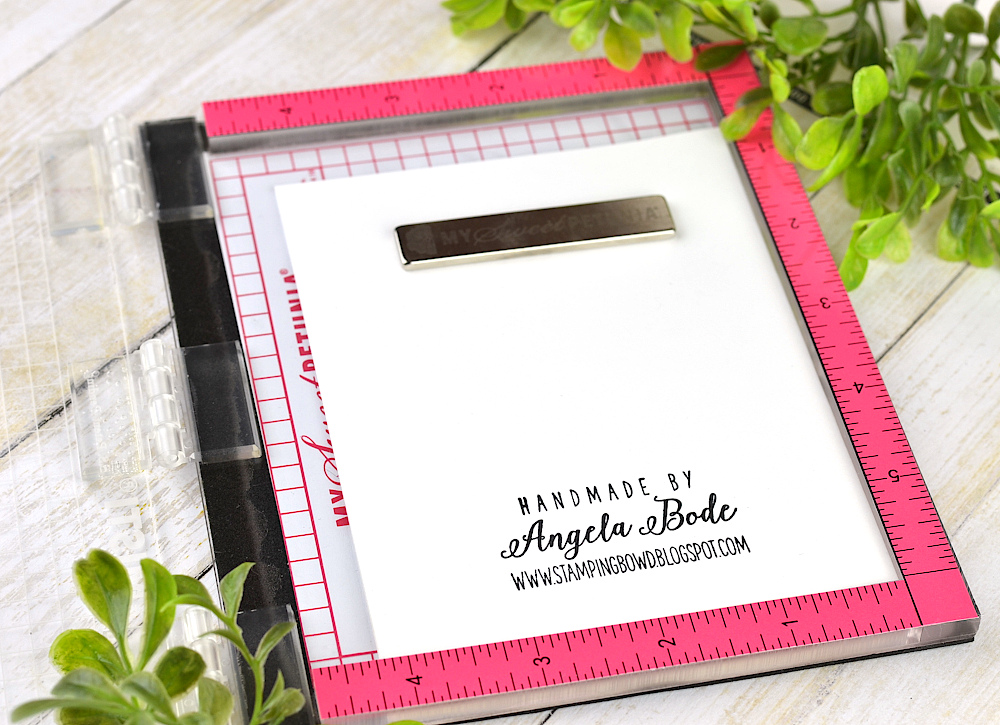
 Use the Misti to stamp the angel, the cloud and the sentiment onto Hammermill White card. 
 Color with Copic Markers and cut out.
  with brave wings she flies handmade card using card making supplies from AALL & Create

Putting the With Brave Wings She Flies Disk Bound Book Page together

Cut the black book page at 4.2" x 4.5" Cut the white Polaroid Base 3.5" x 4.2" 
 Next, attach the art piece to the top portion of the polaroid page. 
 Place it back into the Misti and stamp FLY in the bottom left corner.  
I'm adding an inspiration word on each page of my art journal. 
 Finally, use Foam squares to attach the angel and the cloud and liquid glue for the words.

  with brave wings she flies handmade card using card making supplies from AALL & Create

Added Embellishments:

Add the Take Risks washi tape along the bottom of the art piece. 
 Add glue and Unicorn Confetti to her wings. 
 I love this piece.  She is my guardian angel watching over me, reminding me that each day is a gift, take risks and enjoy it. 
 My Disk Bound punch should be here this week, so I'll share a future page down the road and show you how I'm putting the book together.     


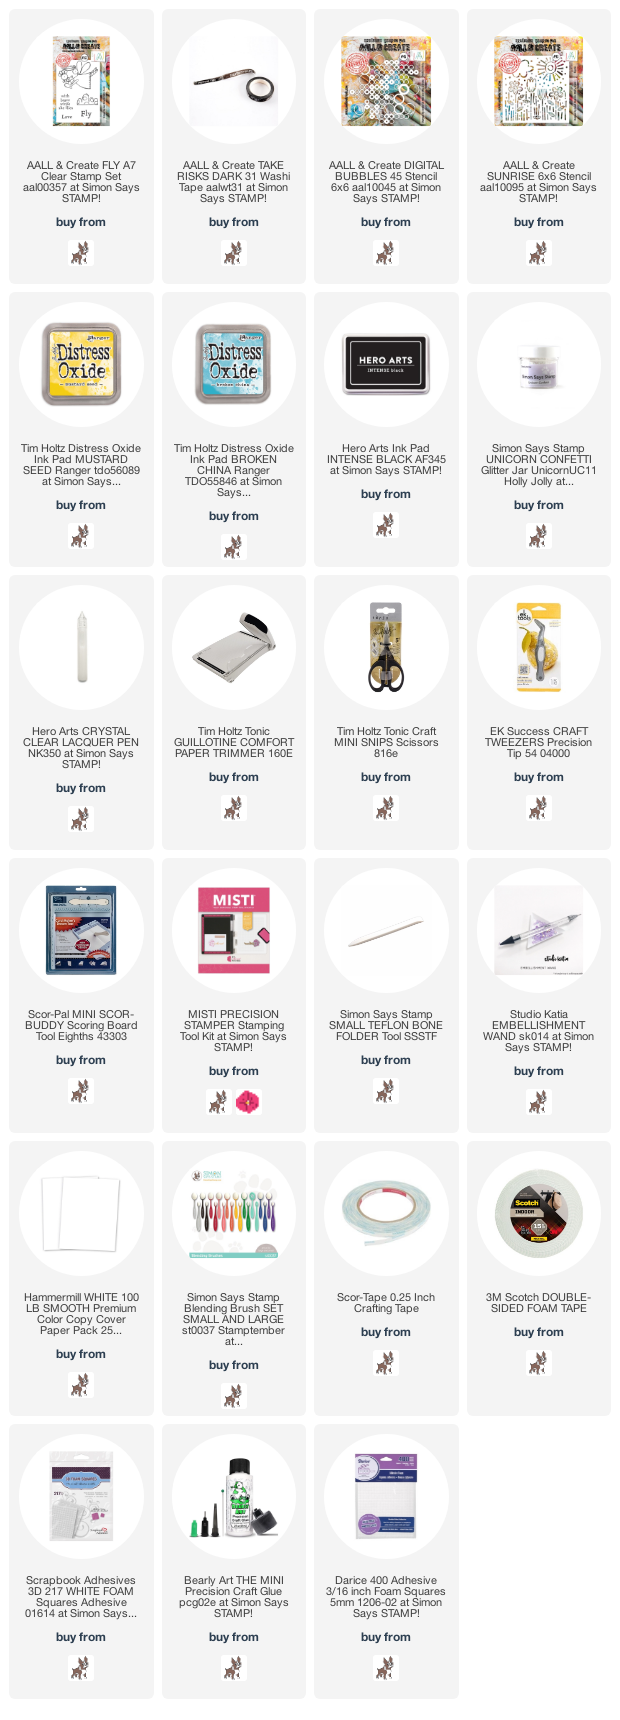
Card Making Supplies used for the With Brave Wings She Flies Card:

Here are the products I used today.  Compensated affiliate links used  where available at no cost to you. When you click on a thumbnail link and shop you are supporting my website allowing me to continue bringing you new projects and videos.  Thank you for your support. 

 Affiliate and product disclosure can be found on my disclosure page.  All products were personally purchased except for AALL & Create products which were provided/sponsored by the company.  As always, I was not paid to do this post.  I only use and recommend products I love.  Click on the icons below each product picture to go to my favorite stores.     

Tuesday, May 3, 2022

Framed by MISTI


Hello and welcome to Team Tuesdays. 

Honestly, I think my MISTIs are beautiful enough to frame. But not one of them has ever broken so why put a very useful tool in a frame. When I retire, I will frame one! This frame card was super easy to make with my standard sized MISTI.

I used the individual images from Impression Obsession Framed and several of the Impression Obsession inks to form my own patterned paper. It was quick and easy. After I completed all the stamping, I trimmed the panel to 4" x 5.25". I adhered this to a piece of purple card stock. It is from the Simon Says Stamp Rainbow card stock pack but I am unsure of the name. 

Once this was all adhered, I die cut the sentiment from white card stock twice and from the purple card stock once. I offset the white from the purple and adhered all the layers with Bearly Precision Craft glue. 

Have a wonderful day and thanks for stopping by;
Susan