Tuesday, July 31, 2018

Team Tuesday with Stephanie

I just returned from Junkie Fest 2018 ... so much love, laughter and stamping goodness.

One of my favorite classes was the Concord & 9th Turnabout Class.  The tips they provided were so helpful in getting good background coverage every time.


The starting point is creating your 6" chipboard base template and drawing an *X* on it with a Sharpie marker from corner-to-corner.  It's also helpful to number the top right corner of each side 1 through 4, so when you rotate for stamping, you can remember your order (I know I'm not the only one who needs a little help).  The template can then be reused multiple times.

The second step is to print out the template for the stamp set you are going to use and line-it-up so you can use a sharpie to draw the same corner-to-corner *X* on the back of your stamp set (on future stamp sets this will be on the back of the set to make it even easier)  Make sure you print it at 100% (my print setting defaults to fit-to-page, which prints it slightly smaller unless you un-check that setting, so make sure you're at 100%).


Next step is to place your Template in your MISTI and then center the *X* on your stamp with the *X* on your template ... once the stamp is lined-up perfectly, then pick-up the stamp with the lid if your MISTI. 

Use a little adhesive to attach your square of paper for your project in the center of your chipboard template (the border should be equal on all sides and the corners should be on the Sharpie lines).  For this card I used a 5.75" squire piece of paper (in class we used 5.5" but I wanted to be able to have a little wider border).

Today I'm using the Concord & 9th Many Thanks Turnabout Stamp and four colors of Catherine Pooler ink from her Zen Garden Spa Collection inspired by this photo at the Home Sweet Home Time Out Challenge.


I started with Skylight ink for my first stamping.  I found that for me with this particular ink, it worked better if I inked the different sections of the words separately vs. trying to get coverage all at once (that's the joy of using the MISTI).  You'll figure out what works best for you.


I rotated my template (with the paper attached) one turn clockwise and stamped with Seafoam.  Love how you can see the image start to come together.


My third color was Skylight.


And I finished with Spruce, my darkest shade.  The joy of these stamps it that you can decide how many times you want to ink and stamp (I could have stopped after stamping two colors and then added some of the other sentiments stamps included with the set.


Next I used the same four colors with a little water and paintbrush to create my card base ... it was inspired by the picture in the wall in the Inspiration Photo.


For my first card, I trimmed-off three rows of my stamped sentiment and attached it to some burlap paper to bring in the texture of the furniture in the inspiration piece.  I added a warp of coordinating twine and another stamped sentiment from the set to complete the card.

I trimmed the remainder of my background into two pieces to create a card using the layout from CAS(E) this Sketch.


I thought the lines of words worked well for this pattern.


I mounted the pieces on a 4" wide Stone Blue card base and added a strip of Spruce cardstock between the pieces. 

I finished with a speech bubble & hashtag stamp from the same set.  Angie mentioned that they try to make sure that they include as many stamps as possible to use every inch of space in a stamp set, and I really appreciate all of the fun little sentiments in this set.

We also got a sneak peek of the next turnabout they will be releasing ... it is pure Autumnal Amazingness ... you're going to love it.

Thanks for hanging out with me today ... hopefully you can use these steps to be even more proficient with your Concord & 9th Turnabout Stamps and your MISTI.

Stephanie Severin

Tuesday, July 24, 2018

Team Tuesday with Chris

Hi everyone!  

Chris here with a very quick video demonstrating a simple and easy way to achieve a light and airy,  translucent look to your coloring by using Strathmore Toned Gray paper and Polychromos pencils.  

Supplies:  
Adhesive

Click to play the very short video tutorial:

(Forgive me:  My voiceover is incorrect.  The pinked edge die that I used on this card is from Concord & 9th.)

Thanks for watching.  I hope you have a fabulous day!
Happy Stamping!

Tuesday, July 17, 2018

Team Tuesday with Jeanne


Hi! Jeanne here today.
I have an easy technique card to share today using my Mini MISTI.


Products used (see links below):
white glue
cardstock (white and light blue)
craft sponge 
inks (Distress inks or dye inks)
MISTI (or Mini MISTI)
Nuvo Glitter Drops Golden Sunset
black fine pen


I used a fun technique called Distressed Glue to make my background. 
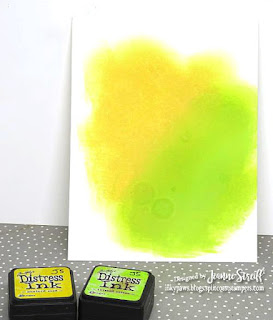
Sponge at least two colors of lighter ink on your cardstock. I used Ranger Distress Mustard
 Seed and Twisted Citron for my project. You can add ink in any pattern you like.

Spread white glue onto your sponged panel. Leave some spaces open. You can make a
pattern or just smear it on. I squirted a few lines straight from the bottle and smeared it
 across my paper with a scrap piece of cardstock.


Once your glue is dry (mine took about an half hour) sponge a darker color over the panel. 
I used Ranger Distress Wild Honey for my card. Wipe off extra ink.


Using my MISTI Stamp Tool I stamped the sunflower (Sunflower Duo
and  colored and restamped to bring out the details in the outline (always leave 
your stamps in the MISTI until after you've colored! 

I also stamped the Bless Your Heart sentiment from Butter My Butt (set of 8)


Here's a closer look at my finished card.


Want a discount? Use code TJ10Jeanne for 10% off at Technique Junkies!

Have a great day! Jeanne

Tuesday, July 10, 2018

Team Tuesday with Giovana


Hello friends! Giovana here today with an Anniversary card!
I have a little story to share with you before I talk about the card I have for you.
I was asked if I could make an Anniversary card, details I got was "color blue", then it was on me, so I was almost done with the card, just needed to stamp "Happy Anniversary" and guess what??? I could not find a stamp with that sentiment!! And let me tell you, I have like 3K stamps, lol, printing was not an option because my printer is a headache and never works when I need it. So I was starting to panic, I needed to finish before the kids wake up from their nap, hehehe, well, then I thought (picture a super bright cloud and  a BLING moment) "I have some old stamp in the closet?!
So, I started to look and look and I got a pile, HUGE pile and nothing and then BAM! I found A SET!! Just 1 set that had the "Happy Anniversary" saying!!
My heart was happy, I finished the card and the kids woke up!
End of this silly story, now back to the card ;)

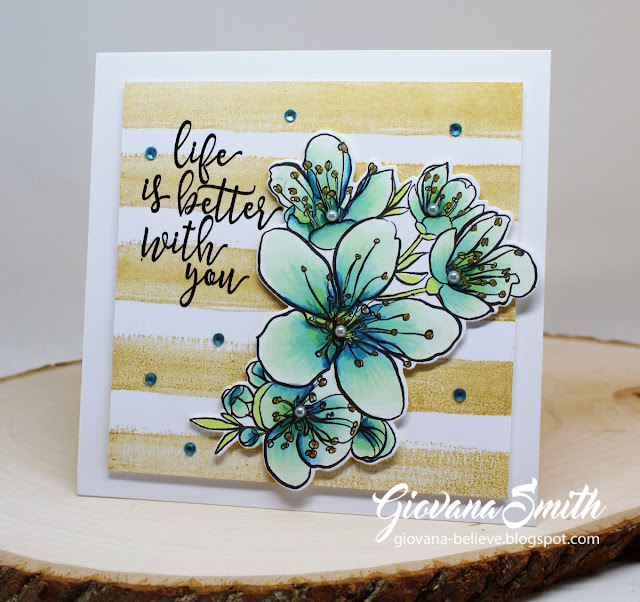
Started stamping the Wide Watercolor Stripe background on a piece of white cardstock in Delicata Golden Glitz ink, set aside to dry. 
For this project I used my Original MISTI
 Stamp the beautiful floral image from Mondo Sakura Set in Memento Tuxedo Black
 Color image with markers, here I used Spectrum Noir Markers.
 After that, die-cut image with coordinated die.
 Stamp sentiment from By your side set on  stripes panel in Jet Black Stazon Ink.
 Stamp Happy Anniversary inside.

Finally, I added blue rhinestone and pearls to embellish the card.

Hope you  like it.
Have a fantastic day!!


Tuesday, July 3, 2018

Team Tuesday with Ceal

Hello everyone and welcome to Team Tuesday! 
It's Ceal here to share with you today using some of the newest products by Concord & 9th. 
I love the turnabouts that were developed especially for the Original MISTI by Concord & 9th. For my background I used their latest Star Turnabout Bundle. 
In case you have never used the turnabouts before there is a little learning curve. First you have to make a jig which is a 6x6 square, I just use the back of a 6x6 sheet of patterned paper. Using a ruler you draw a line from corner to corner and next you number the corners, this is not necessary but if you are called away you will be able to tell which turn you were on if you are doing more than one rotation. Then you place your jig in the Original Misti.


The next step is to align your stamp, all of the turnabout stamp sets have a diagram on the packaging on how to line it up so do not throw away the packaging. After you have lined your stamp up close the lid of the Misti and pick up the stamp. Place a card front size of cardstock in the center of the jig using removable adhesive and start your rotations. All turnabout stamps can be rotated up to 4 times to give you a background on an A2 size card front.


For the focal point I used the Shine On bundle also by Concord & 9th. In my opinion the Misti is a must have for stamping the shine background also. I cut the background die out of Coastal Cabana cardstock and then placed the negative in the Misti and placed the cutout in the negative space in order to stamp it where needed. I used silver glitter paper behind the stitched panel so the cut out stars would be silver and also for the word Shine. The Birthday Girl is from the Hooray stamp set by yep Concord & 9th.