Thursday, April 29, 2021

To Craft or not to Craft?

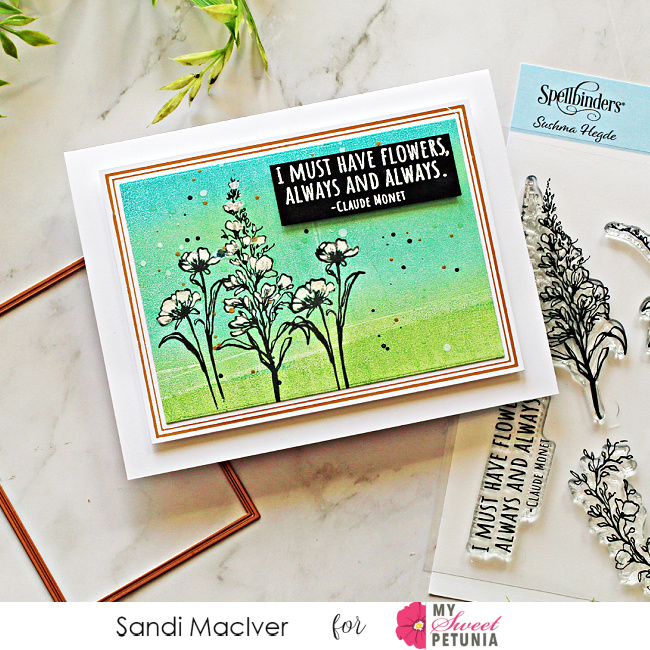
 Hi! I am Angie and the MISTI is my favorite stamping tool! I am delighted to share with you my first post as a team member!  

Recently a friend gave me a couple of wreath building stencils so I thought this would be the perfect time to showcase a fun way to utilize the MISTI.  


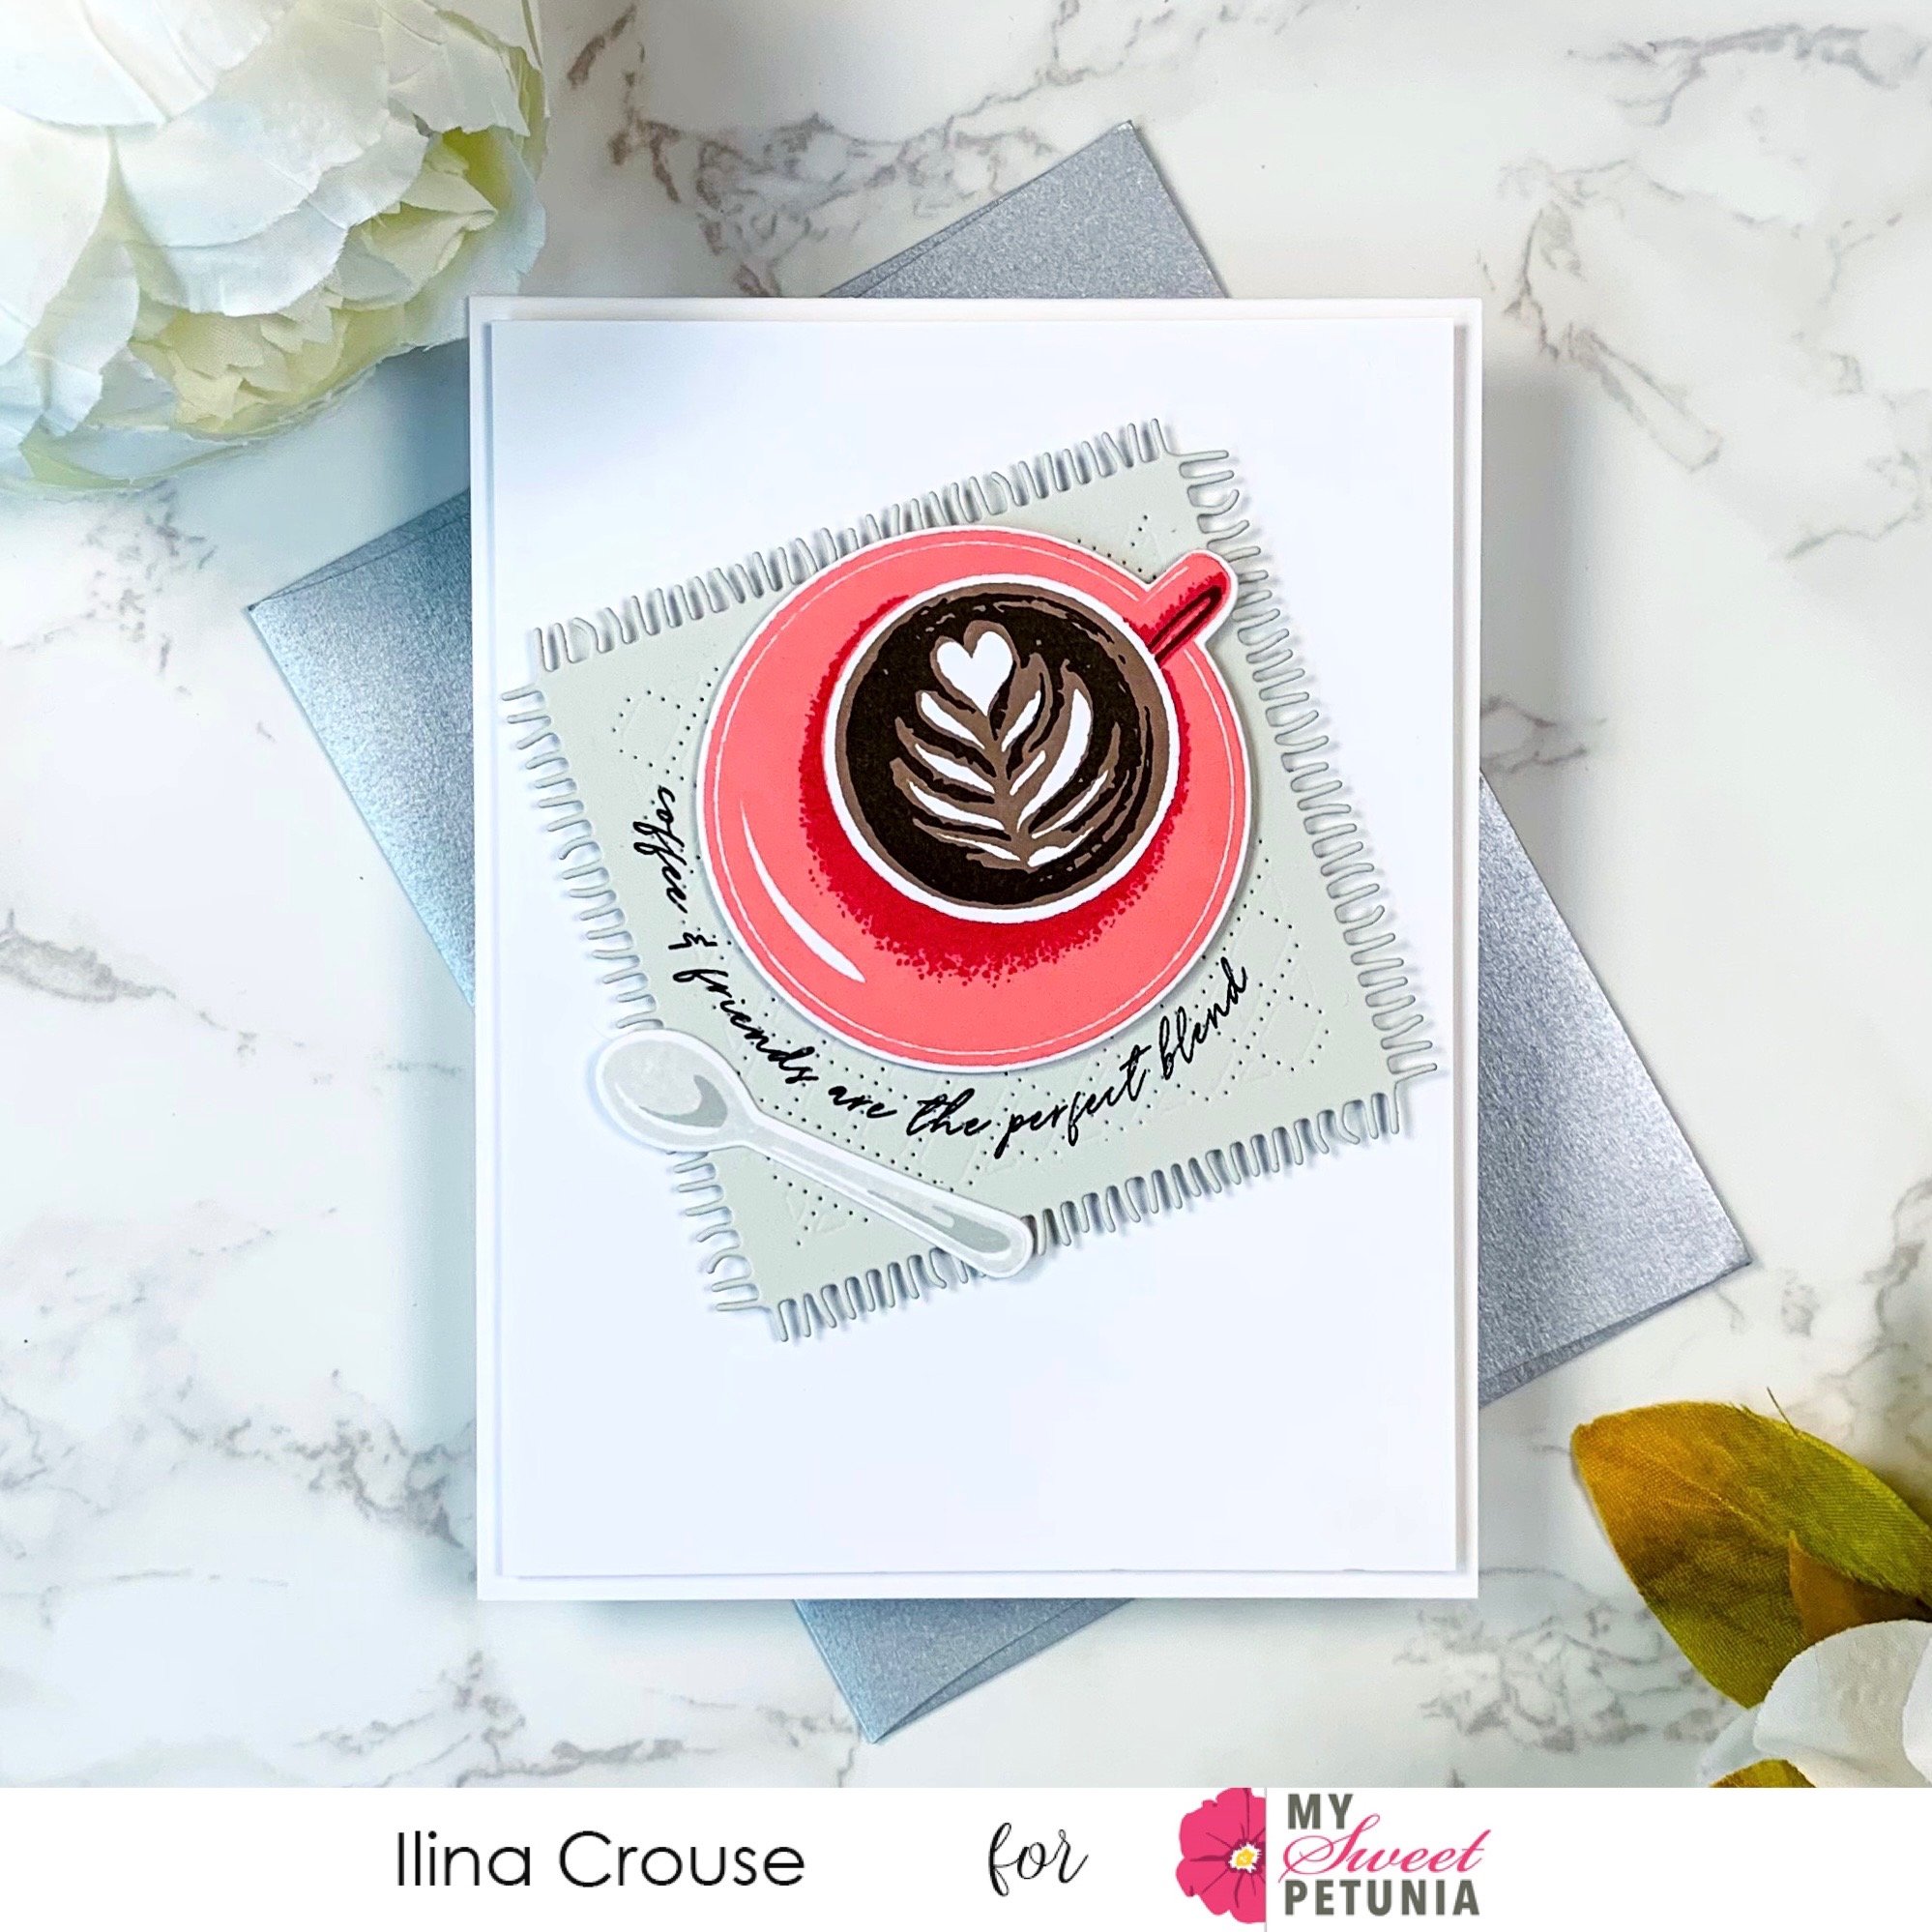
First, I took three small stamps from the I Work for Watercolor stamp set and arranged them on a corner of a 3 3/4 inch square piece of cardstock.  I closed the lid of the MISTI to pick up the stamps, then inked and stamped.


Then, I turned the cardstock so that the next blank corner was in the top right-hand corner of the stencil.  I inked the stamps and closed the lid to stamp.


Next, I continued turning the paper and inking until I had stamped all four corners.


 I colored the image, then cut it from corner to corner and layered the triangles on black cardstock measuring 3 3/4" x approx 5 1/4" leaving an opening in the middle.  In the middle, I added a sentiment strip with a fun sentiment from Crafty Lifestyle and sprinkled a few Irish Coffee Sequins. You can find lots of wreath-building ideas from Gina K on Youtube!

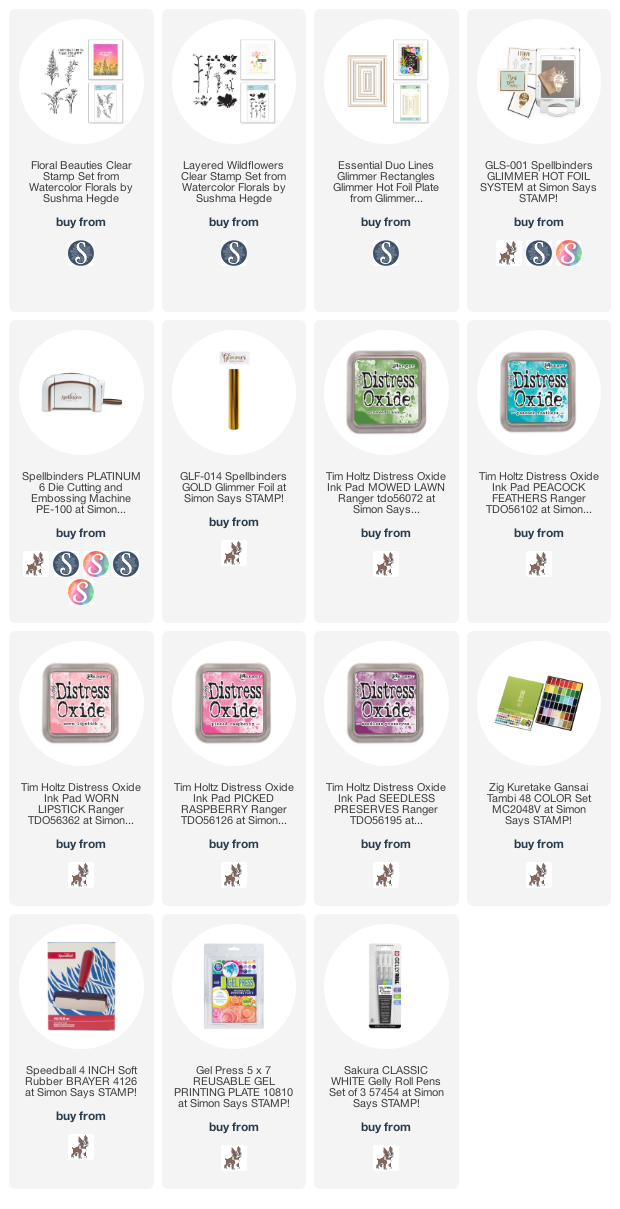
To visit the My Sweet Petunia site for a full list of products, click HERE!

You can find me at I Would Rather Be Stamping.

Thanks so much for stopping by! 


Wednesday, April 28, 2021

Adding Colour to Your Life with Judy

Hello stamping friends!

Judy here with my first post as a team member and I am excited! Today I am sharing a colorful (or as they say in the UK, colourful!) card using my MISTI and products from Visible Image Stamps (based in Wales).

I started off by using the Stars and Stripes Stencil, and a hue of rainbow colored Distress Oxide inks, and blended them through the stencil using a blender brush. I love the edge of the stencil that looks like a little bit of torn paper. It adds some interest to an otherwise "flat" looking surface.  Next I added the sentiment from Brighten Your World and the small flower from Total Chaos. I used my Mini MISTI and stamped each using VersaFine Clair Nocturne (my most favorite black ink!). Finally, I added sequins to match the stripes colors and gave my card a lime green base.
I love having the convenience of a Mini MISTI right on my desk all the time! Not only does it help my stamping to be precise and clear, it helps me keep my card bases straight after the intial scoring. I score the line, then fold with the card bases against the MISTI corner, and then crease with the bone folder. Keeps everything nice and straight!

You can find more of my projects on my blog, Joy in a JAR, and on my Facebook and Instagram too! Thanks for stopping by!


Thursday, April 22, 2021

Coffee and Friends

 Hi everyone,

Ilina here. Today I am sharing a set of card using Cozy Cup Stamp set from The Greetery along with the coordinating dies and the Cozy Cup Coaster die.

To make the cards I started by die cutting bunch of the dies from white card stock, also a template of the die cuts to use in my MISTI to mass produce the images. Once I had everything die cut, I positioned my template from the negative die cuts and stamped the images. Usually when I do this technique I stamp bunch of images, way more than needed and save for later use. 

Once I had stamped them, I set them aside. Die cut coasters from Dove card stock and stamped sentiment in black. All I had left to do was to assemble my cards. I made four and saved the rest of the stamped images for later use. 

Tuesday, April 20, 2021

Banner Builders with Ceal


Hello friends and welcome to another edition of Team Tuesday! 
It's Ceal, here and today I am sharing a couple cards and some backgrounds using Concord & 9th products. 


To create these two cards I started with a top folding white card bases and  white panels. I used the Lets Party Turnabout stamping both of them in four turns to create the backgrounds and the Banner Builder Bundle for the sentiments. 
The Misiti is a must have for Turnabout stamping. The Turnabouts were actually designed to use in a Misti stamping tool.

For the first card I placed the Let's Party Turnabout in the Original Misti  and stamped in the following colors Dove, Midnight, Sprout and Stardust, then adhered the background on a Midnight panel. 
I placed the Banner Builder Sentiment in the Original Misti and stamped the greeting in black and then cut them out with the Coordinating dies. These dies cut out the sentiments separately so that you can mix and match your sentiments for the banners. I used Midnight cardstock to cut out the banner itself. 
 To finish the card I added a balloon cut out of Sprout and covered with vellum to give it a more realistic look from the Happy Balloons dies. 


The second card I created the same way as the first and stamped in Sprout, Buttercup, Honeysuckle, and Aqua Sky and then adhered it to a Honeysuckle Panel. I also cut the banner out of Honeysuckle as well and to finish the card added a balloon cut out of Buttercup and added to the front. 
For a little fun I used some bakers twine as the balloon strings on both cards. 


When I am using a Turnabout stamp I love to make at least 5 background to use on future cards so I will have them on hand when I need a quick card and I love that with the Banner Builder set you end up with lots of banner sentiments to go with those backgrounds you have created. 

Here are the color combos for the three other backgrounds I created
1. Midnight, Sprout, Marmalade, Oceanside
2. Dove, Seaglass, Stardust, Sorbet
3. Peacock, Poppy, Sprout, Stardust


Thanks for stopping by and until next time. 
Happy Turning! 


Supply List:


Tuesday, April 13, 2021

Spellbinders Layered Wildflowers

 Hey cardmaking friends, it's Sandi here and I have a couple of cards to share with you today created with the Spellbinders Layered Wildflowers and Floral Beauties stamp sets.


So I've been noticing a few of my cardmaking friends have been knocking the dust of their Gel Presses and getting busy with them again, and I thought "GREAT IDEA".

So, I dug around and found one of mine.  I also decided to try Distress Oxide Inks for my blend and I just love how they turned out.  It reminds me of a silk screen.


I know we use our Misti's for stamping, but it's also a great place to put your Gel Press, that way you can turn it, pick it up, tip it to make ink run, all kinds of fun things.  I was pretty boring with my print today, I simply added Mowed Lawn and Peacock Feather ink direct from the ink pad.  Blended it with my brayer, and threw a print.  I turned it to vertical for the next card and I didn't even clean it, I just added more ink again and threw a print.

I added these pretty florals stamped in black ink and when that was dry I added white highlights with a Sakura White Gelly Roll #10


The second card is pretty much the same except I used the Mowed Lawn to stamp the stems and leaves.

This is the Layered Wildflowers stamp set, and that large flower has two layers of ink, Worn Lipstick and Picked Raspberry over it.  I love the chalky look and how they blended.  The darker ink on the small florals is Seedless Preserves.

Of course, the Misti also made short work of this layered stamping as I was able to line up the stamps perfectly.

Once all the ink was dry, I splattered both panels with white, green, blue and gold Gansai Tambi watercolors.  I just love a little splatter don't you?

I white heat embossed the sentiment on black for both cards and mounted them on mats that I Glimmer Foiled with the Spellbinders Essential Duo Lines Glimmer Hot Foil Plate.


That's it for me today and below I have listed the products I used.  Affiliate links used where possible, meaning I receive a small commission on any sales at no cost to you.

Thanks so much for stopping in today and hope the rest of your week is awesome.


Sunday, April 11, 2021

Let's Talk About Clarence + $1400 in Prizes!

Hey friends! Lydia here today to help celebrate the Altenew anniversary!

Because I have recently struck up a friendship with a squirrel, who I have named Clarence, I had to make a squirrel card today. 

The image is from the cutest little set, which also has chipmunks! Fun fact - my first word was "chippink" when I saw a chipmunk, so I'm a little partial to critters. 

Clarence waits for me every day with his little paws on my front steps. I think he thinks he wills me into existence with his mind - because he just sits there and stares at the door until I come out. Sometimes I see him on our camera, but sometimes I just go out and there he is. 

So this set was so perfect for recreating my daily scene. 

First, I used Limestone ink and a small blending brush with Post-it tape to create the steps.

The stamp just happens to have Clarence in his exact pose, so I stamped him in Milk Chocolate on a scrap of cardstock and cut him out with the matching dies.

Then I used two brown, a grey, and a reddish brown Polychromos pencil to color him in, and arranged him in the begging position on the step. So adorable! The sentiment is from the same set. You can see a video of Clarence below. 


Here are all the supplies I used today.
Altenew Chipmunk and Squirrel...
[ ALTN ]
Faber-Castell Polychromos Pencils and...
[ BLIC ]
Milk Chocolate Crisp Dye Ink – Altenew
[ ALTN ]
Limestone Crisp Dye Ink – Altenew
[ ALTN ]
Altenew Ink Blending Tool Set -...
[ ALTN ]
Understand Blue Card Making Bundle #3...
[ CTC ]
Understand Blue Card Making Bundle #1...
[ CTC ]
Understand Blue Card Making Bundle #2...
[ CTC ]
My Sweet Petunia
[ MSP ]
Pre-Cut & Scored Cardstock
[ CTC ]
Sakura CLASSIC WHITE Fine Line 05...
[ SSS ]
Art Anthology BIG CRAFT MAT 24x36 311473
[ SSS ]
Heavy Base Weight Card Stock- White
[ GNK ]
MISTI Stamping Tool
[ MSP | HA | SSS | ELH | MFT | UNT ]
Rotatrim Professional Series Cutter -...
[ BLIC ]
LightView 2in1 LED Magnifier for...
[ BRG ]
Mudder 10 Pack White Buffer Sanding...
[ AMZUS ]
Xyron ADHESIVE ERASER 23675
[ SSS | ART | AMZUS ]
Teflon Bone Folder - Ellen Hutson LLC
[ ELH | SSS ]
Crafter's Companion GEMINI...
[ SSS ]
Scor-Pal MINI SCOR-BUDDY Scoring...
[ SSS ]
Storage Envelopes, Medium 25pk,...
[ ELH ]
CheckOutStore Stamp & Die Clear...
[ CHC ]
Extra Large -50 pk, Avery Elle Stamp...
[ ELH ]
Mermaid tidy towel case and glue...
[ ETS ]
Lawn Fawn STAMP SHAMMY Cleaner LF1045
[ SSS | CST ]
Airtable: Organize your stamps & dies
[ ART ]
Altenew Blog - Inspiring crafters...
[ ALTN ]


Now enjoy the real life inspiration for this card in this video.


Now this is all part of the anniversary blog hop! Click the graphic to see the full list of people and companies participating, and if you came here from Jaycee, your next stop is Agnieszka.

Thanks for stopping by!