Thursday, January 28, 2021

Hey There, Dumpling

 Hi everyone!

Ilina here. Today I am sharing super cute card using one of the new Catherine Pooler Designs Sets called Hey there dumpling.

To make the card I cut down a piece of white card stock A2 size and with the help of the MISTI I stamped all the dumplings in two different colors, Sand Castle and Do-Si-Do. Once I had stamped the dumplings I stamped the little faces the same way. Then the little cheeks and dots and hearts around it. Once I was satisfied with the result trimmed the panel to 4" x 5 1/4". 

Stamped the sentiment on black card stock and embossed in white. Die cut a vellum heart and assembled my card. 


Tuesday, January 26, 2021

Scattered Hearts Turnabout With Ceal


Hey Y'all!
Welcome to Team Tuesday! 
It's Ceal here to share a couple cards with you today using some new products by Concord & 9th. 
I love Turnabout stamps. Did you know that they were created specifically for the Misti? They are so much fun and so easy. They now come with an alignment guide which makes turning even easier. 


To create these two cards I used the Original Misti and some inks by Concord & 9th. (all listed below) I placed the turnabout jig in the corner of the Original MIsti, aligned the stamp up with it using the alignment guide and then the fun began. 
For both of these cards I only turned three times because I wanted more white space. 
I am currently doing a valentines series on my blog so I decided to create a masculine and feminine version of this card for my series.  
Until next time, stay crafty! 


Below you will find links to the products used. Click the picture to start shopping. Compensated Affiliate links are used at no additional cost to you. Your support helps me to keep bringing you new projects and I appreciate that so much!  

Thank you!


Thursday, January 21, 2021

Have Faith Today with Karen Reategui


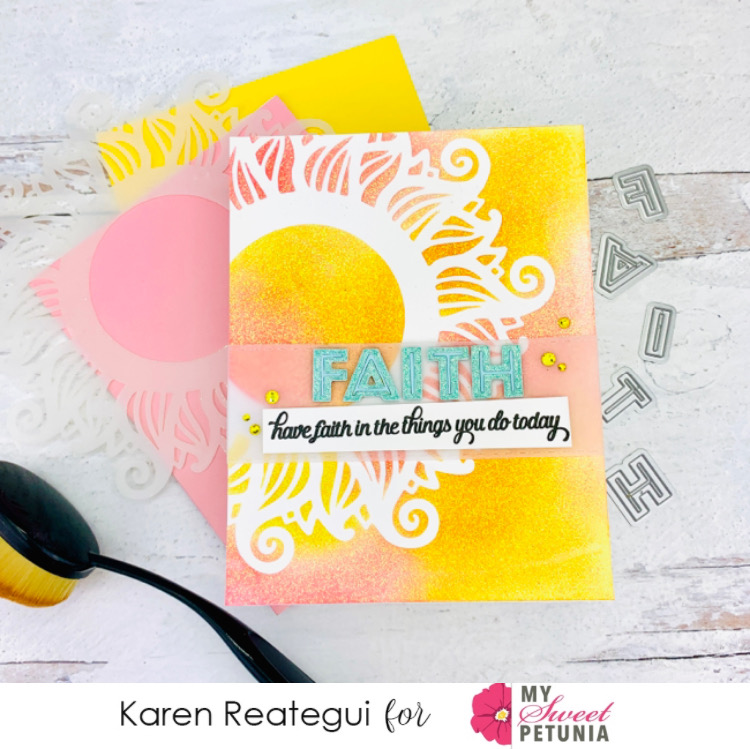
Hello friends! Today I'm sharing this bright and shinny encouragment card using Picket Fence Studios products and the original MISTI.


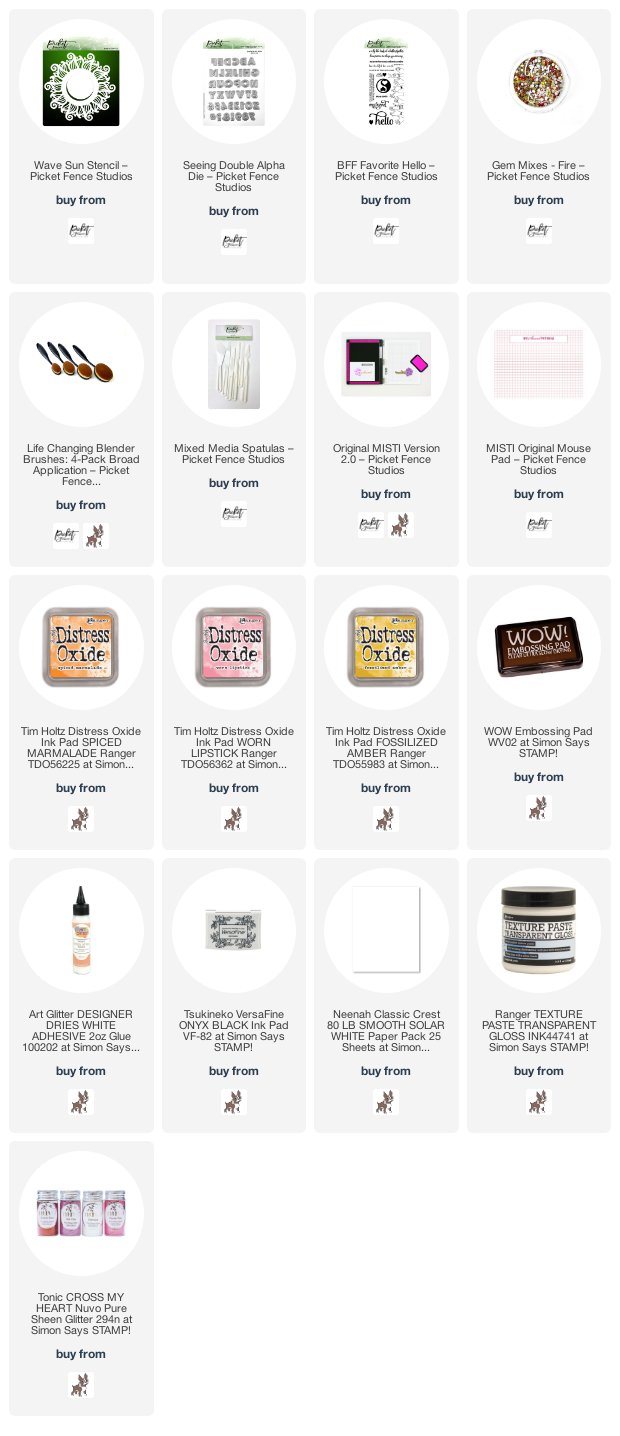
Let's begin! I started by placing the new Wave Sun Stencil from Picket Fence Studios on top of an A2 panel, then I applied distress oxide inks using the Life Changing Blender Brushes. The inks I used Fossilized Amber, Worn Lipstick and Spiced Marmalade. Once I finished applying the colors I didn't removed the stencil.


Next, I mixed Ranger Texture Paste Transparent Gloss with Nuvo Pure Sheen Glitter Diamond and using a spatula I applied this mix through the stencil. When I finished I immediately removed the stencil and let this panel dry overnight. Because the texture paste is transparent you will be able to see the colors from the background and also all the shine from the glitter, giving this background a wonderful look.  


Once it was dry, I adhered a piece of vellum and wrapped it around the panel. I secured the vellum using glue. I also, heat embossed a piece of cardstock using WOW! Minty Embossing Glitter and die cut from it the word FAITH using the Seeing Double Alpha Die. I added the letters on top of the vellum using glue.


Finally, I stamped my sentiment from BFF Favorite Hello and added it to the velum below the word FAITH. Last, I placed some gems around from the Fire Gem Mixes and adhered a folded note card at the back of this panel. 

Hope you like this card and brings you a little bit of hope and faith with all its bright and shinny colors. Wish you a fantastic day and thanks for stopping by!

Your friend,
Karen
 

Tuesday, January 19, 2021

Colorado Craft Company Perfume Bouquet

 Hi crafty friends and welcome back.  Today I'm sharing the Colorado Craft Company water colored Perfume Bouquet.  This is another in their Big and Bold stamp collection and I find it enjoyable to color these big (and bold) images, there's lots of room to play with color.


How to create the Colorado Craft Company Water Colored Perfume Bouquet:

  • Place the watercolor paper into the Misti and stamp the image several times with VersaMark Ink.
  • Cover with black embossing powder, shake off the excess and heat set.
  • Watercolor the image with Gansai Tambi paints, I used #34, #44, #57, #37, #53 and #42.
  • Once the image is dry, cut it out
  • Use the Misti to stamp the bottle again in black ink onto a piece of Vanilla card stock and add a sentiment to the square.
  • Cut this out and glue it to the square on the bottle.
  • Add a large Gold Crystal to the lid where the circle image is.


  • Cut another piece of watercolor paper 4-1/4 x 5-1/2 and color wash the entire thing.
  • Once the background is dry, attach it to a black mat 4-3/8 x 5-5/8 and then mount it to a side folding 5 x 7 card base in Audrey Blue from Simon Says Stamp
  • Use Foam Squares to attach the perfume bottle image to the center of the card.


  • Finally, place a scrap of black card into the Misti and stamp the sentiment in VersaMark Ink.
  • Cover with white embossing powder and heat set.
  • trim to a strip and add across the flowers with small pieces of foam squares
I hope you enjoyed my share today.  There is also a set of dies available now for this stamp set and I have added them in the shopping links below.


used for the Colorado Craft Company Water Colored Perfume Bouquet:

Want to find the products I used?  I have them listed below.  Compensated affiliate links used at no cost to you. Thank you for your support, it helps to cover my blogging and video expenses.     
 

Tuesday, January 12, 2021

Team Tuesdays and A Winner


Welcome to Team Tuesdays. This is Susan Wymer. Happy belated birthday to Rabbit Hole Designs! I will get to the cards after I announce the winner of the My Sweet Petunia gift certificate. Please email hello@mysweetpetunia.com and put Rabbit Hole Designs Hop winner in the subject line.

The winner of the $50 gift card to The Rabbit Hole Designs is: 

            Barbaralynn

Have fun shopping Barbara!


So for the card above, I used Just Cake and Happy Birthday. I first stamped the cake with my MISTI and then colored it with my Copics. I stamped the Happy Birthday - don't you love that script - with Versafine Onyx Black and heat embossed with clear embossing powder to give the sentiment some shine. I added Wink of Stella Clear Shimmer and Glossy Accents to the cake to add some shine. I fussy cut it out and popped it up on 3M foam dots. 


This card you absolutely need a MISTI. I created the background using all the sentiments from Blended Sentiments. First, let me apologize for my dirty MISTI but as I see it, a dirty MISTI is a loved and well-used MISTI. I lined up the card stock on my MISTI. I do have an old Silhouette mat on top of my mouse pad. I laid out the stamps on the MISTI for the first round of stamping. I used Gina K Designs Warm Glow Amalgam Ink.


for stamping this background. I stamped the first round and then set up my MISTI again to fill in the blanks. 


You can see in the above picture that I reset the sentiments after the first stamping. I continued this throughout the stamping process. I trimmed this panel down to 4" x 5.25" and mounted it onto an A2 sized card. I colored in my poor tired bunny with my Copics. 


For the third card, I used the Open Heart stencil to make a Gel Press print using gold and red acrylic paints. I used Waffle Flower's A7 Layers die cuts to make the panel and back panel. All of this was mounted on a 5" x 7" Neenah Solar White 110 lb card stock. 

Thanks for stopping by;
Susan 

Products Used: I am using compensated affiliate links at no further cost to you. My Sweet Petunia and The Rabbit Hole Designs provided some of the products used in this project.

Friday, January 8, 2021

Happy Birthday to The Rabbit Hole Designs + Giveaway!

 Hi friends! Lydia here today with a birthday celebration of our friends over at The Rabbit Hole Designs! This coffee-loving company with just the right amount of snark turns TWO today, so we have lots of fun in store for you, including a $50 gift card to our store and theirs for two lucky commenters! We will announce the Rabbit Hole Designs winner on our winners page and on the blog on Tuesday!

But let's celebrate with - A RABBIT. Or maybe two! This adorable stamp set is one of two new ones today, and I couldn't resist a little watercolor! I decided to make my bunnies blue, in tribute to my childhood fascination with the Blue Bunny ice cream brand. I actually thought there WAS a blue bunny somewhere at that company for many years as a tot! I used my Daniel Smith watercolors from my split group, and die cut the scene with circle infinity dies. The sentiment is from the same set - so sweet and so perfect for a Valentine. The colors I used are all from my curated "Lydia" split in the split group - Manganese Blue Hue, Phthalo Blue Green Shade, Rhodonite, Green Apatite and Phthalo Yellow Green. I painted it on cold press watercolor paper. To get the cheek blending so soft, I just did wet on wet  watercolor. What a sweet image. 


Here are all the supplies I used today and stay tuned below for more inspiration and our giveaway!

Je T'aime & Just Cake
[ THR ]
DI199 Nesting Circle Infinity Dies...
[ HA ]
Daniel Smith Extra Fine Watercolors
[ BLIC ]
VersaFine Clair Ink Pad, Nocturne -...
[ ELH | SSS ]
Fabriano Extra White Cold Press...
[ BLIC ]
Lanaquarelle Watercolor Blocks |...
[ BLIC ]
Escoda Versatil Brushes | BLICK Art...
[ BLIC | UTR | BLIC | INK ]
My Sweet Petunia
[ MSP ]
Stamps – The Rabbit Hole Designs
[ THR ]
Pre-Cut & Scored Cardstock
[ CTC ]
Rotatrim Professional Series Cutter -...
[ BLIC ]
Teflon Bone Folder - Ellen Hutson LLC
[ ELH | SSS ]
Crafter's Companion GEMINI...
[ SSS ]
Scor-Pal MINI SCOR-BUDDY Scoring...
[ SSS ]
Storage Envelopes, Medium 25pk,...
[ ELH ]
CheckOutStore Stamp & Die Clear...
[ CHC ]
Extra Large -50 pk, Avery Elle Stamp...
[ ELH ]
Mermaid tidy towel case and glue...
[ ETS ]
Airtable: Organize your stamps & dies
[ ART ]
My Sweet Petunia
[ MSP ]
The Ultimate Mixing Palette: a World...
[ BLR ]
Stillman & Birn Archival Sketchbooks...
[ BLIC ]
Lawn Fawn STAMP SHAMMY Cleaner LF1045
[ SSS | ELH | ART ]
Nesting Porcelain Bowls - BLICK art...
[ BLIC ]


Here are the designers participating today:


You can also find everyone's creations on Instagram with the hashtag #TRHDMISTI.

Leave comments for your chance to win a $50 gift card to our store or a $50 gift card to The Rabbit Hole Designs!

Thanks for stopping by.


Thursday, January 7, 2021

Friends Make Life Better


Hi everyone,
Ilina here! Today I am sharing a card that combines few products from different companies and I am very pleased how it turned out!
I used Gel Press and a stencil from Picket Fence Studios (along with few distress oxide inks) to create my background. I put my Gel Press plate on top of my MISTI which allowed me to move it around easier and apply the ink and spread it with the brayer much easier. 
Once I created the background, I prepared the rest of the elements, the branch die cuts using My Favorite things die and the Strip sentiments and die set from Taylored Expressions.
To assemble the panel I cut down the gel press print to 4" x 5 1/4" adhered the die cuts and the sentiment and to finish it off I added several Honey Bee gems!! Using craft foam adhered to white note card!