Tuesday, June 28, 2022

MISTI Morning


Hello and welcome to the My Sweet Petunia blog. I made this card this morning in my currently non-air conditioned craft room. But life was so easy with my MISTI. I stamped WPlus9 Designs Flora and Fauna 3 with Antique Linen Distress Ink. Even though I was stamping onto Neenah Solar White Super Smooth 80lb card stock, I used my MISTI as I knew I would triple stamp this. I stamped the sentiment and die cut friend with my MISTI as well. All of this was quick because of the MISTI and I could color elsewhere due to the heat.  

By the way, if you spend $75 at My Sweet Petunia you can get a free MISTI bag while supplies last. I use my bag every time I fly or travel with my MISTI. I can pack it full and know my MISTI is safe.

Have a wonderful day;

Susan


Products: I am not using compensated affiliate links on this post. I have included links to My Sweet Petunia for your personal use.

Standard MISTI

Sticky Mat

MIS-T

Creative Corners

Saturday, June 25, 2022

Ink Pad Swatches with the MISTI


I love, love love, organizing my supplies.  I find that I tend to use my supplies more efficiently when I know what I have.  Ink swatches make it easier to see color combinations.  I also have found out what companies have identical colors.  

Here is a quick video that shows how I make my swatches.  Thanks for stopping by!!!


Affiliate links to supplies used:


Thursday, June 23, 2022

Purrfectly Wonderful Silhouettes

Lately, I have been in a Distress Ink mood and I am so thankful for the MISTI!  Before I had a MISTI, I avoided silhouette stamps.  It's almost impossible to get a rich impression on the first try, especially when stamping on Distress ink.  With the MISTI, multiple, perfectly aligned stampings are a breeze! Next, I drew a line with the MIS-T Ruler to ground Mr. Kitty.  I love these rulers because they are perfectly sized to use for card making!  They also have small grid lines to help with alignment!


Thanks so much for stopping by today!  Below you will find a list of all the My Sweet Petunia items I used in creating my project. 

 ***Affiliate links used when possible at no charge to you! Thanks so much for your support!***


And to clean up my MISTI I use:

If you would like to see more projects by me you can find me at I Would Rather Be Stamping!


Tuesday, June 14, 2022

Team Tuesday with Ceal


Hello friends! 
It's Ceal, here. Welcome to team tuesday! 
Today I am sharing a card using a mix of Concord & 9th and Pinkfresh Studio. 
I have linked to the products below using affiliate links where possible. 

To make this card I started with a white top folding ard basem a white panel and a black panel. 
The stamp set I used is a set that has a layering stencil to go with it and makes it super quick to make a card. 
I stamped the floral image down the used the stencil to color it. When coloring with Layering stencils I use Sticky Mat along the Original MISTI . I place my cardstock in the corner, this allows me to line up each stencil perfectly.  Next I cut out all the pieces which was also super easy because it all cuts out at the same time, used some of them and added a little to my floral images. 
I used a cover plate by Concord & 9th cut out of white paper to contrast the black. 
I finished the card with a sentiment also by C9. 


Below you will find links to the products used. Click the picture to start shopping. Compensated Affiliate links are used at no additional cost to you. Your support helps me to keep bringing you new projects and I appreciate that so much!  

Thank you! 

Tuesday, June 7, 2022


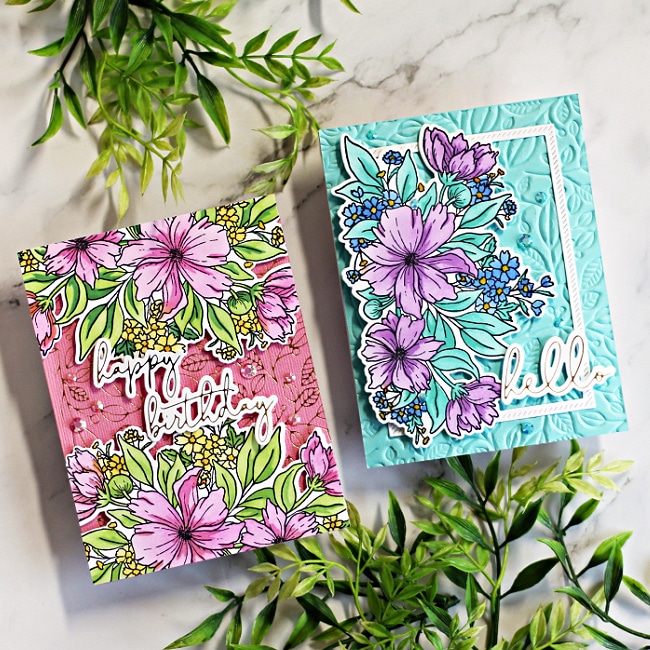
Hi crafty friends and welcome back.  It's Sandi here and today I have a New Cardmaking Video for you, Pinkfresh Studio Cosmos Bunch 2 Cards.  I did two different layouts and two sets of colors to provide as much inspiration as possible with this fabulous Cosmos Bunch bundle. 

 To say I am over the moon with the Stamp/Die/Stencil Combo that Pinkfresh has come out with is an understatement.  They are so versatile and can made card making so simple.  I can color the image, I can die cut the image, I can stencil the image - there are so many possibilities.  

Today I'm playing with the layering stencil bundle as there are 5 stencils in this set and the Misti Sticky Mats are perfect for this technique as you will see in the video below. 

 All supplies are linked to multiple sources in the thumbnails at the end of this post. Compensated affiliate links may be used at no cost to you and product disclosure is below.  As always, I appreciate your support of my Blog and YouTube Channel.


two handmade cards using the Pinkfresh STudio Cosmos Bunch bundles and cardmaking supplies from Pinkfresh Studio 

 In today's Pinkfresh Studio Cosmos Bunch 2 Cards Video I walk you through creating the blue card on the right. Next, near the end of the video I share the details on how to create card #2. I won't go into a pile of detail here as it's all explained in the video.

  handmade blue card with purple florals created with new card making supplies from PinkFresh Studio

Pinkfresh Studio Cosmos Bunch 2 Cards - Card 1

Use the 5 layer stencils to add color to the hand stamped image.
 Next, cut it out with the coordinating die.
Finally, layer it to a beautiful embossed background created with the Lush Vines Hot Foil Plate.


handmade birthday card with pink flowers and a pink background created with new card making supplies from Pinkfresh Studios

Pinkfresh Studio Cosmos Bunch 2 Cards - Card 2

Use the Misti Stamping Tool to stamp the image twice on Hammermill cardstock. 
 Next, use the layering stencils to add the colors to the image. 
 Inks Used:  Marigold and Sweet Mustard, Bubble Gum,  Grassy knoll and Evergreen 
 Finally, cut out both images with the coordinating die. 
 Add them to a card front gold foiled onto pink cardstock. Then add the gold foiled sentiment and Essentials Jewels.

Here is the Pinkfresh Studio Cosmos Bunch 2 Cards Video

You can view it here or over on my YouTube Channel in HD.  Don't forget to subscribe while you are over there and if you love the video - please consider giving me a thumbs up and sharing it with your friends on social media - I would so appreciate that.  


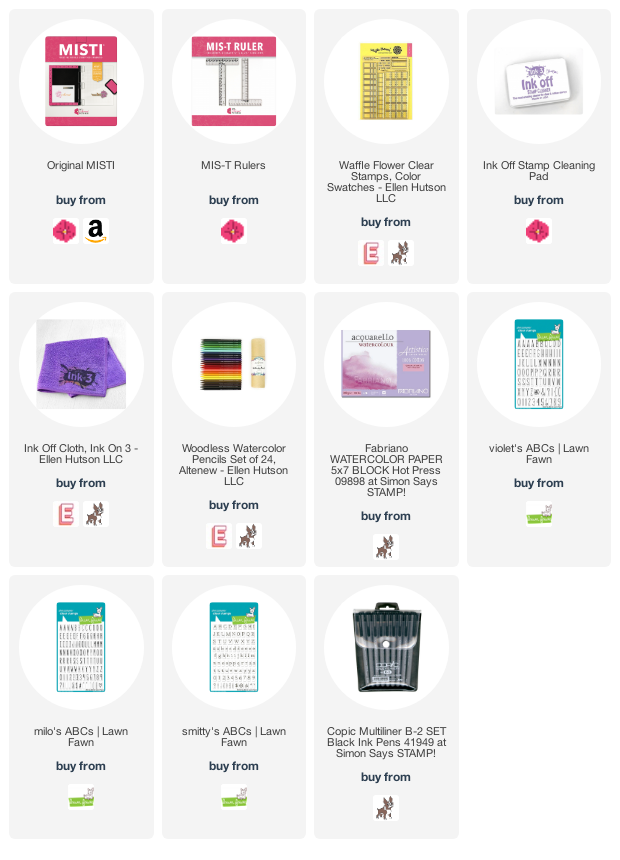
Card Making Supplies used for the Pinkfresh Studio Cosmos Bunch 2 Cards :

Here are the products I used today.  Compensated affiliate links used  where available at no cost to you. Clicking on a thumbnail link and shopping supports my website and allows me to continue bringing you new projects and videos.  Thank you for your support.  Affiliate and product disclosure are found on my disclosure page.  All products for today's post were personally purchased. 

 As always, I was not paid to do this post.  I only use and recommend products I love.  Click on the icons below each product picture to go to my favorite stores.            

Sunday, June 5, 2022

Altenew Swatch with the MIS-T Ruler


Hi everyone!!  It is Iliana.....It has been a long time since I have actually written my own blog post.  The last few years have been a whirlwind.  I started the process of moving from Illinois to Texas to be closer to my family.  I am just now getting my craft room all put together.  I promise to post a video tour soon.  

Today, I wanted to show you one of the uses of the MIS-T ruler.  I love to use the grid squares to line things up.  The following video will show you how the MIS-T ruler make things easier.


Thanks so much for stopping by. 

Affiliate links to products used:

Thursday, June 2, 2022

Morning Coffee & Hello

***Affiliate links used when possible at no extra charge to you!***

Hello, I love creating coffee-themed cards so today, I decided to feature this fun set by Impression Obsession.  The cup and saucer are separate stamps so that the cup can be stamped alone or together as I have done here.  I love this set not only because I love coffee sets but also for the mix & match possibilities!

I was so happy to have more than one MISTI to create this project! I put the saucer in one MISTI and the cup in the other.   The sugar cubes went in the top corner of the MISTIwith the cup.  Then the coffee cream went in my Mini MISTI
I stamped all the elements on copy paper first to see if the design was appealing.  I ended up trying several different backgrounds because with the stamps in the MISTIs it was a snap to stamp the design over and over. 


Thanks so much for stopping by!

You can find more of my projects at I Would Rather Be Stamping!

Thanks,
Angie


Wednesday, June 1, 2022

It's Graduation Season!

Spring brings a LOT of graduations - it seems pretty much April to June someone is celebrating a milestone achievement. Today I have a graduation design that is easy to make with the help of some fabulous dies, and beautiful papers - and, of course, my MINI MISTI!

Every school but one that I have attended has had the colors of blue and gold. From elementary school to my university (in another state), and ALL of the schools in the town where I currently live - blue and gold are popular choices. This classy card uses amazing papers and two sets available from Stamp Simply.

I cut a piece of the beautiful Ink Drops Candy 6x6 by Craft Consortium for my background, and stamped one of the Graduation Sentiments twice along the bottom. I used the gridlines on my MINI MISTI to line it up. I used another small piece of the paper and stamped "To the graduate" -- both are with VersaFine Onyx Black ink. All edges were distressed with a distress tool. I cut the cap and diploma from gold shimmer cardstock, and popped them up with foam tape on their matted panels. For a little extra shimmer, I tied metallic thread around the center of the card, fanning it out for interest.


Supplies from Stamp Simply:
  • Graduation Sentiments
  • Congrats Grad Steel Dies
  • Craft Consortium Ink Drops Candy 6x6
  • VersaFine Ink Pad - Onyx Black

Other Supplies:

  • MINI MISTI
  • distress tool (for card edges)
  • gold shimmer, dark blue, light blue cardstock
  • metallic blue thread
  • foam tape
Thanks for stopping by today! You can find more of my projects at my blog, Joy in a JAR.