Showing posts with label technique. Show all posts

Tuesday, February 1, 2022

Rainbow with Gradation/Ombre Stamping

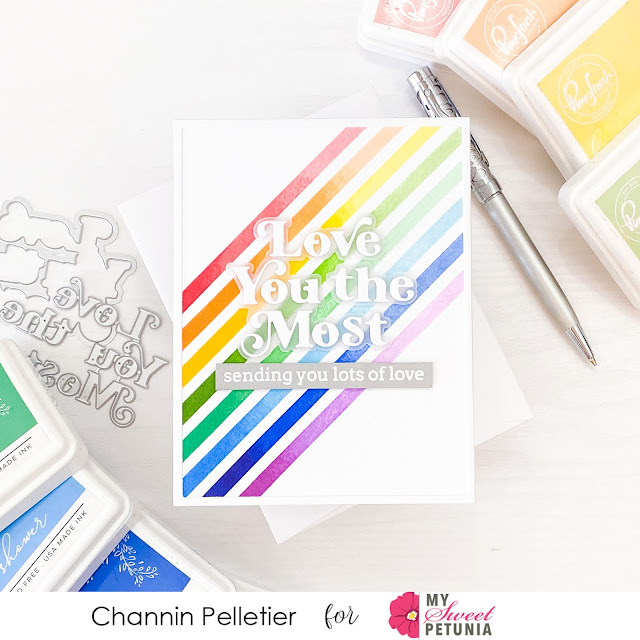
Hello friends!! It’s Channin here and today I’m sharing one of my favorite MISTI techniques, gradation/ombre stamping!! I use this technique to create a beautiful fading rainbow background featuring stamps and dies from Pinkfresh Studio. 
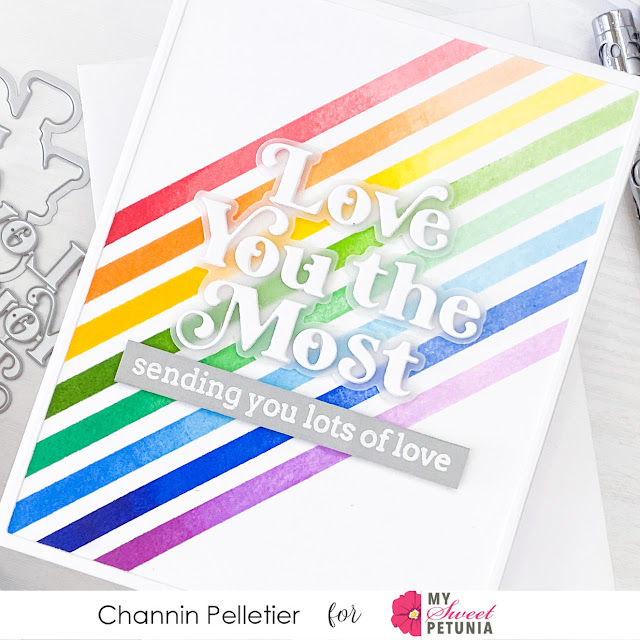

To create this card I first stamped the background using the Pop Out: Diagonal Stripes Cling Stamp Set. I started with the #6 stripe stamp and inked it up with Coral Reef ink and stamped it onto a 8 1/2” x 5 1/2” panel of white cardstock. I then partially inked up two thirds of the same stamp in Passion Fruit, a slightly darker red ink and stamped the stripe again. I then finished the stripe by partially inking and stamping the last third of the stamp in Berrylicious ink. I repeated this process for stripes 7-13 using three different inks (a light, medium, and dark) for each color of the rainbow. 


Once I had finished stamping the background I then cropped the panel down to an A2 panel and adhered it to the front of an A2 top-folding white card base. I then created a thin white rectangle frame using nesting rectangle dies and adhered the frame to the card front.
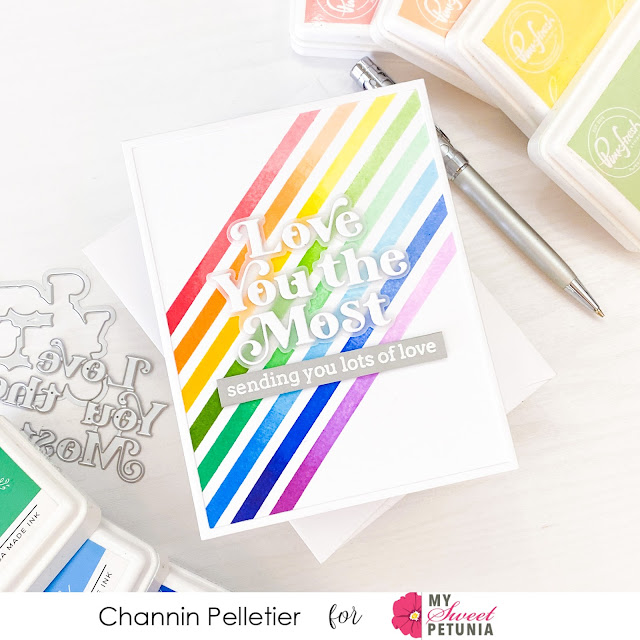


Next, I die cut a sentiment out of vellum and white cardstock using the Love You the Most Die. I then adhered the white letters onto the vellum shadow layer and then adhered the sentiment to the card front with foam adhesive. Lastly, I stamped and white heat-embossed a sentiment from the Simply Sentiments: Hello Stamp Set onto gray cardstock, trimmed the sentiment down to a stripe and adhered to the card front with foam adhesive. 


I hope you enjoyed my card! Thank you so much for stopping by!


~Channin


Supplies:
Tuesday, March 2, 2021

VIDEO: Caring Hands Eclipse Cards with Channin

Hello friends! It's Channin here and today I have a pair of colorful cards and video to share featuring the Caring Hands stamps and dies from Waffle Flower Crafts. Today’s card uses the MISTI and the eclipse technique to add a cool dimensional effect to my sentiment!


To create these cards I first stamped a sentiment from Caring Hands Sentiment Stamp set onto an A2 panel of rainbow patterned paper in VersaFine Onyx Black Ink using my MISTI. I left my stamp inside my MISTI and then adhered the rainbow panel onto the front of an A2 top-folding card base.


Next, I stamped the praying hands from the Caring Hands Stamp Set in Antique Linen Distress Ink onto Neenah Solar White cardstock. I then copic (E30 & E31 or E35 & E37) colored the hands and then die cut them with the matching die. 


Next, I grabbed a scrap A2 panel of cardstock, popped it into my MISTI and stamped the same sentiment I stamped on the rainbow panel. I then centered the praying hands die over the stamped sentiment and then ran them through my die cutting machine. I then discarded the die cut hands and placed the scrap panel back into my MISTI to use as a jig. With my jig in place, I then popped my copic colored hands into the jig and stamped my sentiment once more. 


Lastly, I finished the card by adhering my hands to the card front with foam adhesive, making sure to line up the letters on the hands with the letters on the card front.


I hope you enjoyed my cards and video! Thank you so much for stopping by!


~Channin


Supplies:


Tuesday, August 18, 2020

Split Panel Rainbow Cards with Channin

Hello friends!! It's Channin here with a couple of colorful split panel cards to share!! The split panel technique a fun and unique technique which the MISTI is an absolutely essential tool because your two stamped panels must be identical except for color variances. 

To create these cards I first positioned all the letters I needed for "celebrate" over the center line of a white slimline panel (3 5/8" x 8 1/2"). Because "e" is repeated multiple times I used place holder letters, letters that are about the same shape and size as the "e" (o, c), in place of the e. 

Once I had the letters positioned, I then picked them up with my MISTI and then removed the "e". I removed the "e'' so I could easily ink up the "C" because I want to ink each letter in a different color. 

I stamped the "C" on my first panel in my light pink (Ballet Slipper) and then I stamped the "C" on my second panel in my dark pink (Sparkling Rose). 

Next, I repositioned my "e" on my MISTI, removed the "C" and "l", and then stamped the "e" in a light red on my first panel and a darker red on my second. 

I will basically repeat this process till I have all my letters stamped and end up with a light rainbowed celebrate and a darker rainbowed celebrate. 

Now that my panels are stamped I then used my paper trimmer to cut my panels in half which is at 1 13/16" for the slimline panel. Next, adhered one of the light celebrate halves with one of the dark celebrate halves onto another slimline panel. I then trimmed the panel down and adhered it onto a gray slimline card base (7 1/4" x 8 1/2", scored at 3 5/8").

I then stamped and white heat embossed a couple sub sentiments with the Simply Sentiments - Hello Stamp set onto gray cardstock. I then trimmed the sentiments down and then adhered them to my card front with foam adhesive. 

And that's it! I hope you enjoyed my cards! Thank you so much for stopping by!

~Channin

Supplies:

Tuesday, November 12, 2019

Lovely Blossom Pattern Stamping with Channin


Hello everyone!! It's Channin here with you today and I'm so excited to share with you a couple of cards that I created with one of my most favorite MISTI stamping techniques, pattern stamping!!

I learned this ingenious technique from the queen of techniques, Jennifer McGuire, and quickly became obsessed! Pattern stamping is such an incredibly quick and easy way to create beautiful full panel patterns!

Lovely Blossom Pattern Stamping with Channin

I have a video that you can view down below or on my YouTube channel.


First, I arranged several stamps from the Lovely Blossoms Stamp Set from Pinkfresh Studio on the lower half an A2 panel. Lovely Blossoms is a layering stamp set so the first group of stamps that I arranged are the first layer for the images. I then picked them up with my MISTI and then stamped them in Stargazer dye ink. I then rotated my panel 180 degrees and stamped the other half. Next, I removed the stamps and positioned the second layer stamps. I then inked the stamps up in Blue Jay dye ink and stamped half of the panel. I then rotated the panel 180 degrees and stamped the other half.


Next, I decided to fill in some of the white space by making small dots with a copic marker (B32). Once I finished adding all the dots I then die cut a "hello" out of white cardstock 4 times. I adhered two of the "hello's" together and set aside. Next, I die cut a shadow layer out of vellum and adhered the two glued "hello's" to the underside of the vellum.


I then ink blended over one of the "hello's" with Stargazer and Blue Jay ink and then adhered it on top of the last "hello". I then adhered this pair on top of the vellum shadow layer. I then trimmed 1/8" off all the sides of my stamped panel and then adhered the panel on to an A2 top-folding card base. I then finished my card by adhering my sentiment.


I actually made my second card simultaneously with my first. After I stamped the first layer stamps onto my first panel and while I still had all the stamps arranged in my MISTI, I stamped a second A2 panel with them but this time used a green shade, Emerald City.


I then arranged the second layer stamps, stamped the first panel and then stamped my second panel in Mint. I used YG11 for the dots and then finished the card in the same manner just using Emerald City and Mint instead.

I hope you enjoyed! Thank you so much for stopping by!

~Channin

Supplies: