Hello all!
For my post today I have a bright and happy card to share. I have said many times before, that I use my Misti for a lot more than just stamping. I have
the Mini and the Original Misti, and they sit on my desk, front and centre. So,
the first thing I see before I start anything, are my Misti's.
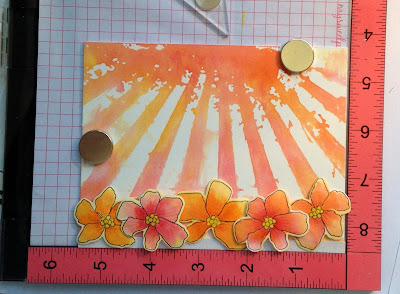
I decided I wanted to stencil a sun ray for my background today.
In my original Misti I removed the foam and paper and covered the area with saran wrap (cling wrap), and added my stencil. I find it easy to use my Misti, which allows me to line the stencil and paper with the grid lines, keeping everything straight.
Using Tim Holtz Distress Inks Wild Honey, Spiced Marmalade and Picked Raspberry, I applied the ink directly to the stencil and spritzed liberally with water, then placed my watercolour paper over the stencil and rubbed all around the paper to ensure the paper absorbed the inks.
My stencilling is complete, and clean up is a breeze, giggles!
I proceeded to stamp and watercolour my flowers using the same colours and adding Carved Pumpkin. I always paint inside my Misti using my Creative Corners to secure the paper. These smaller pieces did not require a lot of securing, but even on larger pieces when I am dealing with a lot of water, my creative corners hold my paper down perfectly. I also rest my hand on the corners so I am not touching what I have just painted.
I attached my background to my card panel, and added a thin strip of glitter paper to the bottom. To my flower centres I added some Wink of Stella and once dry I styled the flowers and attached using foam dots. I put my card back in my Misti to stamp my sentiment. I don't always do this last, but today I was not sure what sentiment I would be using.
For the sentiment I was thinking I wanted it to convey the sparkle of the card, so I used Penny Blacks Sprinkles and Smiles Stamp Set for the sentiment, stamping in intense black ink, which required a few stampings.
I added a few sequins to my finished card, keeping with that sparkle theme I have going.
Here is a close-up of the flowers showing the sparkle a bit more.
I hope you enjoyed my tutorial on my process and the finished results. Thanks for dropping by.


