Showing posts with label my sweet petunia. Show all posts

Tuesday, September 24, 2024

Lots of Stamping All At Once

 One of my very favorite things about the MISTI is the ability to stamp many images at one time.

For today's cards, I created a fun fall shaker card and a second card using the arch cut out of the gold foil for the shaker card.


I stamped and colored all the pumpkins, wagon and foxes with copic markers. The inside background of the shaker is colored with a very light blue copic marker. All of the copic markers used are listed at the bottom of this blog post.


I hope you're busy making some fun fall shaker cards this season and using the MISTI to stamp all your gorgeous images.


Here is the supply list for these cards:
Copic Colors Used:

Pumpkin YR09, YR04, Y19, Y15, Y13

Main Zinnia Flower R59, R29, R27, R22

Greenery YG95, YG93, YG91

Orange Flowers YR09, YR04, Y38, Y35

Yellow Flowers Y19, Y18, Y15, Y11

Foxes E17, E15, E13, E11

Wagon E49, E37, E35, E33 Wheels and Handle C5, C3, C1

Sky Background B01, B00, B0000

Tuesday, March 12, 2024

Perfect Placement with Perfect Rulers

Using the T-Square rulers from My Sweet Petunia will help you get the masterful placement of your sentiments every single time for all your cards. 


These sweet little love birds are from the Lovely Layers: Love Birds and Lovely Layers: Birdcage and By Your Side stamp set from Honey Bee Stamps.


I used the cute little T-Square rulers from My Sweet Petunia to get the fabulous placement of my sentiment. I measured it to be centered and then used it to be straight.

Did you know you could use the My Sweet Petunia rulers in the MISTI? Pretty cool right?


Tuesday, July 11, 2023

A Two-fer for Team Tuesday


(Our team uses affiliate links)

Hey Y'all!
It's Ceal, here for another edition of Team Tuesday. Today I am using a technique that gives you two cards when you are done. 
To make this card, I started with a couple of white top folding A2 card bases, a couple of white panels, two strips of black cardstock and a Turquoise Sea panel. I placed the white panel in the Black Original Misti and stamped the floral image. I used OLO markers to color it. Next I placed the Turquoise Sea in the Black Original Misti and stamped the floral image and used colored pencils to color it this time. After I got both images colored I cut them down to 4 x 5.25 and then cut the panel in half. Next I stamped a greeting on a black trip and embossed it with white. 


Here they are together 


Tuesday, September 20, 2022

MISTI Rescues a Dry Ink Pad


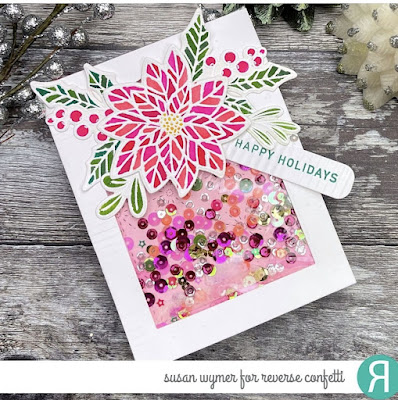
Hello and welcome to Team Tuesdays! My card today features my MISTI along with my Karin Markers. I loaded the stamps from RevProerse Confetti Poinsettia onto the MISTI door and triple stamped them with Versamark Ink onto Canson XL watercolor. Why did I have to stamp three times onto a relatively smooth paper? Because I let my Versamark Ink pad dry out and there was no reinker here at home. In fact, I had two dry Versamark pads. However, I was able to overcome this by using my MISTI. The stamps were aligned on the door already and the sticky pad and magnets were holding the paper. It was easy to "ink up" the stamps three times so that I could heat emboss the images with white embossing powder.

Once this was done, I used my Karin markers to color in the poinsettia and the holly leaves and berries. I also stamped Happy Holidays from Joyful Holiday Wishes. With the MISTI I was able to stamp on paper that been through my paper crimper. The sentiment came out quite crisp despite the crimped paper.  Almost anything can be done with the MISTI!

Thanks for stopping by;

Susan

Products Used: I am using compensated affiliate links at no further cost to you.

My Sweet Petunia Shop

Standard MISTI

Sticky Pad

MIS_T 

Creative Corners

Reverse Confetti

Poinsettia

Stitched Burst Cover Panel Confetti Cut

Joyful Holiday Wishes

Tuesday, August 23, 2022

MISTI for Partial Stamping and A Blizzard


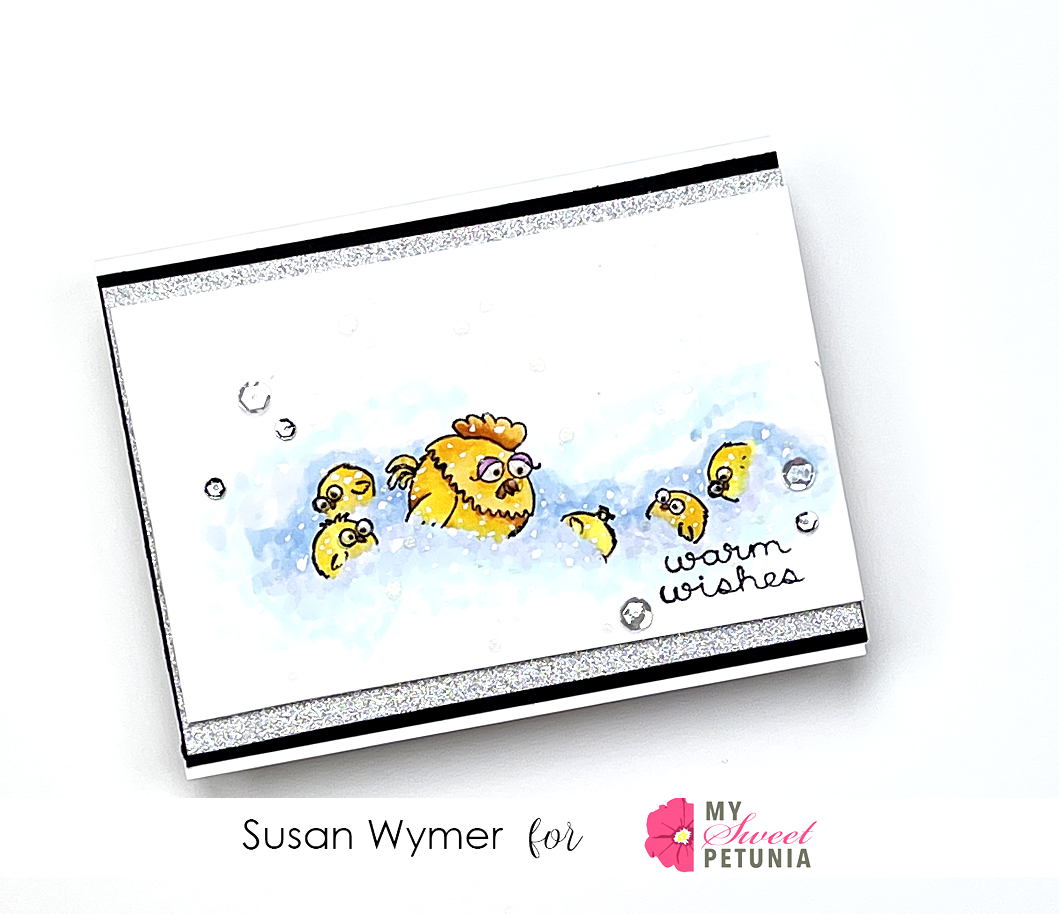
Hello and welcome to My Sweet Petunia Team Tuesdays! Today we have rather an odd card: we are only stamping partial images. My chicken family from the Ink Blot Shop is struggling in some snow. To make the snow I followed an older blog post from Sandy Allnock, the Queen of Copic Coloring, located HERE. This is a very useful technique to have in your Copic or alcohol ink markers toolbox. Using this you can create smoke, blowing snow and blowing dirt amongst other things. 

However, you will need a MISTI. First I placed each chicken where I wanted it on the card panel and picked it up with the MISTI door. I very carefully inked only part of the image with Memento Tuxedo Black. I did this to give the image the appearance of being deep in the snow. I very carefully stamped a couple of the images closely together with my MISTI. 

After stamping the images, I carefully colored them in minding the cutoff points for each image. I then used Sandy Allnock's technique to develop the snow. 

Thanks for stopping by! Get your MISTI out and have some snowy fun!

Susan

Products Used: These links take you directly to My Sweet Petunia or Ink Blot Shop. I am using compensated affiliate links at no further cost to you.

My Sweet Petunia Shop

Standard MISTI

Sticky Pad

MIS_T 

Creative Corners

Ink Blot Shop

Farm Yard Friends


Tuesday, August 9, 2022

Ink Blending, Silhouettes and Sticky Mats


Hello and welcome to Team Tuesday! 
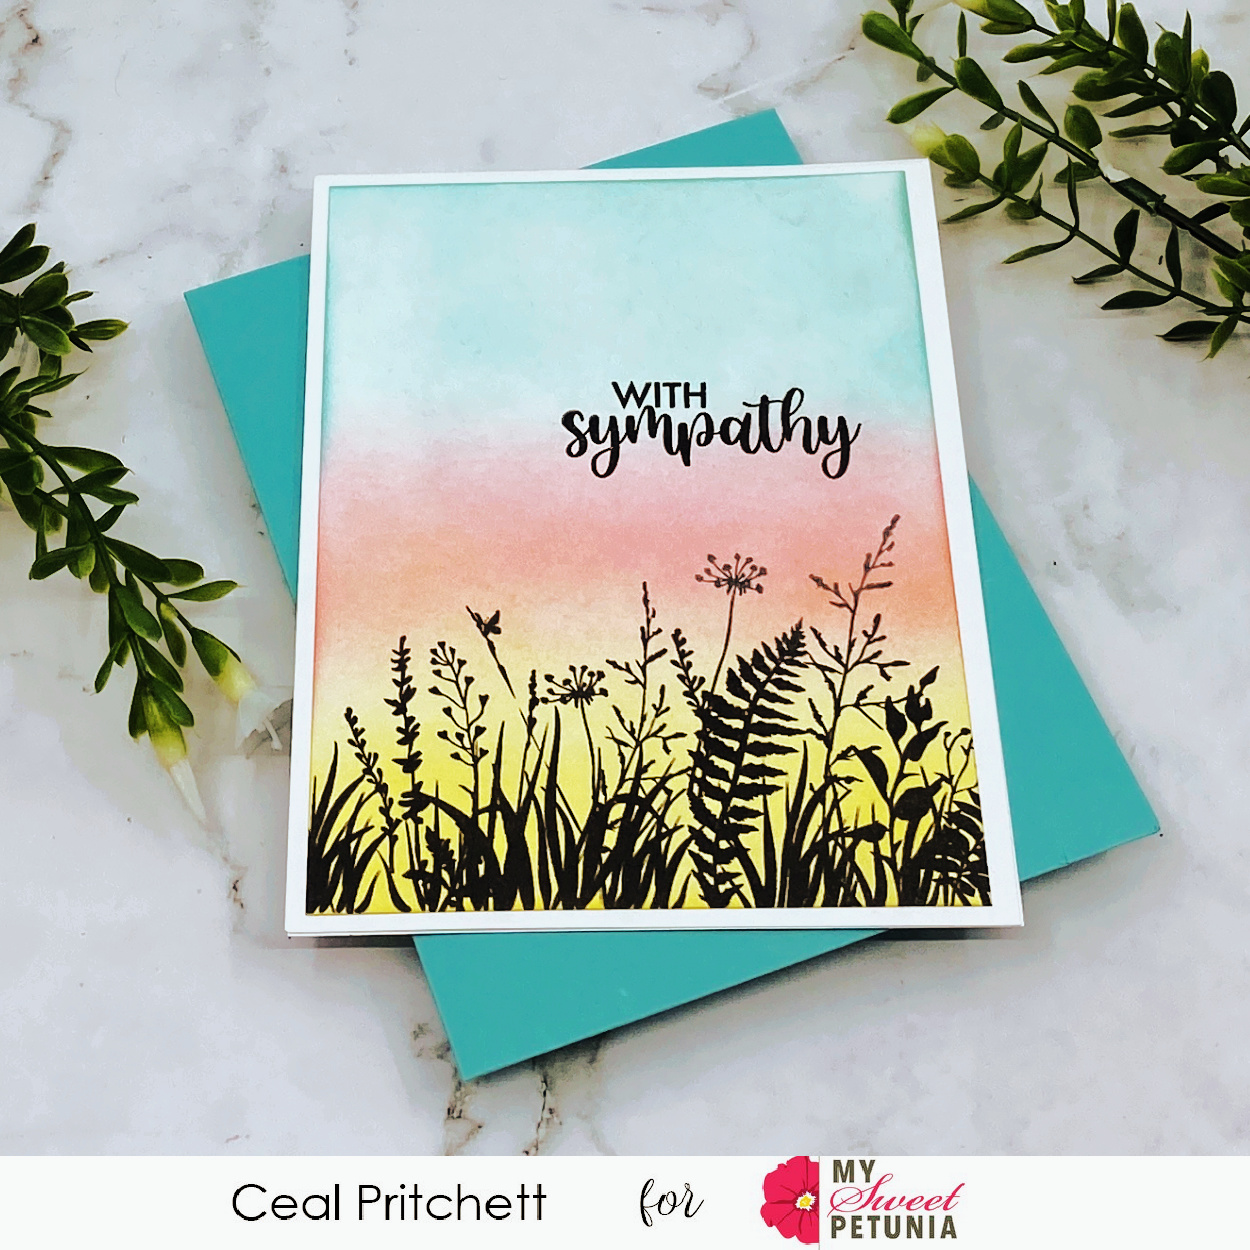
It's Ceal, here and today I am sharing a sympathy card made with a couple of sets by Gina K Designs. 
Sympathy cards can be very hard to create because of the nature of the card itself.
The Summer Silhouettes set by Gina K to me makes a pretty sympathy card, in fact I think any floral silhouette would make a pretty sympathy card. 
To make this card I started with a top folding white card base and a white panel.
I got out my Original Misti and a sticky mat that I have designated for ink blending. 
When you order the sticky mats you get three in the package and I have one of them that I ink blend on because it holds your paper and you don't have to worry about inky fingers. 
I placed the blended panel in the Misti and stamped the silhouette. I always use the Misti for silhouette stamping because if I used a block there is no way I could line it back up to stamp it again if I needed to, which is usually the case because of the blending.
To finish the card I added the sympathy greeting from the sympathy and love set also by Gina K. 

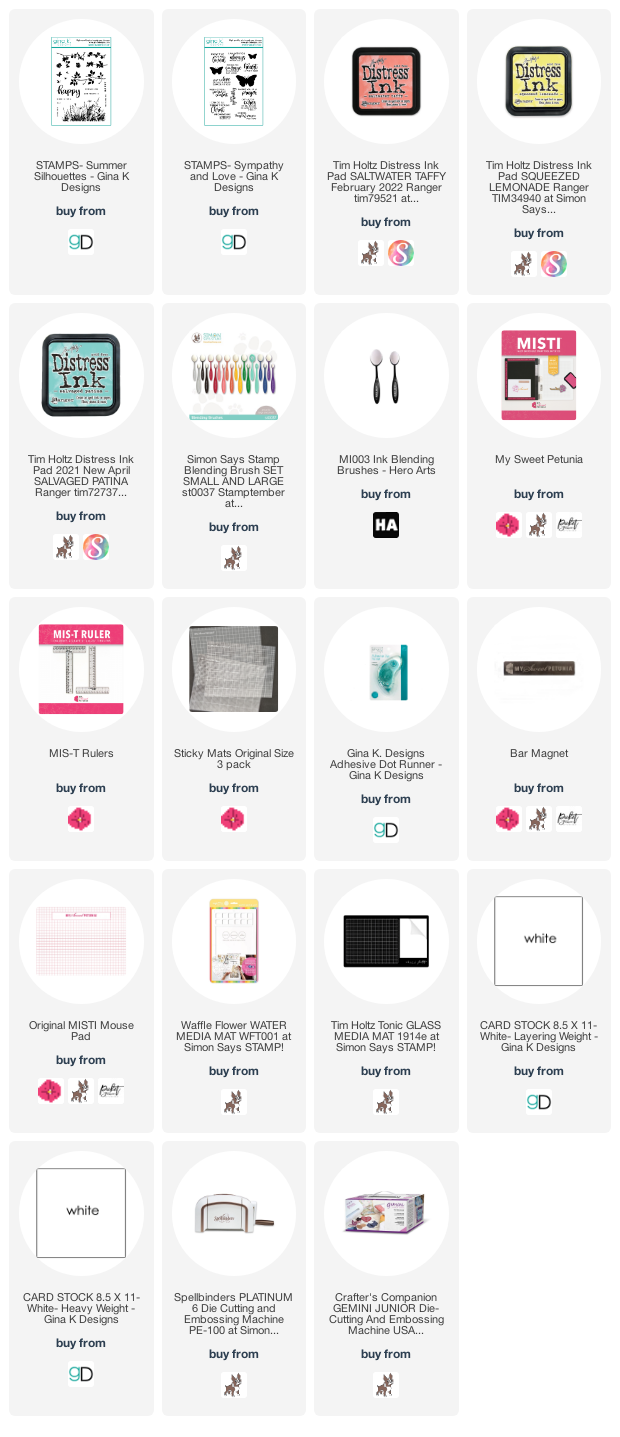
I have linked all the products below using compensated affiliate links at no extra cost to you. 


Below you will find links to the products used. Click the picture to start shopping. Compensated Affiliate links are used at no additional cost to you. Your support helps me to keep bringing you new projects and I appreciate that so much!  

Thank you! 

Tuesday, July 26, 2022

MISTI and Zebra Doodling


Hello and welcome to my blog. Today is a busy day for me as I am posting for My Sweet Petunia and as a guest designer for the Ink Blot Shop. Today I am using the Zebra Background, Billy Silly Goats  and Hey You Giant Stencil from the Ink Blot Shop. 

Using my standard MISTI and the sticky pad, I placed the Zebra Background stamp on the MISTI window. I inked it up with a light grey ink as if I were going to no-line color this. Instead, I used my fine tipped fountain pen with black ink and doodled over the stamped lines. I thought this would provide a different look to a solid black or solid grey background. 

To make the Hey You pop, I stenciled it with Gina K Designs Glitz in black. I then cut out each letter of HEY so I could mount them separately. I just liked that look better than a rectangle of the entire word. I then stamped the sentiment strip using a sentiment from Silly Billy Goats. I matted the strip with black card stock and popped it up with 3M Foam tape and offset it from the HEY. 

I cut down my main panel to 4" x 5.25" and mounted that on black card stock. I adhered the full panel to an A2 sized card cut from Neenah Solar White 110 lb card stock. 

The doodling was really relaxing so give it a try with solid stamps or solid background stamps.

Thanks for stopping by;
Susan

Products Used: I am used compensated affiliate links at no further cost to you.

My Sweet Petunia Shop
MIS-T

Ink Blot Shop

Zebra Print Background

Billy Silly Goats

Giant Hey You Stencil


Tuesday, June 28, 2022

MISTI Morning


Hello and welcome to the My Sweet Petunia blog. I made this card this morning in my currently non-air conditioned craft room. But life was so easy with my MISTI. I stamped WPlus9 Designs Flora and Fauna 3 with Antique Linen Distress Ink. Even though I was stamping onto Neenah Solar White Super Smooth 80lb card stock, I used my MISTI as I knew I would triple stamp this. I stamped the sentiment and die cut friend with my MISTI as well. All of this was quick because of the MISTI and I could color elsewhere due to the heat.  

By the way, if you spend $75 at My Sweet Petunia you can get a free MISTI bag while supplies last. I use my bag every time I fly or travel with my MISTI. I can pack it full and know my MISTI is safe.

Have a wonderful day;

Susan


Products: I am not using compensated affiliate links on this post. I have included links to My Sweet Petunia for your personal use.

Standard MISTI

Sticky Mat

MIS-T

Creative Corners

Tuesday, May 31, 2022

Misti: Field of Wildflowers


Hello and welcome to the My Sweet Petunia blog for Team Tuesdays. I am posting an older card because my husband and I ripped apart my craft room this morning. It was somewhat impulsive but my mojo is almost gone and my poor MISTIs keep getting lost. We had so much fun rearranging everything, I still have to put away just about all my supplies. However, my MISTIs will have their own special place. 

For the card, I used the Wildflower Stamp and die set from Reverse Confetti's May release. I really love this image but because the die cut shape is so intricate you really do need your MISTI. I stamped this out once but double stamped it to catch all the details. I also die cut the shape out twice so I could add some dimension. I stamped the sentiment with my mini-MISTI with the sticky pad. I lined everything up in the MISTI using my magnets and the MISTI along with the L shaped Creative Corner. I tucked a small tag behind the panel and called it done. 

Thanks for stopping by;

Susan

Products Used: I am using compensated affiliate links at no further cost to you. 


Tuesday, May 3, 2022

Framed by MISTI


Hello and welcome to Team Tuesdays. 

Honestly, I think my MISTIs are beautiful enough to frame. But not one of them has ever broken so why put a very useful tool in a frame. When I retire, I will frame one! This frame card was super easy to make with my standard sized MISTI.

I used the individual images from Impression Obsession Framed and several of the Impression Obsession inks to form my own patterned paper. It was quick and easy. After I completed all the stamping, I trimmed the panel to 4" x 5.25". I adhered this to a piece of purple card stock. It is from the Simon Says Stamp Rainbow card stock pack but I am unsure of the name. 

Once this was all adhered, I die cut the sentiment from white card stock twice and from the purple card stock once. I offset the white from the purple and adhered all the layers with Bearly Precision Craft glue. 

Have a wonderful day and thanks for stopping by;
Susan

Tuesday, April 5, 2022

MISTI: A Vegetable Group


Hello,
Why yes, MISTI is a healthy food group in my craft room. I have several and bought some of them before I was on the design team. Why? Because I cannot stamp without a MISTI, a Creative Corner and my Sticky Mat. I use the MIS-T for assembling my final cards. Altogether these tools form a very nourishing veggie group in my studio.

THE WINNERS OF THE INK BLOT SHOP _ MY SWEET PETUNIA HOP ARE: 
@barbdiechl and @rookiecardmaker. Please contact hello@mysweetpetunia.com! 

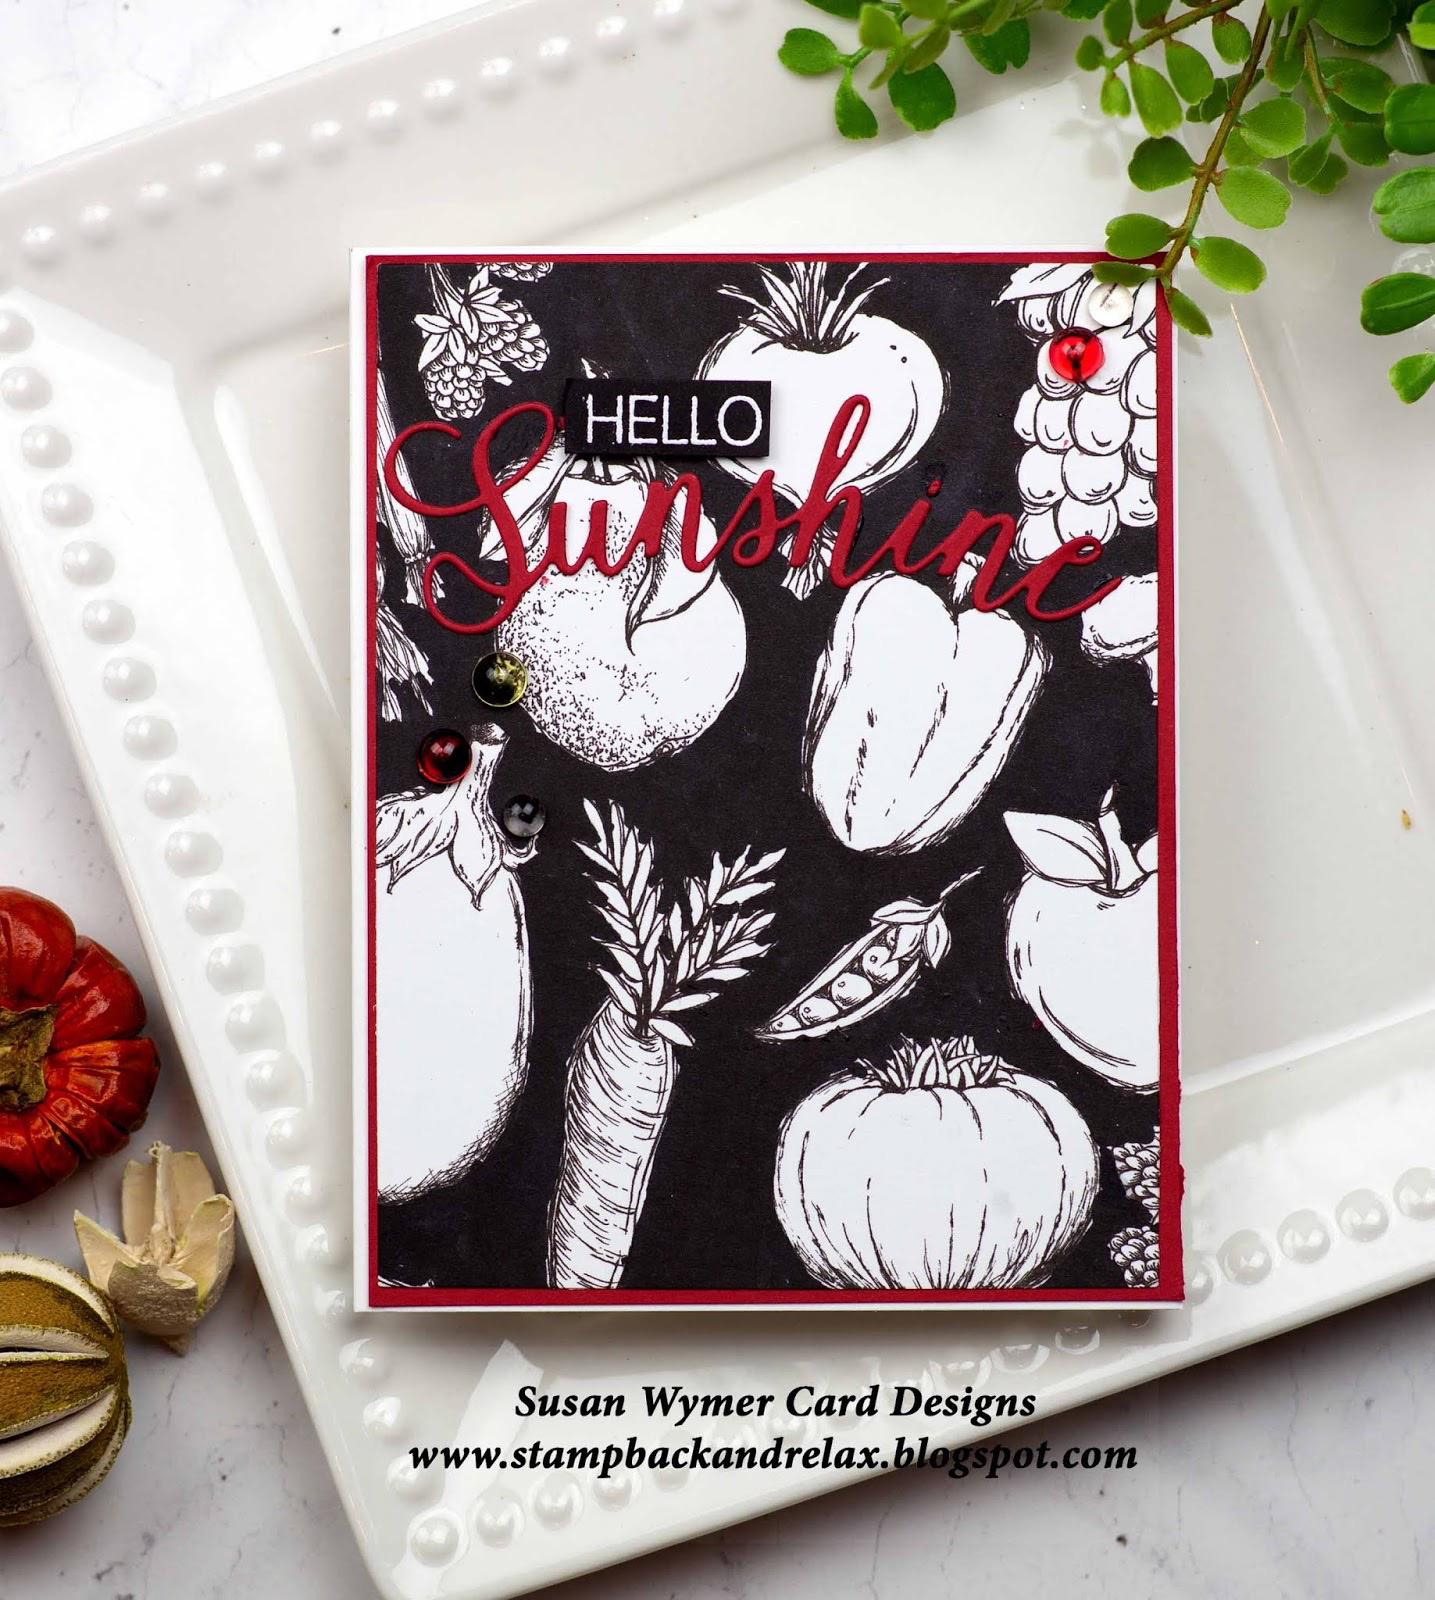
So I actually made this with a cling background called Vegetable but the clear set, Garden Produce is on clearance! In this case I used my MISTI with the foam pad removed and stamped the background with Memento Tuxedo Black Ink. I should mention that I use a 6" x 6" piece of paper for these large backgrounds.  Although I did not color in the veggies, I did color in the background - the white space - with a black Copic marker. I did stamp this twice because I really wanted all the etched lines in the stamp to show up boldly against the black background. This is the advantage of using the MISTI and with the sticky pad I believe that this would have been an even bolder second stamping. 

Once it was stamped, I just carefully colored in the white space with a black Copic! A die cut, sentiment and matting and I was done! I love this background and the set. There is also a sitewide sale at Impression Obsession - 20% off. Code is 2022. 

Thanks for stopping by;
Susan

Products Used: I am using compensated affiliate links at no further cost to you. 

Tuesday, March 8, 2022

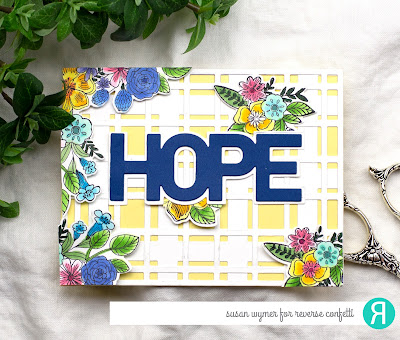
Hope in Blue and Yellow


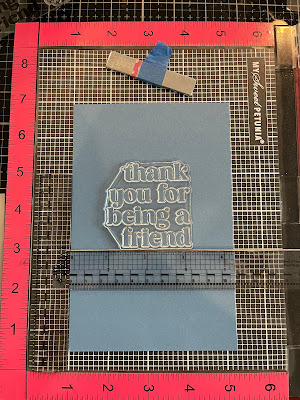
Hello and welcome to the My Sweet Petunia blog. Today, I have a card that I made to give me and others hope. I won't stray into politics here. All the products used here are from Reverse Confetti. The florals are the Friendly Florals from the new release. When I started this card. I had a different idea for a sentiment. So below is a picture that shows how I squared everything up using my MIS-T ruler and the new sticky pad - how did I live without that thing. Look no magnet!


I choose to set the paper in the middle because I needed to have some card stock around the edges of the sentiment. Also I did not have another piece of this paper. I then positioned an oval die over the  sentiment and was able to get a precise cut. Proud of myself for that. 

But as I laid out the card, I just did not like where it was going. I changed up the look by die cutting Hope and its background. 

For the florals, I used my MISTI with the sticky pad and Neenah solar white 110lb card stock to stamp out the florals. After some very, very basic Copic coloring, I die cut the florals and added them to the card. 

Thanks for stopping by;

Susan

Products Used: I am using compensated affiliate links at no further cost to you. 

Tuesday, February 15, 2022

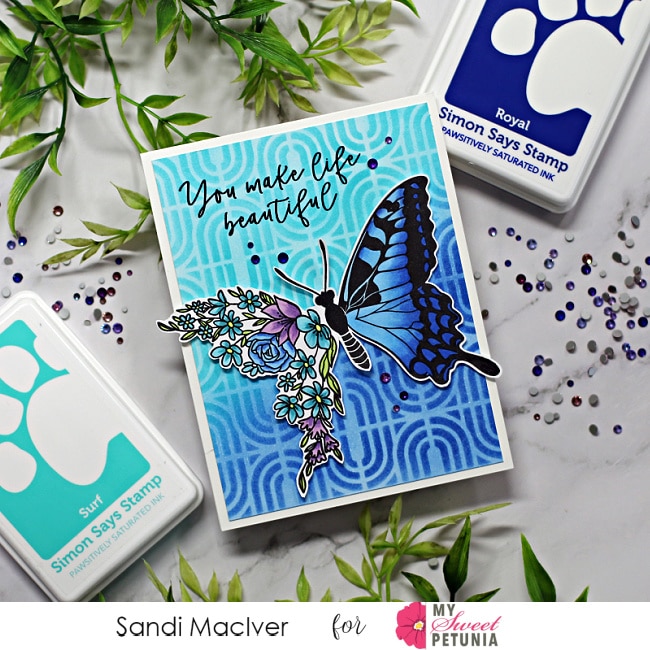
Butterfly In Bloom


Hi card making friends It's Sandi here with a quick and easy card share for you.

I was digging around in my "purchased but not used" bin again and came up with this lovely Butterfly in Bloom by Catherine Pooler
I decided it was high time to get it a little inky.  This was a super fast and easy card to make and took me about 20 minutes.  Check the instructions below.

  handmade card in light and dark blue with a floral butterfly using cardmaking products from SImon Says Stamp

How to create the Butterfly in Bloom Card:

Use the Misti to stamp the butterfly image in Hero Arts Intense Black Ink.  
I used my new STICKY MATS for this and they work great. 
Once the ink is dry, color the image with Copic Markers and then cut out with the coordinating die.

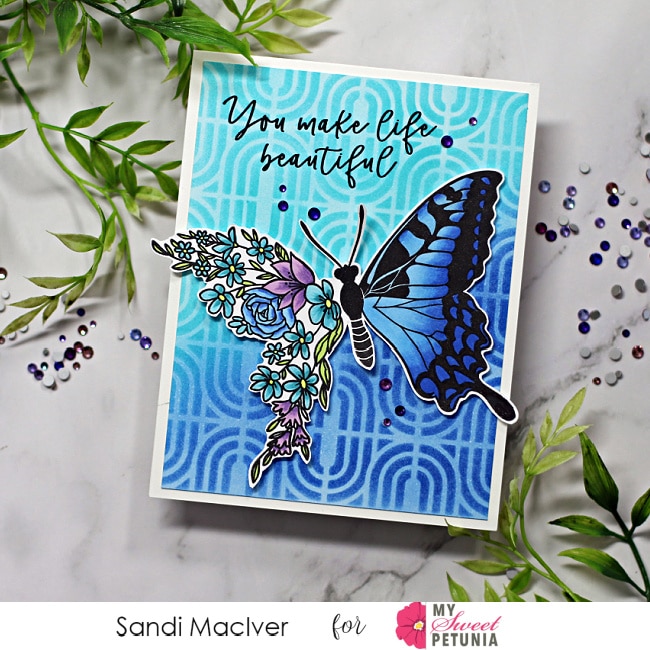
  handmade card in light and dark blue with a floral butterfly using cardmaking products from Simon Says Stamp

COPIC MARKERS USED:

Purple:  V13, V15, V17 
 Blue:  B12, B24, B26 
 Teal  BG53, BG45, BG57 
 Yellow:  Y06 
 Green: YG03

Creating the Background:

Spray Pixie Spray onto the back of the Geometric Arces Stencil from Simon Says Stamp and place it over a 4 x 5-1/4 piece of white cardstock.
 (I must apologize, I didn't realize this stencil was retired until I started doing the product list, so I have linked a few others that would look just as nice)
Use blending brushes to add Simon Says Stamp's Pawsitivily Inks in Surf and Royal.
Next, once you have a nice even blend of color, remove the stencil and add a light layer of ink to get rid of the white between the ink lines. 
Attach this to a top folding A2 White Card Base. Place the card back into the Misti and stamp the sentiment in black. (I really love the font on this sentiment, don't you?) 
Finally, Use foam squares to add the butterfly and embellish with Picket Fence Studios Purple Side of a Rainbow Gem Mix.

  handmade card in light and dark blue with a floral butterfly using cardmaking products from Simon Says Stamp           

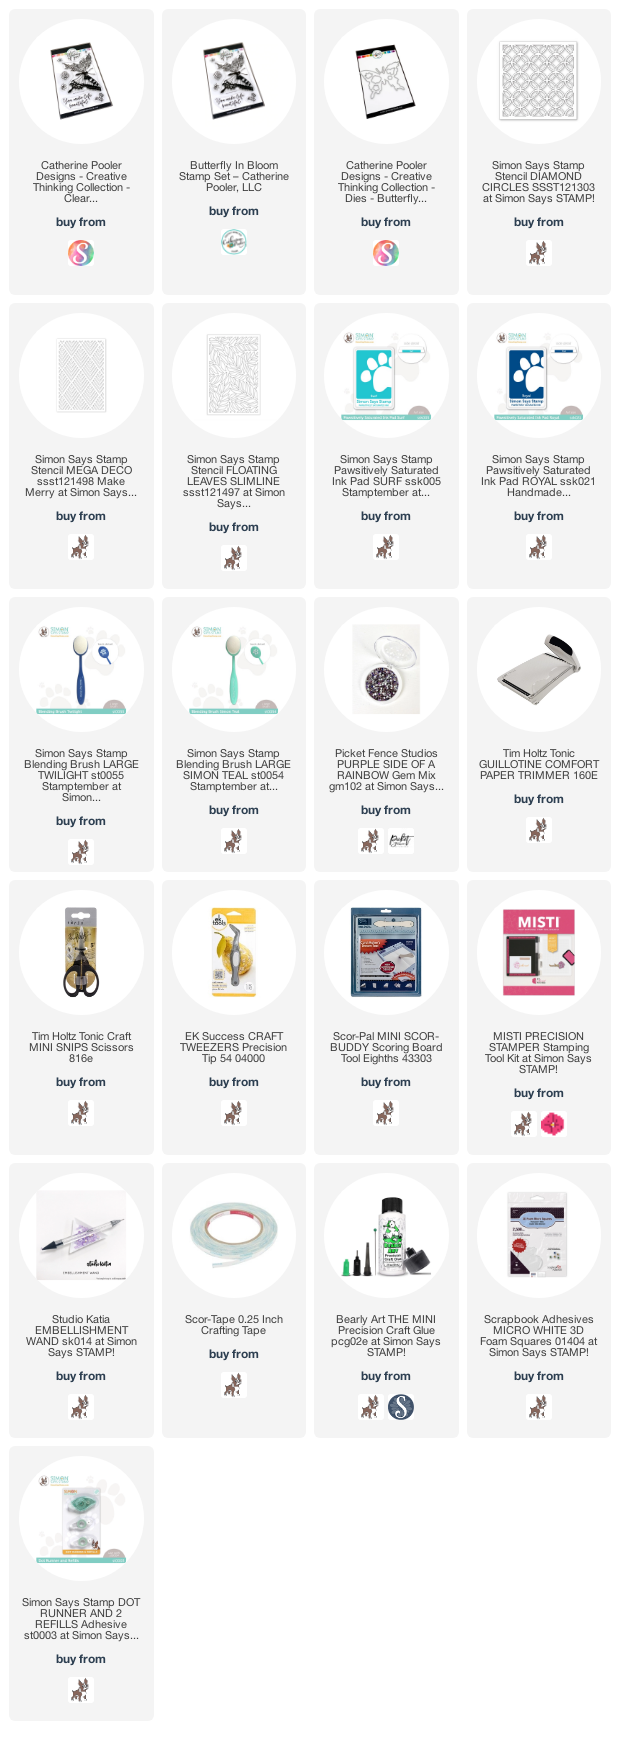
Card Making Supplies used for the Butterfly In Bloom Card:

Here are the products I used today.  Compensated affiliate links used  where available at no cost to you. When you click on a thumbnail link and shop you are supporting my website allowing me to continue bringing you new projects and videos.  Thank you.     

Thursday, January 27, 2022

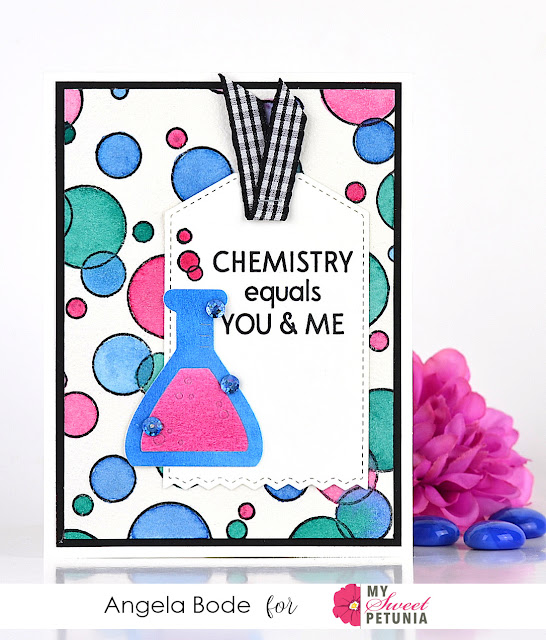
Chemistry & New MISTI Sticky Mats!

Hello!  February is almost here; it's a great time to think about the people we love. 

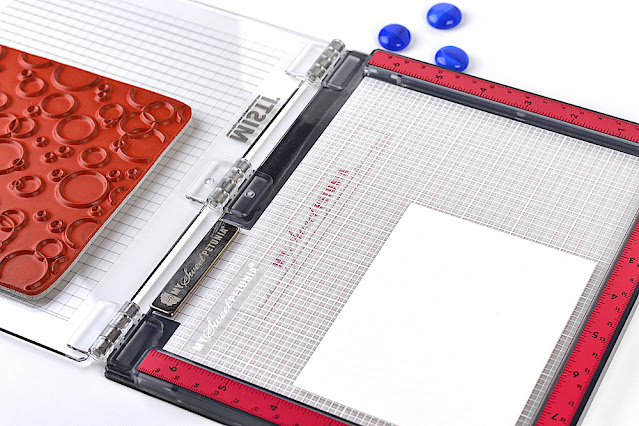
First, I am featuring a fun card for that special love in our lives.  Secondly, I get to show off the new MSP Sticky Mats!  The Sticky Mat is a time-saving tool you will want to add to your collection.  I really like it for stamping large background stamps as it holds the paper in place even when stamping multiple times.


First, I pulled off the plastic liner that protects the sticky part of the mat.  Next, I placed the centimeter grid inside the MISTI, sticky side up.  A piece of watercolor paper was placed on the sticky mat next a couple of centimeters away from the edge.  I love that the watercolor paper did not move even though I stamped the background multiple times to get a good bubble impression.  As always, I used the Original MISTI for the main image and a Mini MISTI to stamp the sentiment.  I like to keep my stamps in the MISTIs until I am completely done with the project.  


The Sticky Mats are sold in a three-pack including quarter-inch, an eighth of an inch, and centimeter grids.


Below, I have linked all the products featured today.  Affiliate links are used when possible which means I earn a small commission when you purchase after clicking a link with no added cost to you!


Tuesday, January 11, 2022

MISTI: Switching Up the Look of A Stamp


Hi,
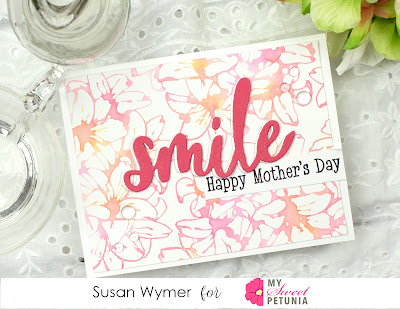
I am up on the blog today and I absolutely had to use my MISTI for this technique. I had so much fun making this card as I used a technique that Dawn Woleslagle has taught a few times on her Facebook Lives. I used Lily Bouquet from Impression Obsession's latest release but I wanted to give this very well-defined stamp a different look. 

First, this is a cling stamp so I removed the foam pad from my standard sized MISTI. I mounted the stamp on the door and using daubers I sponged different colors of Distress Oxides onto the stamp. It is important to really daub color onto the various parts of the stamp. I then misted the stamp all over and then closed the door. I used Vicky Boutin Foundations Mixed Media paper for the stamping. I moved the stamp two more times and repeated the process in order to develop a background piece. This gives the stamp a fun, more modern, water colored appearance. 

Distress Oxides Used:
Dried Marigold, Squeezed Lemonade, Worn Lipstick and Picked Raspberries

I then die cut Smile once from Reverse Confetti's Rose card stock and twice from white card stock. I layered up the die cuts to make a more dimensional die. I stamped the sentiment from Slimline Typewriter sentiments using my MISTI and Versafine Onyx Black ink.

Thanks for stopping by;
Susan

Products Used: I am using compensated affiliate links at no further cost to you.


Thursday, January 6, 2022

T is for Tulips and T-Ruler

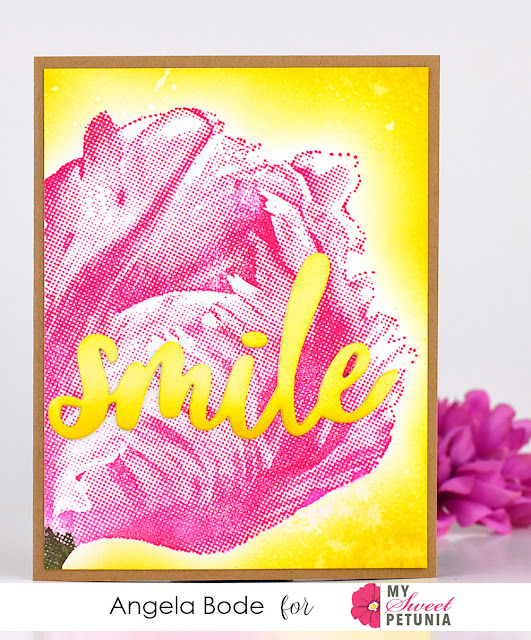
 Hello!  It's Angie here featuring a new tulip stamp and the brand new MIS-T Ruler.  I wanted a dark impression from this pixilated tulip so a MISTI is a must!  I stamped this quite a few times to get the rich tones from Sweet Petunia Ink.


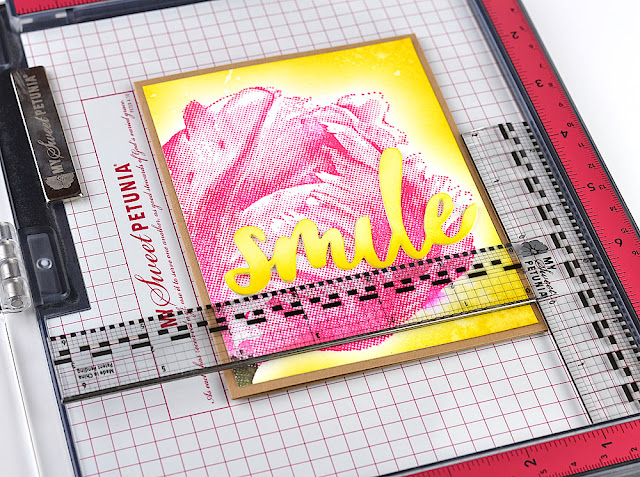
The new MIS-T Ruler is a great add-on to your MISTI tool collection!  The ruler fits easily into the original size MISTI.  I placed my card along a grid line and I placed the ruler up against two sides of the MISTI.    Next, I placed the word die along the ruler edge for perfect alignment!  


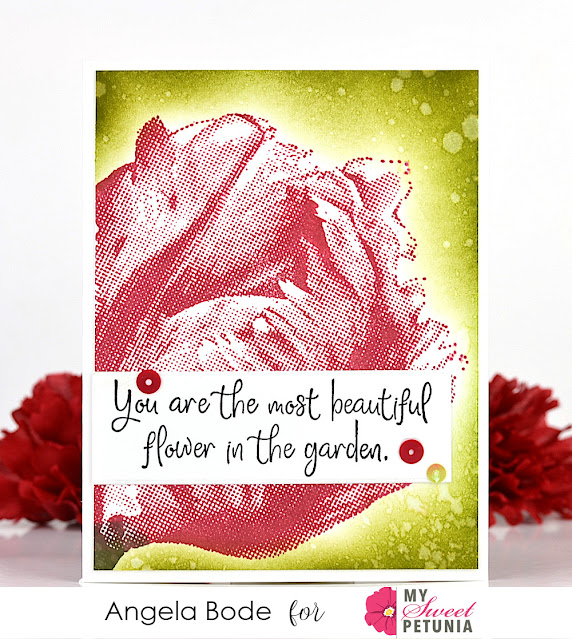
Well, you know what I always say, If I have a stamp in the MISTI why not make more than one card!  I changed the color combo for the next card and added a stamped sentiment from Impression Obsession.  I always leave my image stamp in my original MISTI until my projects are completed.  With the image occupying the Original MISTI, I always stamp sentiments with the Mini MISTI.  


Wishing you a healthy and safe day!!  Thanks for stopping by!

Featured products:

Original MISTI              Mini MISTI