Wednesday, June 28, 2017

Team Tuesday (well Wednesday): Sorry, I'm late.

Hello friends!! Giovana here with a super cute card for you! OK, before I start talking about this project, it was my turn to post on "Tuesday" (yesterday) but my head has been processing things wrong lately and for whatever reason I thought it was "Team Thursday" LOL (even though I knew I had to post on the 27th), so today (still 27h here in the West Coast) I was getting ready to sip my coffee, it was 5:50 am and I see the date June 27th on my computer and I almost spit my coffee, goodness, I felt horrible, but here I am, with a super cute "SORRY" card. I hope you all can forgive me XOXO

OK, now info about this super cute card {wink, wink}
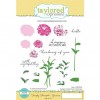
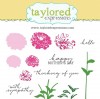
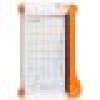
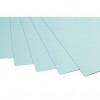


  •  I moved my image to my regular MISTI, where I kept it the entire time I colored it. The medium I used was Spectrum AQUA markers.


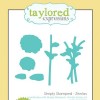
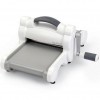
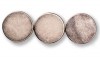
  •  After the image was colored, I die-cut it using Spellbinders die, I die-cut a couple of oval pieces from patterned paper, I wasn't sure what color was the best.


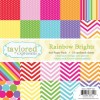
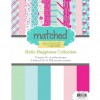
  •  I used a 6" square white card base. I cut a couple of panels from Aqua cardstock and patterned paper and added stitches. Now, here is a little tip: assemble your card layers on you MISTI, see the left bottom corner? yep, find the 1/4" mark from both sides and you will have a perfect aligned panel.


  •  And here it my card, I added few sequins and twine, I also added a little bit of stickles (Does anybody still use them? )


Hope you like it!
Have a fantastic day.

Friday, June 16, 2017

Getting Paint on Our Hands With the Memory MISTI

Today, Lydia Fiedler of Understand Blue has a contributing artist video up on the Gel Press site, showing how the Gel Press works with the MISTI - she's using the Memory MISTI in her video, but Gel Press printing plates work with all size MISTIs.

Take a peek and visit her blog for details on the finished projects!


Thanks for stopping by!

Tuesday, June 13, 2017

Love and capture life


Hello ,

It´s Maria today with a new card , video and technique. I really had a great time making this card and the result is just beautiful. I always for inspiration and this time, I found some great ideas by looking at black and white photos with a hint of color.


To get this result, you will need a stamping tool. The MISTI tool from My Sweet Petunia works really well . I couldn´t do it with an acrylic block,because the stamping must be perfectly done. You can watch the video below to see how I put this card together.

If you like today´s creation ,please visit our wonderful design team. And if you don´t have yet a MISTI , add this on your wishlist and get it ASAP, because it will take stamping to another level.

Thanks for stopping by! Have a great day!


Friday, June 9, 2017

Taylored Expressions Card 4

This is the final card in the series.  If you haven't seen a tutorial for layering cling mount stamps, this is the card for you.   The video below will show you how to make multiples in jiffy.


This card can be made for any occasion by changing the sentiment.  Birthday,  Sympathy, Mother's Day, Missing You, any of those occasions would work.

Thanks so much for stopping by.  Hope you enjoy the video.


Affiliate links for supplies used


Tuesday, June 6, 2017

Garden Hydrangea

Hello Everyone
Welcome to Team Tuesday, Ceal here sharing a card using the original MISTI and Altenew stamps. Before the MISTI came into my stamping world I would not buy layering stamps, I had tried them and no matter how I tried I always messed up when stamping them. The MISTI has solved that problem, there are so many gorgeous layering stamps like the Garden Hydrangea that I would have missed out on if I didn't have the MISTI.

To make my card I started with a piece of cold press watercolor paper and some Daniel Smith watercolor paints. I stamped the flower and the leaves in Archival ink and generously colored them, even going outside the lines, you will see why in a later picture.


Next I stamped the images again on scrap watercolor paper, colored them and then cut them out with the coordinating die 

Using foam tape I popped them up and allowed the other to show. I splattered some paint in the background to give it some texture.
I used the  ruler and the magnetic corner from the Creative Corners to help me line up the greeting.


Thanks for looking and Happy Tuesday! 


Friday, June 2, 2017

Taylored Expressions Card 3

Out of all the cards I made for my Taylored Expressions class, this one was the cutest.  The Party Pals can be colored to match whatever pattern paper you have on hand.  


I like to color my images, then over-stamp them with Versafine Onyx black ink and emboss with clear embossing powder.  It really makes the images pop.  Last, I die cut.  Otherwise, I will fumble with the little pieces.


I wasn't able to find a link to the Sketchy Banners.  A simple banner can be substituted.

Thanks for stopping by.  Only one more in this series.  Hope you enjoy the video.


Affiliate links to supplies used.