Showing posts with label Mini Misti. Show all posts

Wednesday, October 1, 2025

Umbrella Snowman


Hello everyone! Anna here, with greetings from a beautiful fall embraced pacific northwest! 

Do you love snowmen as much as I do!? The cards I’m sharing today were made using the recently released snowman of the month photopolymer stamp set from SweetMissDaisy Designs, Umbrella Snowman. A delicately watercolored image paired with the soft texture of watercolor paper and designer Holiday Mini Gingham patterned paper also from SweetMissDaisy DesignsFaux stitching, cotton lace and a fun twine or twill bow makes for a really cute card, perfect for sending love to someone near or far. Swoon!

I used the Mini Misti to stamp the snowman image several times to ensure a great impression on textured watercolor paper.

I love how the Mini Misti allows me to stamp perfectly, every time! On card panels or on smaller sentiment banners, I can stamp with precision, giving me the perfect placement and impression for every project.  Sentiments are stamped perfectly placed, and stamped images on watercolor paper (or other textured papers) are a breeze to create! 

Thanks for joining me on the blog today! Stay healthy and well!

Thursday, September 11, 2025

MISTI Magic for Halloween

 Hello friends!

I have a fun Halloween project to share with you today featuring the Open if You Dare set by SweetMissDaisy Designs. I created two cards and a coordinating bookmark—and I have to admit, the bookmark is staying with me!

To start, I die-cut three coffin-shaped tags. I placed them all on a sticky mat inside my Original Teal MISTI and positioned a different image on each one. With just one round of inking, I stamped all three tags at once—a huge time saver!

Next, it was time for sentiments. I reached for my trusty Mini MISTI, tucked a banner die cut inside, and aligned the sentiment perfectly to fit. In no time, I had two crisp, sentiment banners ready to go.

Card One – Cute Dracula

For my first card, I featured the cutest little Dracula. I had so much fun coloring him, right down to matching the tag reinforcement ring with his outfit. I even added a fluffy chenille ribbon to the tag for a fun texture.

For the background, I trimmed a 4x4 piece of patterned paper from the SweetMissDaisy Ghostly Paper Pack, then cut it diagonally to create two triangles. I adhered them at the top and bottom of my card base for a bold frame.

Using my Cut-Align Ruler, I centered the coffin tag with the help of the “0 center” feature—perfect alignment every time! To finish, I popped up the sentiment banner for a touch of dimension.  I used an alignment grid over the sentiment strip to verify its exact alignment.

Card Two—Spooked Ghost

My next card stars the sweetest little ghost, colored in soft shades of purple. I took the coffin tag with the stamped ghost back to the Mini MISTI and added a spider at the top—I just couldn’t resist! Now, it looks like the spider startled her, and I love that playful touch.

I used the same layout as my first card, with patterned paper from the Ghostly Pack, but this time I added a solid piece of purple cardstock in the center to tie in with the coloring. The tag and reinforcement were inked using Seedless Preserves Distress Ink, and a purple chenille ribbon finishes the look. Just like before, I popped up the sentiment banner to complete the card.

Bookmark – Halloween Kitty

My final project is a coffin-shaped tag bookmark—this one’s just for me! No surprise to my regular readers, I chose the kitty image. To give it a sturdier finish, I layered a black coffin tag behind the stamped one. I colored the tag reinforcement to match the kitty and added a black-and-white chenille ribbon to complete it!

I hope these projects inspire you to create your own Halloween treats. The MISTI makes multiple-item projects a breeze, and I love how quick and fun these came together. Thanks so much for stopping by! 

Stop by the My Sweet Petunia Store for the tools I listed above, plus many more of my favorites!  

Stamps and Papers are available at SweetMissDaisy Designs.


Wednesday, September 10, 2025

Open If You Dare


 Hello everyone! Anna here, with greetings from the pacific northwest! The tags I’m sharing today were made using the recently released Open If You Dare clear stamp set from SweetMissDaisy Designs. A delightful set with a vintage flair, perfect for cards, tags, journals, and more! I stamped the images and sentiments on watercolor paper, and painted the images with watercolor paints. I think they just might be the cutest Halloween tags around!


I used the Mini Misti to stamp the images and sentiment several times to ensure a great impression on textured watercolor paper to create each tag. I used the Received Ledger background stamp from SweetMissDaisy Designs to stamp interest on the base of the tag.

Some fun fibers and cute silver pumpkin charms added the finishing details. 

I love how the Mini Misti allows me to stamp perfectly, every time! I can stamp with precision every time, giving me the perfect placement and impression for every project.  Sentiments are stamped perfectly placed, and stamped images on watercolor paper (or other textured papers) are a breeze to create! 

Thanks for joining me on the blog today!

Thursday, August 21, 2025

The Little Things

The MISTI is, hands down, my most important tool in the stamp room! Today’s vintage-inspired butterfly card is a perfect example of why. The patterned paper I chose has a soft sheen, which can make direct stamping a little tricky. Thankfully, the MISTI kept everything perfectly aligned—even with a large background stamp like the "Received Ledger" by SweetMissDaisy Dsigns. Since that stamp required multiple inkings, I couldn’t have done it without the MISTI holding everything steady.

After finishing the background, I stamped and fussy-cut the delicate butterflies from the "She Began to Fly" set by SweetMissDaisy Designs. I adore the sweet little details on each one—they bring a charming touch to a design like this. For the sentiment, I reached for my Mini MISTI. Its smaller footprint makes it ideal for lining up the “little things,” such as greetings.

And what a perfect message it is: In the Little Things is the Greatest Joy.

More Invaluable Tools

Thanks for stopping by!


Wednesday, July 30, 2025

Ho ho hello!


 Hello everyone! Anna here, with greetings from a cheerful, sunny day in the pacific northwest! 

The card I’m sharing today was made using the recently released Twinkling Lighta Santa clear stamp set from SweetMissDaisy Designs. A cheerful set with an adorable Santa, and fun sentiments! I stamped the image and sentiment on watercolor paper, and paired the image with a festive red paper from the designer Mini Gingham patterned paper also from SweetMissDaisy Designs. 

I used the Mini Misti to stamp the image and sentiment several times to ensure a great impression on textured watercolor paper.

I love how the Mini Misti allows me to stamp perfectly, every time! On card panels or on smaller sentiment banners, I can stamp with precision every time, giving me the perfect placement and impression for every project.  Sentiments are stamped perfectly placed, and stamped images on watercolor paper (or other textured papers) are a breeze to create! 

Thanks for joining me on the blog today!


Wednesday, May 7, 2025

Unfrogettable Birthday


Hello everyone! Anna here, with greetings from a cheerful, sunny day in the pacific northwest! 
The cards I’m sharing today were made using the recently released Unfrogettable clear stamp set from SweetMissDaisy Designs. A cheerful set with adorable critters, and really fun sentiments! I stamped the images and sentiments on watercolor paper, and paired with the images with fun paper prints from the designer Ribbit patterned paper also from SweetMissDaisy Designs. 
I used the Mini Misti to stamp the image and sentiments several times to ensure a great impression on textured watercolor paper.

I love how the Mini Misti allows me to stamp perfectly, every time! On card panels or on smaller sentiment banners, I can stamp with precision every time, giving me the perfect placement and impression for every project.  Sentiments are stamped perfectly placed, and stamped images on watercolor paper (or other textured papers) are a breeze to create! 

Thanks for joining me on the blog today!

Wednesday, March 26, 2025

Spring Greetings


Hello everyone! Anna here, with greetings from a cheerful, sunny day in the pacific northwest! 

The card I’m sharing today was made using the recently released Happy Spring clear stamp set from SweetMissDaisy Designs. A cheerful spring image with adorable critters, watercolored, and paired with the eclectic and fun prints from the designer Home patterned paper also from SweetMissDaisy Designs. Faux stitching and natural twine make for a really cute card, perfect for sending spring greetings to someone near or far. 

I used the Mini Misti to stamp the image several times to ensure a great impression on textured watercolor paper.

I love how the Mini Misti allows me to stamp perfectly, every time! On card panels or on smaller sentiment banners, I can stamp with precision every time, giving me the perfect placement and impression for every project.  Sentiments are stamped perfectly placed, and stamped images on watercolor paper (or other textured papers) are a breeze to create! 

Thanks for joining me on the blog today! Stay heal

Wednesday, March 5, 2025

Spring is on her way!

Hello everyone! Anna here, with greetings from a late winter, sunny tho chilly pacific northwest! 
The card I’m sharing today was made using the recently released Henny & Penny and Correspondence Bits clear stamp sets from SweetMissDaisy Designs. A delicately watercolored image paired with soft textures of watercolor paper, designer Home patterned paper from SweetMissDaisy Designs, faux stitching and cotton lace makes for a really cute card, perfect for sending love to someone near or far. Not to mention, she has a chicken! Swoon!

I used the Mini Misti to stamp the image several times to ensure a great impression on textured watercolor paper.

I love how the Mini Misti allows me to stamp perfectly, every time! On card panels or on smaller sentiment banners, I can stamp with precision every time, giving me the perfect placement and impression for every project.  Sentiments are stamped perfectly placed, and stamped images on watercolor paper (or other textured papers) are a breeze to create! 

Thanks for joining me on the blog today! Stay healthy and well!

Wednesday, February 12, 2025

Heart Banner Bunny


Hello everyone! Anna here, with greetings from a cold and snowy pacific northwest! 

The card I’m sharing today was made using the recently released Heart Banner Bunny clear stamp set from SweetMissDaisy Designs. A warmly watercolored image paired with soft textures of watercolor paper, designer Love patterned paper from SweetMissDaisy Designs, faux stitching and rustic twine makes for a really cute card, perfect for sending love to someone near or far.

I used the Mini Misti to stamp the image several times to ensure a great impression on textured watercolor paper.

I love how the Mini Misti allows me to stamp perfectly, every time! On card panels or on smaller sentiment banners, I can stamp with precision every time, giving me the perfect placement and impression for every project.  Sentiments are stamped perfectly placed, and stamped images on watercolor paper (or other textured papers) are a breeze to create! 

Thanks for joining me on the blog today! Stay healthy and well!


Wednesday, January 22, 2025

He’s so Charming!


Hello everyone! Anna here, with greetings from a chilly, somewhat snowy pacific northwest! The card I’m sharing today was made using the recently released Charming snowman clear stamp set from SweetMissDaisy Designs. A warmly watercolored image paired with soft textures of watercolor paper, textured card stock, faux stitching, and toasty colored ink makes for a real charming snowman card!

I used the Mini Misti to stamp the snowman image several times to ensure a great impression on textured watercolor paper. The Mini Misti also allowed me to precisely place the sentiment and stamp it several times to get a great impression!

I love how the Mini Misti allows me to stamp perfectly, every time! On card panels or on smaller sentiment banners, I can stamp with precision every time, giving me the perfect placement and impression for every project.  Sentiments are stamped perfectly placed, and stamped images on watercolor paper (or other textured papers) are a breeze to create! 

Thanks for joining me on the blog today! Stay healthy and well!

Wednesday, January 1, 2025

Get Well Soon


Hello everyone! Anna here, with greetings from a (finally) snowy pacific northwest! Flu season is imminent, so let’s add some get well cards to our stash! The cards I’m sharing today were made using the recently released Get Well Bug limited edition clear stamp set from Whipper Snapper DesignsPaired with bright, cheery papers and colors, these bugs are sure to bring wellness (or at least happiness) to anyone who receives them. 

I used the Mini Misti to stamp the bug in a jar image several times to ensure a great impression on textured watercolor paper. The Mini Misti also allowed me to precisely place the sentiment and stamp it several times to get a great impression!

I love how the Mini MISTI allows me to stamp perfectly, every time! On card panels or on smaller sentiment banners, I can stamp with precision every time, giving me the perfect placement and impression for every project.  Sentiments are stamped perfectly placed, and stamped images on watercolor paper (or other textured papers) are a breeze to create!

Thanks for joining me on the blog today! Stay well!

Wednesday, December 11, 2024

Ho ho ho, ho ho!


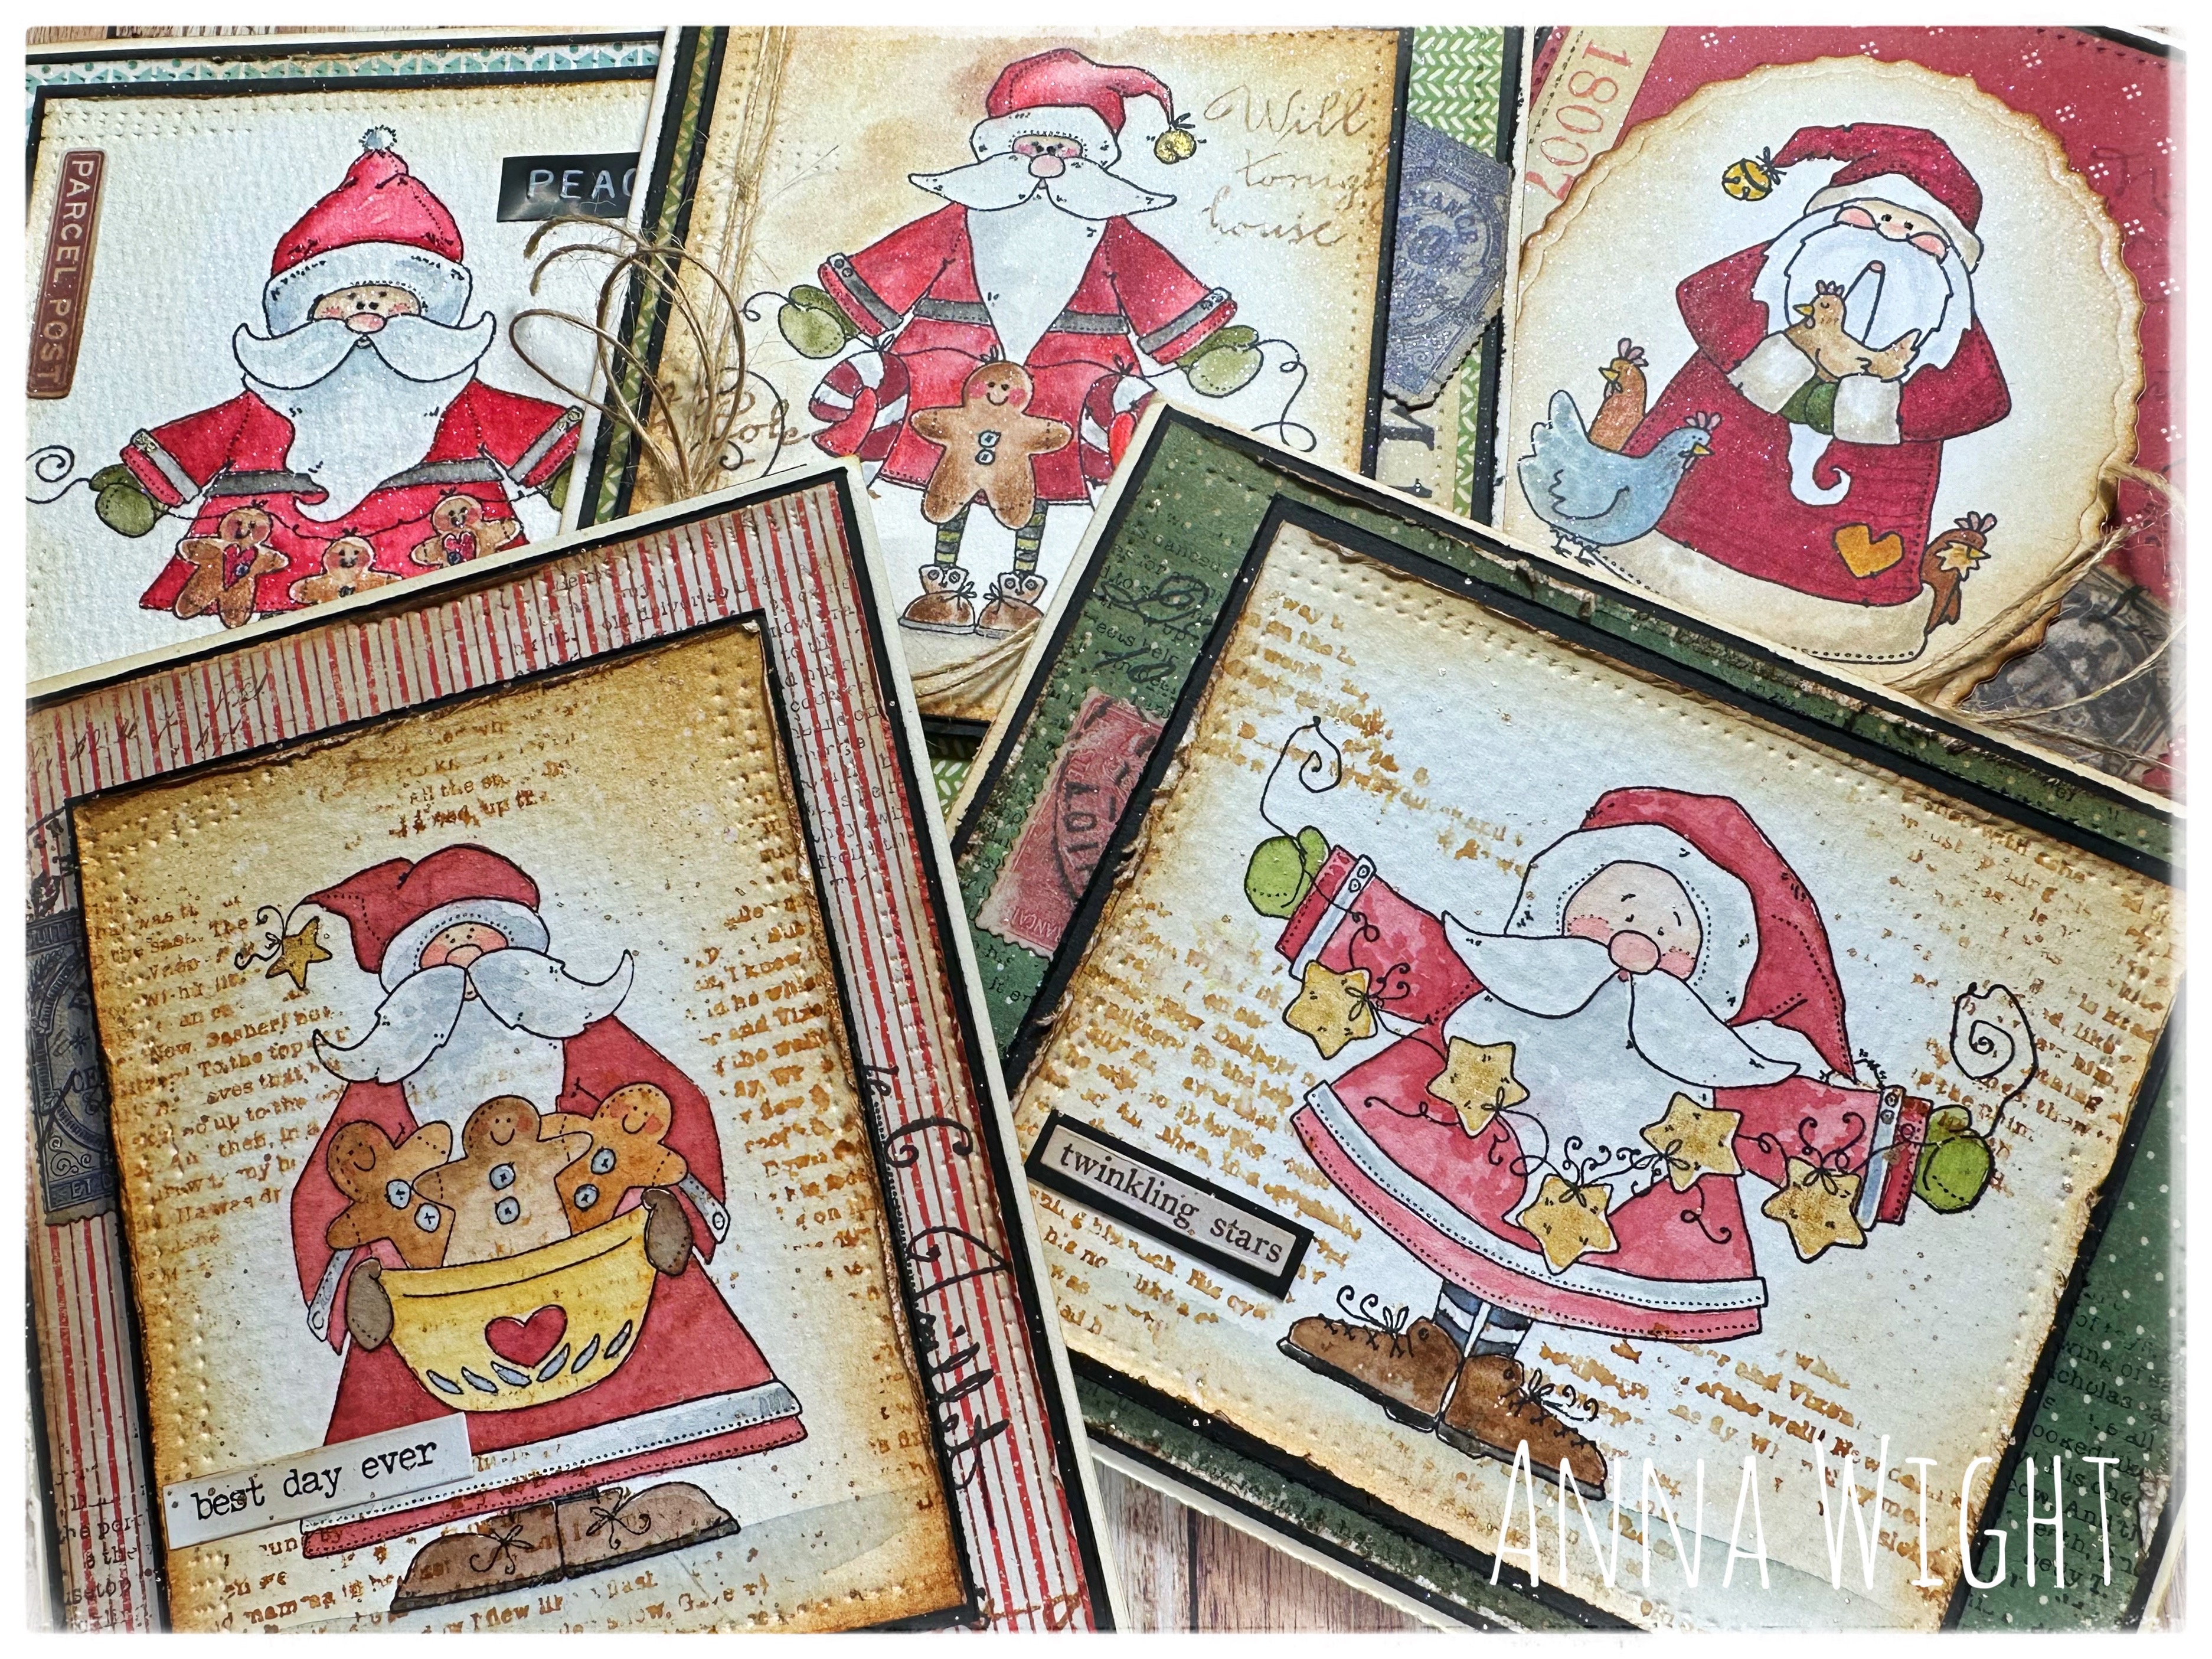
Hello everyone! Anna here, with greetings from a chilly pacific northwest! I don’t know about you, but I’ve got Santa on the brain! :) We have a bit longer to pull out all of our cute holiday Santa images and put together some cards to celebrate the season. 


The cards I’m sharing today were made using
 Santa stamps from Whipper Snapper Designs


I love the country primitive style. Do you?!


I love how 
the Mini MISTI allows me to stamp perfect images on textured watercolor paper, every time! On card panels or on smaller sentiment banners, I can stamp with precision every time, giving me the perfect placement and impression for every project!  Sentiments are stamped perfectly too, and stamped images on watercolor paper (or other textured papers) are a breeze!

Thanks so much for joining me on the blog today!

Thursday, October 31, 2024

Happy Haunting!

Happy Halloween! I hope you have a safe and sweet Halloween.  

The MISTI is a fantastic tool for everyday stamping and more! It did a spectacular job with the clear, solid stamps I used on this project. 

First, I masked the moon and blended Distress Ink over the entire cardstock. Then I placed a Sticky Mat and my inked cardstock in the MISTI. I positioned the haunted mansion in the center of the cardstock and picked up the stamp with the lid. Clear, solid stamps usually need to be stamped more than once, so I love that the Sticky Mat holds my paper in place for precision stamping every time!  I stamped the bats twice to get a dark impression and added the sentiment!  

Tools used in making this fun Halloween card:


The spooky stamp set is called Happy Haunting.

Thanks so much for looking!  

Tuesday, October 22, 2024

Fantastic Use of the Sticky Mat

 Hello friends, 

I just love my MISTI Sticky Mats for holding in place smaller die cuts, or large pieces of cardstock to stamp a large image.

When your stamp must cover your entire cardstock piece, slip in a sticky mat and you're all set.


In this example, my cardstock is cut at 3-1/4" x 8-1/4" for a slimline layer. The adorable stamp from Trinity Stamps is just slightly larger than this piece of cardstock, leaving no space for the magnet on the cardstock to hold it in place. 

Insert a sticky mat and add your magnet to the sticky mat to hold it in place and you're ready to stamp.


I created this fun card using the Beary Cute Layered Mug die set.


The full product list for this card is below.

Friday, August 30, 2024

Using Multiple MISTIs For Creating

 Today I am sharing two cards I created using both my Original MISTI and my Mini MISTI

For this card, I used the Mini MISTI and the sticky mats to get my stamping just right on this tiny piece of inked cardstock. I chose to heat emboss the sentiment and knew I would need to stamp multiple times on this tiny piece of paper.

Using the sticky mat is the perfect solution for stamping on small bits of cardstock. For all the items glued together, I used the Precision Glue Press.


For the second card, I used my Original MISTI to stamp the turnabout stamp. Unfortunately, I did not have the correct products to use the turnabout correctly, but I was able to make it work with the help of the MISTI.

After creating this background I cut it down to use for smaller pieces on the card base.


Here is the supply list for these cards:


Thursday, July 18, 2024

Waiting for Your Sparkle

**Our team uses affiliate links at no charge to you!**

Hello! Today I share several ways the MISTI adds sparkle to a creative session!  

First, I made a background by placing a Grid Mat inside my Original Black MISTI. Next, I put a piece of cardstock in the middle of the Grid Mat. Then I placed the dotted stencil over the cardstock and pressed the stencil edges onto the Grid Mat. I love this technique for stenciling because it holds the stencil in place without tapes or sprays! When the mat is very new, I press the mat away from the cardstock to remove the cardstock without tearing.  

The MISTI absolutely sparkles during the next step. I placed the silhouette stamp on the stenciled background. Since this is a clear stamp, it takes multiple stampings to achieve a solid image. I would never have been able to stamp this image repeatedly with precision using an acrylic block! Last, I used my Mini MISTI for the sentiment.   


  MISTI is celebrating 10 years with a sale!  


Thanks for stopping by!

Supply List:


Wednesday, June 5, 2024

You are an Angel

 Hello everyone! Anna here, with greetings the pacific northwest! The card I’m sharing today was made using recently released stamp from Whipper Snapper DesignsAdorable sunflower angel themed card with fun bees throughout the image and sentiment, paired with a sheet from the Bzzz patterned paper collection from Impression Obsession. The stamp set is perfect for making cards and tags for friends near and far.

I love how the Mini MISTI allows me to stamp perfect images on textured watercolor paper, every time! On card panels or on smaller sentiment banners, I can stamp with precision every time, giving me the perfect placement and impression for every project!  Sentiments are stamped perfectly placed, and stamped images on watercolor paper (or other textured papers) are a breeze to create!

Thanks so much for joining me on the blog today!

Thursday, May 16, 2024

Hanging Jars

***Our team uses affiliate links at no charge to you!***

Hi there! Today, I am sharing a cute card that uses multiple stamps to create the scene. I used a Black Original MISTI to stamp the planter hanger, the flag, and the tree. With a MINI MISTI, I stamped the small flag on a piece of patterned paper (the same as the card background), then stamped the sentiment on the flag. After that, I fussy cut the flag and used the Precision Glue Press to adhere it in place. I love the Precision Glue Press for small items like this flag. I then put the layer inside of my Teal Original MISTI.  After layering an Alignment Grid on top of the layer, I arranged the jar stamps so they would "hang" from the pole's hooks. I stamped the jars on the grid, then made adjustments so they hung directly on the hook. I followed suit with the bird after that. 

Leaving the stamps on different MISTIS helps me to quickly create multiples.  If I make a mistake, I can easily restamp the card because the stamps are still in place.


Thanks so much for looking!  

Angie

Stamp set: Lazy Days Swing
 

Wednesday, March 13, 2024

Lucky to Have

**Our team uses affiliate links at no charge to you!**

Hello everyone! I created something green with St. Patrick's Day just around the corner. When I create, I always feel lucky to have several MISTIs at my disposal. For precise coverage and alignment, I stamped the sentiment multiple times and left it on the Original  MISTI. Then, I moved to the Mini MISTI to stamp the clover. I keep my stamps in the MISTI until I finish a project so that I can easily make another if I make a mistake along the way. 

Additionally, I used the Cut Align Ruler, the Precision Glue Press, Sticky Mats, and the Alignment Grids. You can find these tools and more in the MSP Retail Shop, which you can access HERE


Thanks so much for stopping by!