Tuesday, September 26, 2017

Team Tuesday with Kia

Greetings everyone. It is time for another "Team Tuesday", and, it is also Autumn, my favourite time of the year. So, to celebrate I have done a few Autumn cards using tissue paper along with Paper Artsy Infusions and Bister Powders. If you are not familiar with these powders, both brands are a water soluble stain which have dye colour pigment mixed with walnut stain, and they make for some fabulous backgrounds. I have used both powders on my cards today, along with tissue paper and embossing powders.  

My Misti plays a big role in making these cards. I have added a video below walking through the steps of making the 4th card below, and how I used my Original Misti, Creative Corners and the new Bar Magnet in the process.

The stamp and die sets that I have used throughout are from Neat and Tangled and called Maple Thanks. The rectangle dies I have used are Sizzix Dotted Rectangles, Simon Says Stamp Stitched Rectangles and Simon Says Stamp Wonky Rectangles.  

These are the first two cards. The left is done using Paper Artsy Infusions Frankly Scarlet  and Bister Yellow. The right card is done using Infusions Frankly Scarlet, Green Man and Bister Yellow. For both cards, the panel is attached on foam tape, and the embossing is done in gold. 


For these 2 cards, on the left, Infusions Emerald Isle and Bister Yellow, and the right card is done using Infusions Sleight Blue and Bister Yellow.

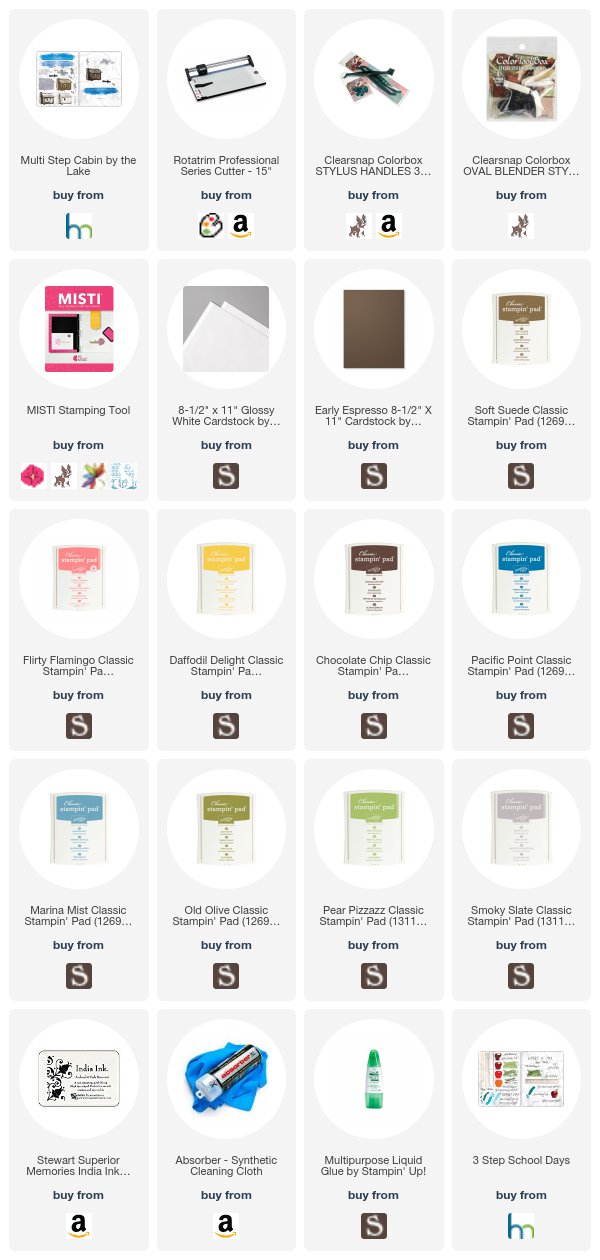
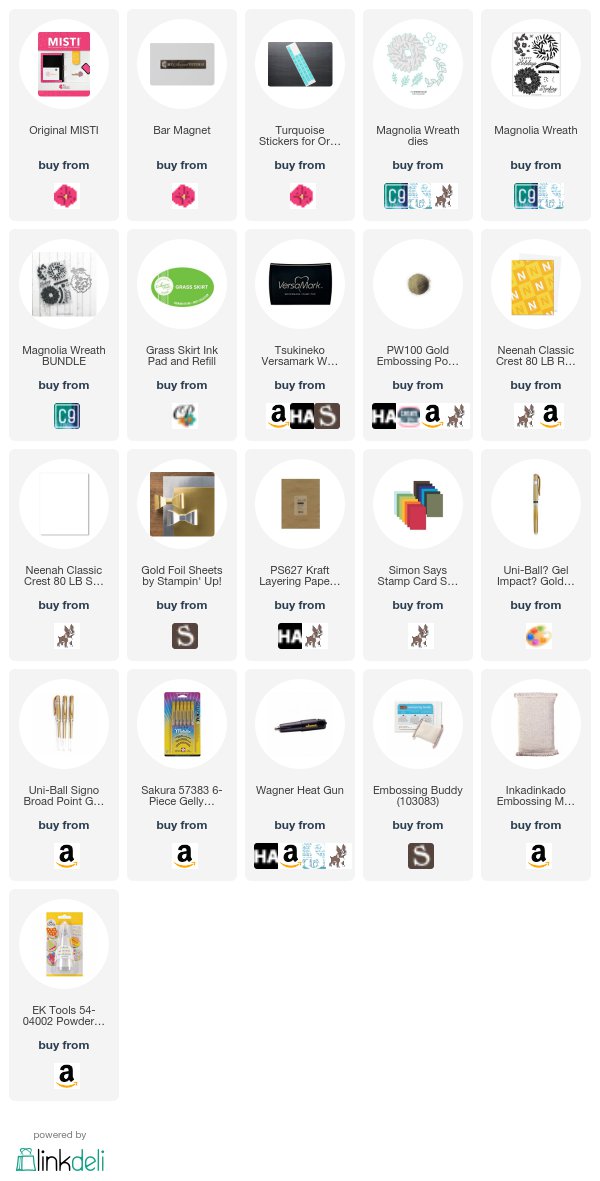
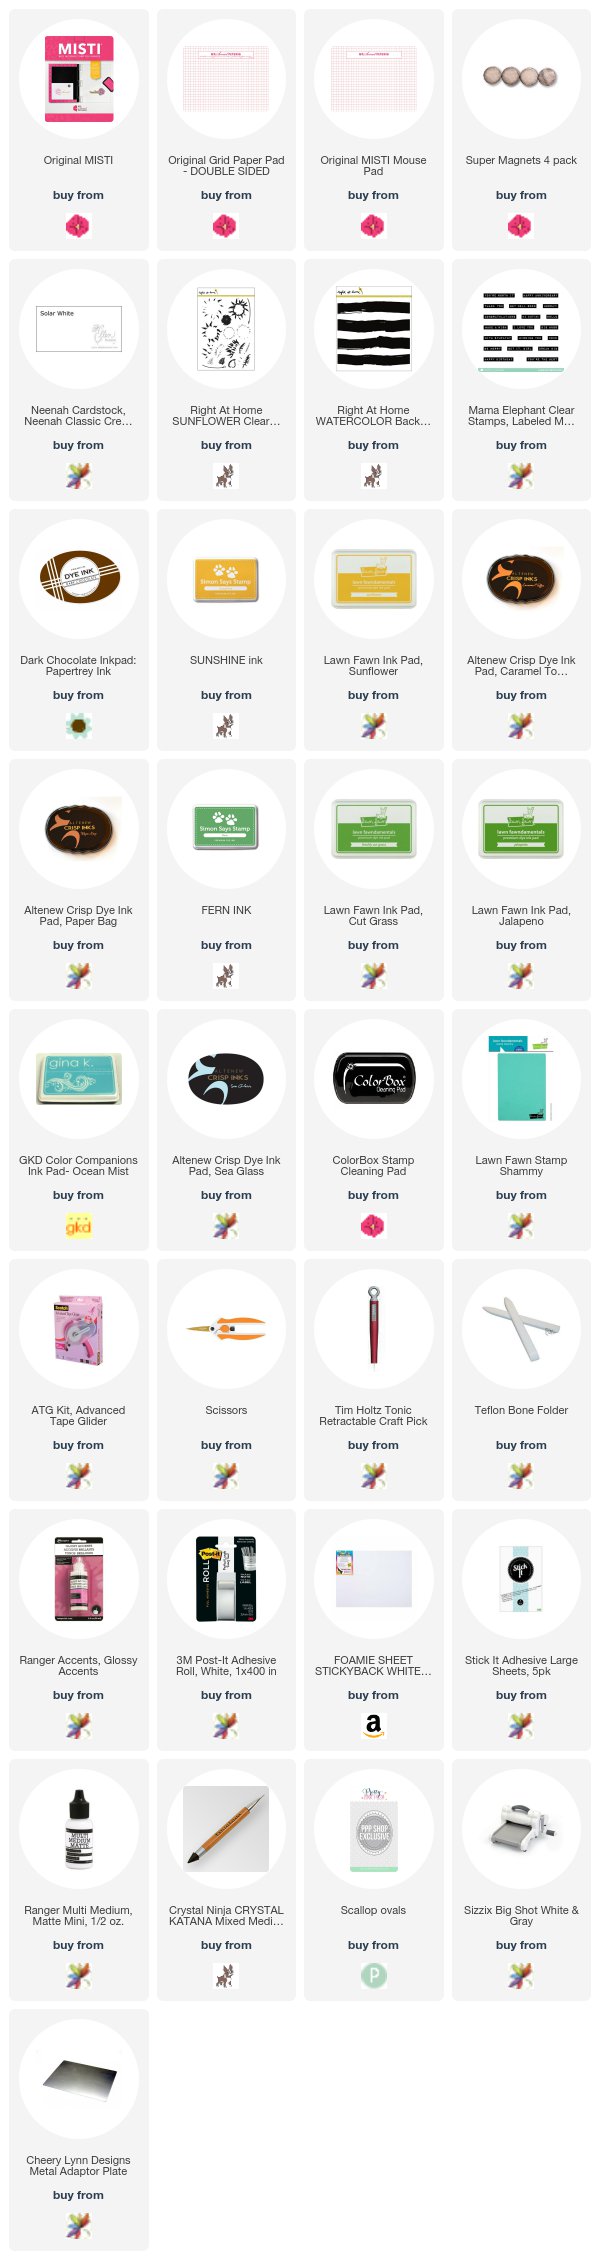
To peak your curiosity, here is a picture showing almost all of the products that I used for these cards. A few things are missing, such as the Clear Embossing Powder and a couple of the Martha Stewart Glitter Markers that I used to colour the leaves inside the cards, along with the Tim Holtz Distress Peacock Feathers Ink. 


And, following is the video link. I hope you enjoy the video and that you too will feel compelled to create using the Tissue Paper Watercolour Technique. 


My inspiration for the Tissue Paper Watercolour came from Loll Thompson. You can find a link to her video on my blog under Awesome Tutorials here.

Thank you for joining me today for Team Tuesday - have yourself a MISTI creating day. 


Monday, September 25, 2017

Blog Hop with Kitchen Sink Stamps

Howdy - Lydia here! Today the team is doing a blog hop with Kitchen Sink Stamps. I met Maria (the owner) - years ago in Houston when KSS did a traveling class - it was truly one of the most amazing classes I've ever taken. She is the inventor of what I consider the original multi-step stamps, and her images are amazing, so I'm thrilled to have the chance to hop with this incredibly creative woman and her team. I chose her Cabin by the Lake set because it looked so peaceful. I wanted a non-wintery setting for the cabin, so I decided to create a more summery lake scene, using the Colorbox stylus, foam tips and numerous inks. For the sky, I used pink and yellow, and then added blue on top to make it a nighttime scene, but leaving some pink and yellow shining through. I work with the stylus from the edges of the card in, and to get the best results, you really need to work on glossy cardstock - so happy that we carry this again. For the water, I stamped only the detailed water image from the set in Pacific point, and then used the stylus to add Marina Mist ink over that, as well as Daffodil delight for the reflected sun. All the green inks below are for the ground, and I used the browns for shadows. The cabin was stamped on Whisper White, not glossy, and I cut it out and sponged the edges with early espresso using the stylus, to make sure the edges were in shadow. I love the duck stamps and how they blend in with the water stamp and have their own reflection. The sentiment is from School Days.
https://understandblue.blogspot.com/2017/09/missing-walter-white.html
I love how moody and peaceful it looks.
This card is for today's Kitchen Sink Stamps & My Sweet Petunia blog hop and giveaway!
https://understandblue.blogspot.com/2017/09/missing-walter-white.html
If you comment on every blog in the hop, you will be entered to win one of two prizes: - a mini or original MISTI (winner's choice), and another lucky winner will get a $50 shopping spree at Kitchen Sink Stamps. It just so happens that today - actually this very day - is Kitchen Sink's 10th anniversary! In honor of that, Maria is having a sale - 35% off all in-stock items, with free shipping at $65 and above. Sale excludes out of stock and special order/retired items, and the sale runs from today through 9/29 at midnight Pacific. Use coupon code KSSDECADE to get the sale pricing! So here are the rest of the hoppers - go see what they've done and good luck! Comments close at 11 PM Central time on 10/2 and winners will be announced on the MSP and KSS blogs on October 3rd.
 You are here >>>Lydia Fiedler<<< You are here 

Tuesday, September 19, 2017

Team Tuesday - Happy Holidays with Ilina

Hi everyone!
Happy Tuesday! And Tuesday means it's Team Tuesday. Today I(Ilina) am showing you how to make quick and easy Christmas cards using the MISTI tool and ones that involve a lot of embossing.

For my card I used the new Concord and 9th set Magnolia Wreath. I stamped the main wreath using Garden Skirt ink pad, The rest of the images and the 2nd layer of the wreath were stamped in Versamark ink, and embossing with Hero Arts gold embossing powder. The wreath was die cut along with rest of the elements (the banners were hand cut ;)) , assembled and adhered onto Hero Arts Kraft Layering Paper. Using gold gel pen I added little dots for more interest. To finish I adhered the panel onto white top folding note card.

Watch the video below to see how this card came to be


Tuesday, September 12, 2017

Team Tuesday with Stephanie

I'm excited to share my first Team Tuesday post with you.  Recently, I had a blast using my MISTI to stamp with a 5" x 7" Gel Press Plate to create lots of interesting backgrounds.

But before I share my technique ... drum roll ... I wanted to announce the winner of the My Sweet Petunia & Right at Home Stamps Blog Hop.


Teresa - Go to the My Sweet Petunia Website and set-up an account ... then e-mail hello@mysweetpetunia.com your account e-mail address and whether you would like the original or mini MISTI as your prize.

Now on with the show ...

I started with 4 1/2" x 6" pieces of watercolor paper.  I used Yellow Inks to stamp a mostly solid background.


Next step was to cover my inked base with three widths of Eyelet Outlet Glitter Washi Tape and then ink again using blue ink ... combining the blue and yellow made a fabulous green.


After I was done inking my first background, I used the remaining ink on my Gel Press Plate to create a ghost print ... since there was more ink left on the plate where it had resisted the washi tape, the design is almost in reverse.


Next I used my MISTI to add stamping to my backgrounds.  It made it super-easy to position my sentiments in the un-inked space.


I added some Eyelet Outlet brads to complete my fun masked design with a sentiment from Essentials by Ellen's Crafty Ladies.


For my ghost print, I used a larger bolder sentiment from the same Crafty Ladies set.  I added some Eyelet Outlet glitter washi to accent the washi tape lines.


Here are a few more cards I made using the same technique.  For this one I used my MISTI to do some shadow stamping with my sentiment from Joy Clair Hello Sentiments.


Here is another pair of prints ... the original masked & the ghost print from the same Gel Press inking.


With black ink & my MISTI, it was quick and easy to make two more cards.


This one uses new Happy Hour stamps from Simon Says Stamp! with a green enamel dot olive.


For the next one, I thought the card was finished (I even had it mounted on the black card base), but then I decided it needed one more hashtag stamp at the bottom (stamps are Simon Says Stamp! Yay).  
In the past, I would have just let it be (or perhaps tried to stamp the hashtag and ended-up messing-up and throwing the card in the trash).  With my MISTI, it's a super-easy fix ... #nailedit.


I love how strong and bold the text gets with multiple MISTI stampings.

Now go break out your Gel Press & your MISTI and have some fun.

Tuesday, September 5, 2017

Team Tuesday with Chris

Hi everyone!

I hope you all had a fabulous holiday weekend, and have had a chance to hop with the My Sweet Petunia and Right at Home Collaboration Blog Hop!


Today I'm sharing a little tip that I used to create these two cards using Altenew products.

Stamps/dies used:  Altenew Peony Scrolls, Halftone Cover die and Halftone Hello

To create the floral elements for these cards quickly and easily, I used my MISTI to help place the stamps to match up with the dies while still wired together.

I placed the dies cutting side down on my MISTI.  Then carefully aligned the stamps within the coordinating dies.


Then I closed the lid, picking up all the stamps at once.


I then stamped all the images at once onto watercolor paper, painted them, and once they were fully dry, was able to align the dies and die cut them all in one pass.


Here is the video demonstrating this time-saving tip:


Thanks for stopping by!
Until next time,
Chris

Right at Home Blog Hop


Welcome!!! We are here today in a Blog Hop with Right at Home.  Hopefully, you are here from Christy Reuling's blog.   Hope you have been enjoying all the wonderful projects from our design teams.


Let's get to our project.  I used the Watercolor background to create the base.  I stamped it in the Original MISTI.  Then I rotated the cardstock 180 degrees in order to create the appearance of the sky.

I die cut all my pieces and used the MISTI to stamp my different layers.  Once I had my elements all put together, I added a little bit of sparkle with my Wink of Stella.   Finally, I added some Glossy Accents to make my clear drops.

For more detailed instructions, please check out the video below on how to put the card together.

Now for the fun part.... leave a comment on each blog to be eligible for a chance to win a prize.  The deadline to enter is noon CST on September 8, 2017.   We will draw two winners on September 12, 2017 and post them on the Right at Home Blog and on the My Sweet Petunia Giveaway Winner page.  The prizes:  Winner's choice of Mini or Original MISTI and a prize package from Right at Home including the Sunflower stamp set, Harvest Blessings stamp set (new release) and two Distress Oxide Inks - in Cracked Pistachio and Peeled Paint.

Thanks for stopping by and don't forget to leave a comment.


Affiliate links to supplies used: