Showing posts with label A Colorful Life Designs. Show all posts

Tuesday, August 6, 2019

I like to wear my money

Hello friends!
Giovana here today with a fun post.
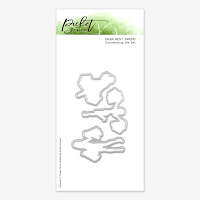
Since I was working on projects for the Trifecta Blog Hop, I decided to make an extra project using this fun Dear Best Friend Stamp Set.

Let me tell you the details:
Position your image on your Original Misti, stamp image on white cardstock in Periwinkle Ink, then die-cut it using Dear Best Friend coordinated die.
Die-cut a couple of banners and stamp sentiment in Black Ink.
Create a background using Every Angle Stencil (used Pixie Spray to position on cardstock) and Periwinkle Ink, then mist panel with Dazzle Shimmering Bliss.
Trim panel and adhere it to white card base.
Add banners and image, add silver thread behind image.
Finally embellish card with Crushed Grapes Nuvo drops and dew drops.


Shimmery look of the card, so pretty in real look.
Products used:
http://shrsl.com/1ql2lhttp://shrsl.com/1ql2jhttp://shrsl.com/1mqmfPinked Stitched Sentiment Banner
Pixie Spray pictureBlackPeriwinkle

Hope you like it a give it a try.
Don't forget to visit my blog to check out the Trifecta Blog Hop!!

Have a wonderful day!!

Tuesday, February 19, 2019

Team Tuesday with Giovana: Thank you for being there

Hello friends!
Giovana here today with a flowery card, I am dreaming with flowers and warm weather, we got a winter storm, snow storm, blizzard and everything else, in my 13 years living in this part of the PNW never experienced anything like this, anyways, I have snow to give away, lol.
So I can't wait to see flowers and warm weather, Spring is my favorite season and I can't wait for it.

Anyway, today I have an easy card, using your MISTI to full potential.
Love my MISTI, I use it in every single project I make.

Start stamping the Peony Solid Image on a piece of light pink cardstock in Rose Ink.
Repeat the stamping until you cover the entire panel.


Stamp Precious Peony on Peony Solid in Chocolate ink.
I used the panel that comes with the stamp-a-ma-jig to stamp the outline peony, the image doesn't fit exactly to solid image, but gives an amazing detail. 


Stamp the Being There sentiment on white cardstock in Chocolate Ink. 
Use your Cut-a-Align to get the perfect straight line.


Use the Chain Wave Stencil to give the background a little extra texture.
Add thin white tap and Gold and Dandelion Yellow Nuvo Drops to embellish.


Here is a look of the finished card.


Hope you like this project!
Have a fantastic day!


Tuesday, January 8, 2019

Team Tuesday with Chris


Good Morning!  Happy Tuesday!

Chris here with you today, sharing a watercolored and inked card.


I stamped this rubber cling image, Just... Sorry from Unity Stamp Company and the greeting with black waterproof ink from Inkon3 onto a 5"x7" piece of  Fabriano Artistico cold press watercolor paper using my original MISTI.  

I like to watercolor right in my MISTI, using the magnet to hold my paper flat.  I used Daniel Smith watercolors to very quickly paint the panel.


When fully dry, I used my Rototrim to trim the panel down to 3 3/8" x 5 1/2". and cut both a black and a white mat just slightly wider than the panel.

 I used the Mod Rectangle stencil from A Colorful Life Designs stencils, to create a pattern down the left side of a white top fold card base.  I used Therm O Web's Purple Tape to secure the stencil to my card base, as well as used my MISTI bar magnet to help secure the project down inside my MISTI while I inked it up.  I used a 1" blending brush from Picket Fence Studios to do my inking, first with Gina K. Red Velvet ink, then adding Cherry Red to the far left edge.  I had to move my stencil to complete the whole edge of the card base, but the repeating pattern in the stencil was very easy to match up and ink seamlessly.

My doing my inking right inside the bottom surface of my MISTI, it made it very easy to clean up any ink.  I just used a baby wipe to wipe up any ink.


Lastly, I assembled the card with liquid glue.


Thanks for stopping by!  
Have a great week!

Wednesday, November 7, 2018

Team Tuesday (on Wednesday) with Jeanne Streiff


Hi everyone! Hope you are having a good week!

I thought I would share another way I use my MISTI today. Did you know the back of the MISTI works with magnets too? Well, that's creates the perfect surface for stencils! 


I chose 3 stencils to create my background (all from A Colorful Life Designs). I used Marvelous Masks Rectangles, Flamboyant Flourishes and Grunge Dots

First I layered Marvelous Masks Rectangles (to create a border)and Flamboyant Flourishes onto the back of my MISTI and used MISTI magnets to hold them in place. I used my "Life Saving" Blender Brushes and Distress ink in Twisted Citron and Tumbled Glass. 


This is what it looked like with these layers.


Then I added another stencil layer with Grunge Dots and Tumbled Glass


I used a fun sentiment from Picket Fence Studios called Levels of Friendship.


I added a some Nuvo Drops in Simply White and Caribbean Ocean to finish my card.


Have a great day!