Showing posts with label Giovana Smith. Show all posts

Tuesday, August 6, 2019

I like to wear my money

Hello friends!
Giovana here today with a fun post.
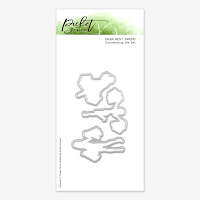
Since I was working on projects for the Trifecta Blog Hop, I decided to make an extra project using this fun Dear Best Friend Stamp Set.

Let me tell you the details:
Position your image on your Original Misti, stamp image on white cardstock in Periwinkle Ink, then die-cut it using Dear Best Friend coordinated die.
Die-cut a couple of banners and stamp sentiment in Black Ink.
Create a background using Every Angle Stencil (used Pixie Spray to position on cardstock) and Periwinkle Ink, then mist panel with Dazzle Shimmering Bliss.
Trim panel and adhere it to white card base.
Add banners and image, add silver thread behind image.
Finally embellish card with Crushed Grapes Nuvo drops and dew drops.


Shimmery look of the card, so pretty in real look.
Products used:
http://shrsl.com/1ql2lhttp://shrsl.com/1ql2jhttp://shrsl.com/1mqmfPinked Stitched Sentiment Banner
Pixie Spray pictureBlackPeriwinkle

Hope you like it a give it a try.
Don't forget to visit my blog to check out the Trifecta Blog Hop!!

Have a wonderful day!!

Tuesday, June 11, 2019

Team Tuesday with Giovana and Blog Hop Winner!!

Hello friends!

Today I have a perfect sunny caffeinated card!
I love coffee and sunny days, but I am not a fan of HOT days.
I do love bright sunrises and sunsets, I am very blessed to live in the country where I get beautiful skies!

Anyways, let me show you the card I created for you.
Details:
Position your Reverse Sunburst Stamp on your Misti, stamp image on white cardstock in Goldenrod Ink.
I stamped the image like 3 times to get the perfect impression.
Die-cut panel and adhere it to white card base.
Stamp Good Morning image (coffee cup) on white cardstock in Jet Black Ink, color image with markers and fussy cut.
Die-cut Checkered Frame in Watercolor paper (x3), glue them together and adhere it to card base.
Add coffee cup with foam adhesive.


Here you can see the thickness of the frame. 

Finally add Clear Shimmer Pen on coffee cup! 

And now the winner of our Trifecta Blog Hop
(picked at random, chosen from Jeanne's blog)

Beautiful color combos and cards!
To claim your prize, please set up an account at www.mysweetpetunia.com, then email us at hello@mysweetpetunia.com from the email address you used on your account. If you already have an account, just email us.

Hope you like my project!
Have a wonderful day!

Tuesday, April 16, 2019

Team Tuesday with Giovana

 Hello friends! 
Giovana here today, I am a little late, life has been crazy around the Smith house, my days are so mixed up, but I have a fun project simple and adorable ;) great for every occasion.

For this project I used this fantastic Boho Mandala background.
Details:
Mist a piece of watercolor paper with Gold Shimmering Bliss Topper, set aside to dry for a few minutes.
Position background stamp on your Original MISTI, stamp it first in Orange Ink, then add Chocolate Ink to the edges of the Boho Mandala.
Stamp Happy Everything sentiment on a piece of vellum, then trim it using the amazing Cut-Align.
Add watercolor panel to a white card base.
Embellish Boho Mandala with a gold pearl.
Adhere sentiment.
Add a couple of die-cut flowers from Spring Branches set.


Love the shimmery look!!

This is how it looks!
This picture doesn't do justice!
Hope you like it.
Have a wonderful day!

Tuesday, February 19, 2019

Team Tuesday with Giovana: Thank you for being there

Hello friends!
Giovana here today with a flowery card, I am dreaming with flowers and warm weather, we got a winter storm, snow storm, blizzard and everything else, in my 13 years living in this part of the PNW never experienced anything like this, anyways, I have snow to give away, lol.
So I can't wait to see flowers and warm weather, Spring is my favorite season and I can't wait for it.

Anyway, today I have an easy card, using your MISTI to full potential.
Love my MISTI, I use it in every single project I make.

Start stamping the Peony Solid Image on a piece of light pink cardstock in Rose Ink.
Repeat the stamping until you cover the entire panel.


Stamp Precious Peony on Peony Solid in Chocolate ink.
I used the panel that comes with the stamp-a-ma-jig to stamp the outline peony, the image doesn't fit exactly to solid image, but gives an amazing detail. 


Stamp the Being There sentiment on white cardstock in Chocolate Ink. 
Use your Cut-a-Align to get the perfect straight line.


Use the Chain Wave Stencil to give the background a little extra texture.
Add thin white tap and Gold and Dandelion Yellow Nuvo Drops to embellish.


Here is a look of the finished card.


Hope you like this project!
Have a fantastic day!


Tuesday, December 25, 2018

Team Tuesday with Giovana

Hello friends! 
First, I want to wish you all a very Merry Christmas
Hope you are having a great time with your family and friends, that's the best gift we all can get, the love from the ones around us.

Now, let me tell you about my project.
Valentines is just around the corner and I have the perfect card for you!

This card uses brand new stamps from Impression Obsession.
Position your stamp on your Original Misti, then stamp the Baby's Breath Large on the front of a white card base in Bubblegum Ink.
Color little flowers with a pink marker.
Mist a watercolor panel ,then stamp Seven Million Smiles in Chocolate Ink
Die-cut stamped panel and add it on top of a pink panel, then add it to card base with foam tape.
Finally, add little drops of Rhurbarb Crumble Nuvo drops.


I hope you like it.
Have a wonderful day!


Tuesday, October 30, 2018

Team Tuesday with Giovana


Hello friends! Giovana here today with a super sweet Fall card.
I don't know if you like Fall or not, but I love it!! 
Even though around this area it can get a little too cold for a regular Fall season, I love the cold morning and warm afternoons, all the beautiful changing colors of the trees and the birds chirping around looking for a warm spot.
I love the PNW, it's beautiful here, and not I am not talking about Seattle, lol. I live far away from the city, which makes it a lot better. 
I don't know if you knew it, but I am from Peru, exactly from Lima, and we don't get this kind of Fall, actually right now over there is Spring (South Hemisphere) and it is not warm yet!!

Anyway, I have a fun project for you, who doesn't like a little bit of cheer, right?
I used this beautiful Layered Pinecone set from Impression Obsession.
I used my Mini Misti and stamped the pinecone twice using Mist, Beige, Sienna, Chocolate and Black Inks, then die-cut the image using coordinate die.


I created a super diluted background using a piece of watercolor paper with Liquid Metals: Metallic Saffron and Iron Oxide and lots of water!! 
The shimmer from these 2 liquid metals is beautiful!!
Stamped the sentiment from same set in Chocolate Ink.
Die-cut the panel using the frame from Bunny Frame Set


Added watercolor panel to a white card base.
Die-cut Arched Leaves in Vellum and Gold cardstock and adhered them to panel, then adhered one pinecone direct to panel and the other one used foam adhesive.
Covered the pinecones with Wink of Stella.
Finally added copper sequins and little dots of White Nuvo Drops.


Hope you like this project!
Have a wonderful day!!


Tuesday, August 28, 2018

Team Tuesday with Giovana

Hello friends!! Giovana here with a super easy card for you, honestly this is super easy.
Well, first a confession, I was never a fan of this multi layer stamps because I was always messing them up, plus my eyes, seriously, I can't see those tiny lines until I got this super fun set from Altenew!! (And to be honest, they have amazing more sets too!!)
 This set is called Build a Flower: Cattleya. So easy, plus you get a guide with special marks to align your stamps so you get the perfect layer!!!
Believe me, if I can do it you can too!! {wink, wink}

OK, so I started with my Original MISTI stamping with the outline stamp, then added the layers using these colors: Summer Sky (Memento), Ultramarine (Impression Obsession) and Navy (Impression Obsession), then added the greens: Pistachio, New Sprout (Memento) and Avocado (Reverse Confetti)


See how pretty they look!! Love it!

After all the stamping was done, I die-cut the images with coordinated die-cut.

I sprayed a piece of watercolor paper (3.75" x 5") using Gold Topper and Harvest Sunset Shimmering Bliss (Technique Junkies), adhered it to a mustard piece (4.5" x 5"), added thin metallic tape to the watercolor piece, then added the die-cut pieces with foam tape to the panel. 
Stamped the sentiment on a black cardstock piece in Versamark Watermark, then added white embossing powder and heat set. Adhered it to panel with foam tape.
Finally added the panel to a 5" x 5.5" white card base.
Added few sequins to embellish.

Here, you can see the shimmer action.


You can get the Shimmering Bliss with a 10% discount using my code: TJ10Giovana

ETA: The winner from the Crackerbox & Suzy Stamps and My Sweet Petunia Blog Hop is


To claim your prize, please set up an account at www.mysweetpetunia.com, then email us at hello@mysweetpetunia.com from the email address you used on your account. If you already have an account, just email us.


Hope you like it.
Have a wonderful day!

Tuesday, July 10, 2018

Team Tuesday with Giovana


Hello friends! Giovana here today with an Anniversary card!
I have a little story to share with you before I talk about the card I have for you.
I was asked if I could make an Anniversary card, details I got was "color blue", then it was on me, so I was almost done with the card, just needed to stamp "Happy Anniversary" and guess what??? I could not find a stamp with that sentiment!! And let me tell you, I have like 3K stamps, lol, printing was not an option because my printer is a headache and never works when I need it. So I was starting to panic, I needed to finish before the kids wake up from their nap, hehehe, well, then I thought (picture a super bright cloud and  a BLING moment) "I have some old stamp in the closet?!
So, I started to look and look and I got a pile, HUGE pile and nothing and then BAM! I found A SET!! Just 1 set that had the "Happy Anniversary" saying!!
My heart was happy, I finished the card and the kids woke up!
End of this silly story, now back to the card ;)

Started stamping the Wide Watercolor Stripe background on a piece of white cardstock in Delicata Golden Glitz ink, set aside to dry. 
For this project I used my Original MISTI
 Stamp the beautiful floral image from Mondo Sakura Set in Memento Tuxedo Black
 Color image with markers, here I used Spectrum Noir Markers.
 After that, die-cut image with coordinated die.
 Stamp sentiment from By your side set on  stripes panel in Jet Black Stazon Ink.
 Stamp Happy Anniversary inside.

Finally, I added blue rhinestone and pearls to embellish the card.

Hope you  like it.
Have a fantastic day!!