Showing posts with label Judy Rozema. Show all posts

Wednesday, June 1, 2022

It's Graduation Season!

Spring brings a LOT of graduations - it seems pretty much April to June someone is celebrating a milestone achievement. Today I have a graduation design that is easy to make with the help of some fabulous dies, and beautiful papers - and, of course, my MINI MISTI!

Every school but one that I have attended has had the colors of blue and gold. From elementary school to my university (in another state), and ALL of the schools in the town where I currently live - blue and gold are popular choices. This classy card uses amazing papers and two sets available from Stamp Simply.

I cut a piece of the beautiful Ink Drops Candy 6x6 by Craft Consortium for my background, and stamped one of the Graduation Sentiments twice along the bottom. I used the gridlines on my MINI MISTI to line it up. I used another small piece of the paper and stamped "To the graduate" -- both are with VersaFine Onyx Black ink. All edges were distressed with a distress tool. I cut the cap and diploma from gold shimmer cardstock, and popped them up with foam tape on their matted panels. For a little extra shimmer, I tied metallic thread around the center of the card, fanning it out for interest.


Supplies from Stamp Simply:
  • Graduation Sentiments
  • Congrats Grad Steel Dies
  • Craft Consortium Ink Drops Candy 6x6
  • VersaFine Ink Pad - Onyx Black

Other Supplies:

  • MINI MISTI
  • distress tool (for card edges)
  • gold shimmer, dark blue, light blue cardstock
  • metallic blue thread
  • foam tape
Thanks for stopping by today! You can find more of my projects at my blog, Joy in a JAR.


Wednesday, April 20, 2022

Take Nothing For Granted

I've been thinking a lot lately, as I am sure you are as well, about the things I take for granted. Safety, shelter, food, family. So I wanted to make a card of hope, and one with a reminder to take nothing for granted, as things can vanish quickly. The heart colors are a reminder to support and pray for the people of Ukraine.


I had not ever used the rainbow dies before, and wanted to see what different color combinations I would like. I kept knocking them around on my desk, and got out a Sticky Mat to keep the different bands of color in place while I played! It worked great for me to change colors in and out and see what I liked best. I used my Original MISTI to stamp the sentiment on my cloud, making sure it was in the middle!

Products used: 
  • Original MISTI and Sticky Mats
  • Rainbow Card Front Die (Concord & 9th)
  • Heart Dies (Paper Smooches)
  • sentiment from Group Hugs (Paper Smooches) 
  • Cloud Dies (SNSS)
  • white, pink, magenta, yellow, lime, aqua cardstock (various) 
  • Glitter Paper (Concord & 9th)

You can see more of my projects at my Instgram account: @joy_in_a_jar. Thanks for stopping by!

Wednesday, March 30, 2022

Repeat Stamping Made Easy

 Hello everyone! Judy here with a fun card highlighting repeat stamping!


Nothing makes repeat stamping easier than the MISTI! WAIT. Except the MISTI and the MIS-T RULER!

For my card today, I used a Gel Press background (made with acrylic paint on lightweight cardstock), and then stamped the lightbulb from Visible Image in VersaFine Clair Nocturne Ink. Because the paint is a slicker surface, I had plenty of time to heat emboss with Clear Embossing Powder. I then stamped the sentiment four times, lining up with the MIS-T Ruler, and also embossed with Clear EP. It gives it a fun texture with the background and makes the images really pop and "shine bright"!


You can find more of my projects at my blog, Joy in a JAR.
Stay tuned tomorrow for a special hop with The Stamping Village!


Wednesday, March 9, 2022

Layered Stenciling

I love layering stencils. It's so easy to create something lovely in a short time, and without a lot of fuss. One of the things that makes it easy is having my MISTI to line up the corners of each layering stencil to make sure I have them in the right place. 


I cut my white cardstock 3.75" x 5" and positioned it in my MISTI using one of the new Sticky Mats to hold it in place. I used my blender brushes and several different oxide inks for the background, changing out each layering stencil, with the mat holding each in place.


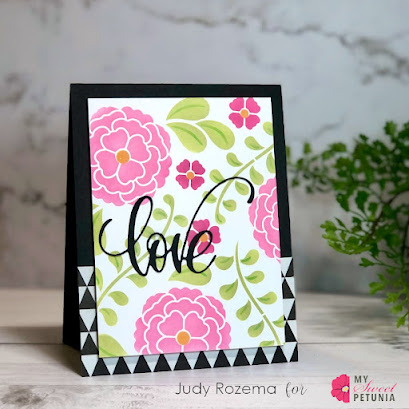
The love sentiment comes with the Stencil Bundle. I cut it from black cardstock and adhered it to the front of the stenciled panel. I added some patterned paper for the background, and popped up the stenciled panel for dimension.


Products used: 
Thanks for stopping by. You can see more of my projects at Joy in a JAR.

Wednesday, December 22, 2021

Let Heaven and Nature Sing

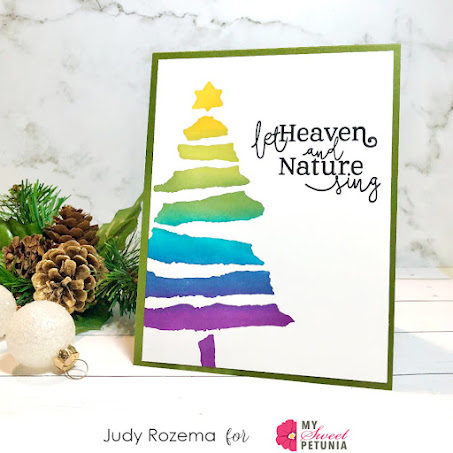
It's down to the wire for mailing cards for me! I don't mind them arriving late, as long as I mail them before December 25! Today I have a fast and easy card that I love -- I am not one for making multiples, but this one I could get into mass producing.

Since it's almost Christmas, I am making this a fast and easy post for my fast and easy card! First of all, get out your MISTI! It helps not only with the stenciling (I put this in the top right corner flush with the cardstock and stencil edge), but of course, making your sentiments look sharp and crisp (VersaFine Clair Nocturne). 


Loving these elements together:
•card cased @amybeth928

Have a wonderful Christmas!
You can find more of my projects HERE.

Wednesday, November 24, 2021

Snowflake Wishes with Judy

Hello everyone!

Have you had your first snow yet? Maybe you live in a place where snow is rare (I would love that). In any case, while I don't like the snow and cold weather, I do love making snowflake cards. 

A few weeks ago I (Judy) headed to sunny southern Arizona, where snow is rare. But my sister and I had a blast making several backgrounds using the Elegant Snowflake Stencil from A Colorful Life Designs. I had purchased the Catherine Pooler Paradise Found Mini Ink set for us to play with, and we had fun trying different colors and depths of color with the stencil.


I love to use my Memory MISTI to hold stencils in place and keep them straight. The magnets work wonders and I am not spending a lot of time taping up the stencil sides. I use a tape loop on the back of my card, and place the stencil in the corner. It makes it quick and easy!


For this card, I chose the lighter of the blue backgrounds, and added a sentiment from one of my sister's stamp sets (SU!) in her stash. I used my Mini MISTI and placed the background in the corner, stamping the sentiment with my favorite black, VersaFine Clair Nocturne. So crisp!  

I have brighter lights in my studio than she did on her living room floor (first photo), but the color gradient is really the same IRL. I offset the front panel for interest. A clean and simple, quick and easy card for Christmas! And no cold or real snow in making it!

I wish all of my US friends a wonderful Thanksgiving tomorrow -- BUT before I go - CHECK THIS OUT:

Don't miss the AMAZING 25% off sale this weekend at My Sweet Petunia! What a deal! You can find more of my projects at @joy_in_a_jar. Thanks for stopping by!


Wednesday, September 29, 2021

Just Buzzin' Around

Hello everyone and Happy Fall! As I (Judy) am writing this, I can hear a symphony of crickets, cicadas, and bees, and I am ok with that as long as they stay OUTside! There are so many bees in my marigolds this year (which went wild from seeds last year!), and although they aren't the big fat bumbles like these, I am happy to see them buzzing around pollinating everything still.

Most of these stamps and dies are from the Hero Arts January 2021 MMH Kit. I had not even used them yet! So today they got to see some ink - and embossing! This kit is not available anymore, but there are other fabulous options out there to recreate this card.

I first cut a circle using a wonky stitched circle die (MFT Stamps) out of the Pale Yellow Glitter paper that came with the kit. I added the Honeycomb window die, also cut with the same circle. I stamped the flowers from the kit using my Original MISTI 2.0 and cut them out as well. And guess what? They were huge for my A2. I could have made a square card, but decided to stick with the usual A2, and just cut each side off the circle. I ended up really liking it. The flowers layer is popped up with foam tape.

Into the MISTI went my fat bees! The bees are stamped in VersaFine Onyx Black and embossed with clear embossing powder. I colored them with Copic markers, cut them out, and popped them up on the flower layer. I added some sequins from Honeybee Stamps. I layered all of this on a black mat, cut out with a wonky stitched rectangle die (MFT). To finish the card, I added some metallic gold Kreinik thread around the middle, and the word "buzz" using the Tall Skinny Alphabet from scrapbook dot com. If you're having trouble lining things up evenly (such as these skinny letters), use your MISTI Mouse Pad or Grid Paper Pad gridlines!

Off to get my morning coffee BUZZ. :-)


Wednesday, September 8, 2021

A Fall Hello from Judy

Happy Wednesday! Judy here with some vacation inspiration. Our family just returned from a fabulous couple of weeks away in the Northeast, where we were able to explore Boston (one of my favorite cities), parts of Vermont and New Hampshire, and end up in one of the most beautiful states - Maine! We had a wonderful time, with lots of good food devoured and new memories made! I am glad to be home and back in the "normal," however - so that I can spend some time crafting!

Our vacation was HOT - record temps in Boston - and back home we have had heat indexes over 100 every day. I am finally ready to move from the hot to the crisp fall air, so bring it on! I am hoping my breezy sunflower card will help do the trick! We saw a lot of beautiful flower gardens on our trip, and some amazing sunflowers.

 
One of the things I sometimes struggle with is scoring my card in half. Simple, right? Especially when you have a Scor-Buddy! I think it's age creeping up saying, "You used to be able to do this, but now you need help!" So I use my Original MISTI after I have scored the halfway mark, and put the cardstock in the corner to fold in half and get it straight! The Cut Align also helps to get those layers straight (along with some magnifying readers!), and I had a few layers here!


I am using the wonderful Sunflowers Dies from Stampin' Up!, along with a fun sentiment (Big Words) from WOW! Embossing (yes, they have stamps!). I have a subtle embossing folder (SU!) for my main white panel to add texture to the background, along with some fun patterned paper from Simple Stories that reminded me of sunflowers. I used my Mini MISTI to stamp the sentiment in a crisp black (VersaFine Clair Nocturne). The leaves and foliage sprigs, as well as the sunflower center are cut from shimmer cardstock (Michael's). A fun fall card for a friend to say hello!

And here is my inspiration from Maine, near Acadia National Park. These were about 8 feet tall:

Have a great week! You can find more of my projects at Joy in a JAR.
 

Wednesday, August 11, 2021

Hello! Nuvo Shimmer Powders Background.

Hello everyone! Judy here with a fun background and large greeting for you!

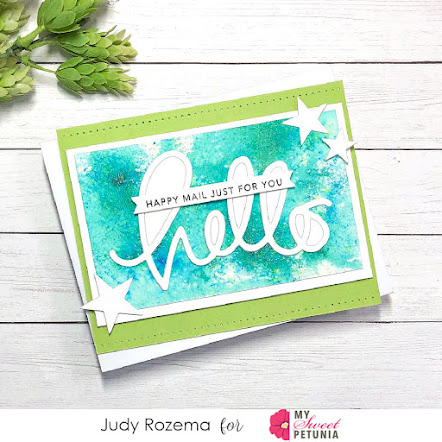
For this week's card, I started with a background that I made using Nuvo Shimmer powders (Atlantis Burst and Green Parade). I adore these powders because of the shine and sparkle. Sprinkle, add water and voila! Out of my box of leftovers and unfinished elements, I pulled this Hello Word Die from Simon Says Stamp that didn't cut all the way through (for a previous project), and decided to use it just as it was. I stacked two together for more dimension (neither had cut!). I added a sentiment strip from Taylored Expressions on top, using my MISTI and VersaFine Clair Nocturne to get a crisp image. I had some stars cut from Ice Silver cardstock (CutCardStock) that I used for the corner elements and did some old school piercing along the top edge.


Happy Mail for a sweet friend! Thanks for stopping by!

Wednesday, June 30, 2021

When in Doubt, Just Keep Adding!

Happy Midweek, everyone! Judy here with two tags I made that I absolutely love. The funny thing is, the panel started as a card - which wasn't working out. So I just kept adding things until I was pleased with the result -- and that included cutting the panel into tags!


I started with my favorite pink -- Kitsch Flamingo DOX and made a splattered background. I added Picked Raspberry and stenciled on the TEA PARTY STENCIL from Visible Image. You can see it faintly in the background. I still loved it as a card, but then once I added the flowers from IMPERFECTION IS BEAUTY I didn't. BUT -- they became beautiful tags that I DID love! I embossed the flowers with Punch and Ebony Embossing Powder (WOW!), and punched the top for some cute pink twine. A word die (Spellbinders) in gray cardstock completed them!


Fun for packages, or to add to a full card at a later date! Isn't that Punch Embossing Glitter amazing? Just MSP pink perfect!
 

Wednesday, June 9, 2021

Mixed Media Butterfly with Judy

Hello everyone!

Judy here with a beautiful butterfly card for my DT share! I call it "elegant grunge." :)

I started with a piece of cardstock that I had used to stamp off the Two Tone stamp from Grunge Tones (Visible Image). I had randomly stamped the dots with Charcoal ink from Close to my Heart and threw it in my unfinished projects box. It was the perfect background for the Butterfly Ink Stencil from Visible Image stamps, and three Distress Oxide Inks: Dusty Concord, Wilted Violet, and Seedless Preserves. 


Next,  I added my sentiment (The World Needs Art/Visible Image), using VersaFine Clair Nocturne ink, and my Mini MISTI to get a good solid black image. I then embossed the sentiment with Clear Embossing Powder (WOW!). 

I randomly added the Large Crack (Create it!/Visible Image) and flowers with embossing ink, and then embossed with Rich Pale Gold EP (WOW!).

I added some interest to the card base with the same Large Crack image, using embossing ink as a watermark.
I love how it turned out! I think this card was the most fun because I just kept adding things here and there -- and didn't mess it up!
You can find more of my projects HERE.


Wednesday, April 28, 2021

Adding Colour to Your Life with Judy

Hello stamping friends!

Judy here with my first post as a team member and I am excited! Today I am sharing a colorful (or as they say in the UK, colourful!) card using my MISTI and products from Visible Image Stamps (based in Wales).

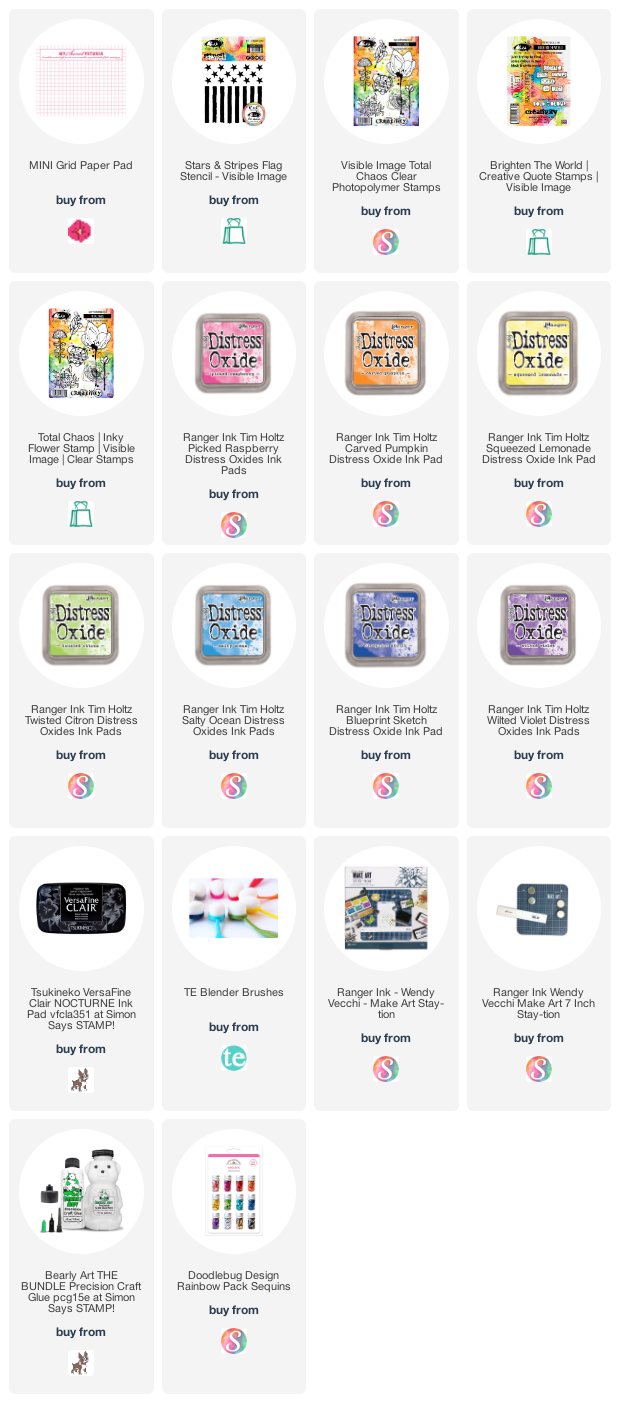
I started off by using the Stars and Stripes Stencil, and a hue of rainbow colored Distress Oxide inks, and blended them through the stencil using a blender brush. I love the edge of the stencil that looks like a little bit of torn paper. It adds some interest to an otherwise "flat" looking surface.  Next I added the sentiment from Brighten Your World and the small flower from Total Chaos. I used my Mini MISTI and stamped each using VersaFine Clair Nocturne (my most favorite black ink!). Finally, I added sequins to match the stripes colors and gave my card a lime green base.
I love having the convenience of a Mini MISTI right on my desk all the time! Not only does it help my stamping to be precise and clear, it helps me keep my card bases straight after the intial scoring. I score the line, then fold with the card bases against the MISTI corner, and then crease with the bone folder. Keeps everything nice and straight!

You can find more of my projects on my blog, Joy in a JAR, and on my Facebook and Instagram too! Thanks for stopping by!