Good Morning!
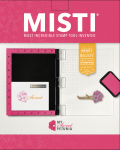
It's Chris here with you today, with a coloring tutorial and some easy tips on using your MISTI for testing sentiment placement and colors.
Today I am using the Picket Fence Studios' large lily image from the Lily Bouquet stamp set.
This card began with a panel of Gina K. Designs' Artist Choice cardstock. I used my Original MISTI to stamp the Lily Bouquet image with Warm Glow no-line coloring Amalgam ink.
This ink is a pale warm reddish gold color that disappears beneath your coloring.
I started coloring this image with Copic Markers YR00 and YR02. I very quickly added the pale colors to my highlight areas, then began to add deeper orange colors of YR14 and YR18 to begin creating the shadow areas and shape of the blooms. I'm careful to just lightly "flick" areas of color in, rather than color the whole flower. I want to leave some very pale, nearly white areas to help create the dramatic shape of the lilies,
I also added flicks of color to the stems and leaves with G43.
Now I begin to define the petals of my blooms using Faber Castell Polychromos pencils. I begin with a mid-shade of burnt orange and work my way from the center of the flower out, and from the petal tips inward, still leaving as much of that pale highlight as possible on the center of each petal that I feel is in direct light.
I use three shades of pencil, the darkest, a reddish brown to really define petals and add cast shadows on the lower petals.
I keep adding deeper color, building up the contrast needed to make the blooms appear three dimensional. I also begin to add darker green pencil to the leaves and buds.
I begin coloring the flower stamens by selecting just a few of the shapes to highlight with a lighter tan, then adding a deeper gray brown around and under those lighter parts. I also add more of the darker brown shadow color to where those stamens would be casting a shadow on the lower petal of the bloom.
Now that I'm done creating the shape the flowers with color and contrast, I've decided to brush in a bit of color to my background to soften the starkness of the white vs. the colorful lilies.
I'm using Tumbled Glass Distress ink, which is very light, so I'm not too concerned about masking. I just use a small piece of Post-It tape and a small piece of tag stock packaging to protect my lightest areas of the petals as I lightly add ink with one of the Picket Fence's Life Changing Blending Brushes.
Now I need to add my greeting to the upper right hand corner.
I'm going use Picket Fence's Thank You stamp, but I'm a bit undecided on what color I want to use. I want to test a few before I decide.
To test, I'm using a piece of quilter's template vinyl that I've cut to fit inside my MISTI. I place it over my card panel, and stamp on the plastic. This is a great way to double check your alignment, especially with the hand-lettered type sentiments that sometimes can be a bit difficult to align because of the irregularity of the letters.
This whisper gray ink blue is too pale. So I wipe it off my plastic sheet and try again.
This blue seems, well... too blue.
I'm not loving the Kraft ink...
And the Charcoal Brown is much too dark.
I think I've found the winner with Tumbled Glass Distress Oxide ink.
So I remove the plastic sheet and stamp on my panel.
And adhere my colored panel to a top-fold white card base.
Thanks for stopping by today!
Happy Stamping!


